
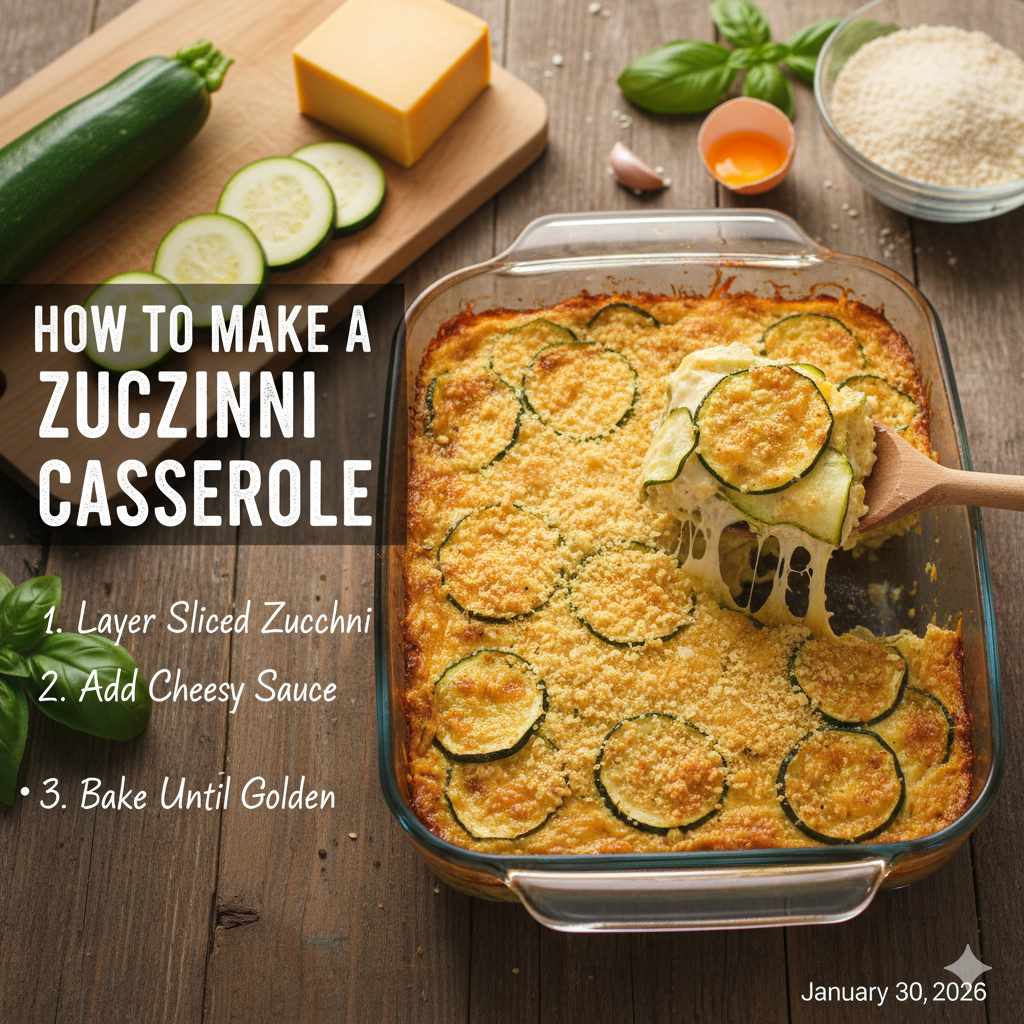
Learning how to make a zucchini casserole is easy! This foolproof recipe guides you through layering fresh zucchini with creamy binders and savory toppings for a simple, mouthwatering side dish that everyone loves. Get ready for a delicious, hassle-free bake!
Zucchini overload happens every summer. You might have too many fresh vegetables from your garden or the farmer’s market. Don’t let those big summer squashes go to waste! Making a zucchini casserole is one of the best ways to use them up. It is much simpler than you might think. Many recipes sound complicated, but we are going to break this down into easy steps. You do not need to be a gourmet chef to create a creamy, cheesy side dish that tastes amazing. Follow along, and we will show you exactly how to make a zucchini casserole that impresses every time. Get ready to handle your squash surplus like a pro!
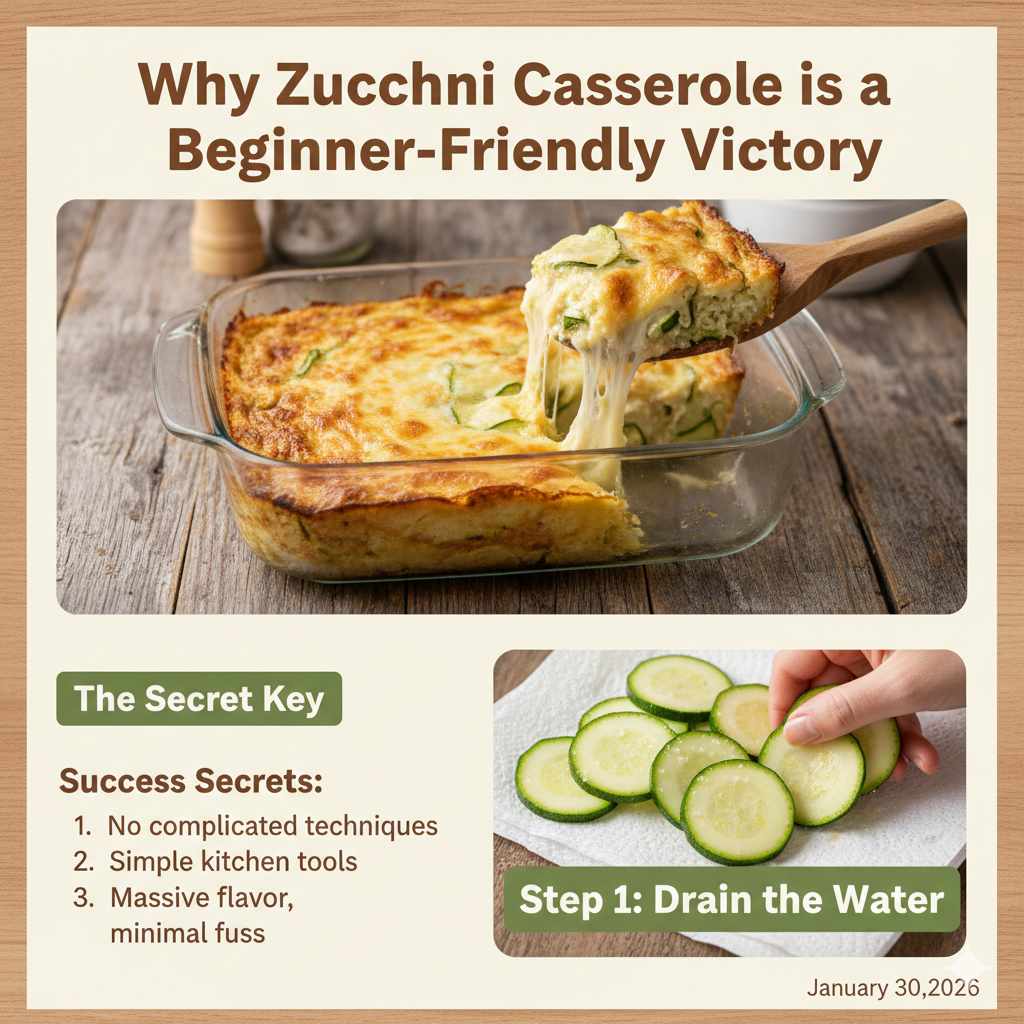
Why Zucchini Casserole is a Beginner-Friendly Victory
Think of a casserole as the ultimate comfort food vehicle. It mixes ingredients, bakes evenly, and usually forgives small mistakes. For those new to cooking, a zucchini casserole offers huge flavor with minimal fuss.
One big challenge with zucchini is its high water content. If you just throw raw zucchini into a dish, you end up with a watery mess. Our method focuses on properly draining the squash, which is the secret key to a firm, delicious casserole. Once you master this one step, the rest is just mixing and baking.
This recipe cuts out complicated techniques. We use simple, common kitchen tools, and the ingredients are easy to find. Mastering this dish builds major cooking confidence. It shows you that making impressive side dishes is absolutely achievable, even if you usually stick to toast!
Gathering Your Supplies: What You Need to Start
Before we start chopping, let’s ensure your kitchen “garage” is stocked. Preparing your tools and ingredients beforehand, often called “mise en place,” makes the assembly smooth, just like preparing your tools before a quick oil change.
Essential Tools Checklist
You likely have most of these items already. Specialized equipment is not required for this amazing dish.
- Large mixing bowl (for combining the mixture)
- Colander or fine-mesh strainer (crucial for draining liquid)
- 9×13 inch baking dish (or an 8×8 for a smaller batch)
- Sharp knife and cutting board
- Measuring cups and spoons
- Grater (if you choose the shredded route)
The Core Ingredients List
This recipe focuses on a creamy, savory flavor profile. Feel free to adjust seasonings later once you understand the base recipe.
| Ingredient | Approximate Amount | Purpose |
|---|---|---|
| Fresh Zucchini | 4 medium (about 6 cups sliced/shredded) | The star of the show; needs draining |
| Eggs | 3 large | Binding agent to hold the casserole together |
| All-Purpose Flour or Baking Mix | 1/2 cup | Adds structure and prevents sogginess |
| Shredded Cheese (e.g., Cheddar/Monterey Jack) | 1 cup (divided) | Flavor and creamy texture |
| Sour Cream or Plain Greek Yogurt | 1 cup | Moisture and tanginess |
| Onion (finely chopped) | 1/2 medium | Aromatic base flavor |
| Salt and Pepper | To taste (start with 1 tsp salt) | Seasoning essentials |
Step 1: The Crucial Zucchini Prep (Getting Rid of the Water)
This step is the difference between a soggy casserole and a perfectly set one. Never skip the draining! Think of draining squash like letting the engine cool down before working on it—it prevents problems later.
Preparing the Zucchini
- Wash and Trim: Thoroughly wash your zucchini. Trim off the ends (the little stem parts).
- Decide on Cut: You can slice the zucchini into thin coins (about 1/8 inch thick) or shred it using a box grater. Shredding is often preferred because it releases water more easily, but coins look nicer.
- Salt It Heavily: Place your prepared zucchini in the colander set over a sink or a large bowl. Sprinkle it generously with about 1 teaspoon of salt. The salt draws out the moisture through osmosis.
- The Waiting Game: Let the salted zucchini sit for at least 30 minutes. You will see beads of water forming on the surface.
- The Big Squeeze: This is the second most important part. Take handfuls of the salted zucchini and squeeze them as hard as you can over the sink or bowl to remove the liquid. For serious draining, you can wrap the zucchini tightly in a clean kitchen towel or several layers of paper towels and twist it over the sink. You want it to feel significantly dryer before moving on.
- Rinsing (Optional but Recommended): If you used a lot of salt, quickly rinse the zucchini now to wash off excess saltiness, then squeeze again until it feels relatively dry.
Pro Tip from Dustin: If you are using very large zucchini (the baseball bat kind), you might want to scoop out the large, watery seed core before salting and slicing. Starting with less water means less work later.
Step 2: Mixing Up the Creamy Binder
Now that our main vegetable is prepped, we build the wet mixture that holds everything together.
Combining Wet and Dry Ingredients
- Preheat and Prepare: Preheat your oven to 375°F (190°C). Lightly grease your 9×13 inch baking dish with butter or non-stick spray. This prevents sticking, which is key for easy serving later.
- Sauté Aromatics (Optional but great): If you decided to add finely chopped onion, cook it gently in a skillet with a tablespoon of butter until soft (about 5 minutes). Let it cool slightly before adding it to the mix.
- Whisk the Wet Ingredients: In your large mixing bowl, whisk the 3 eggs vigorously until they are light yellow and slightly foamy.
- Add Creaminess: Stir in the sour cream (or yogurt) until completely smooth.
- Incorporate Dry Elements: Gently whisk in the flour, along with your seasonings (pepper, garlic powder, dried herbs if using). Mix just until the flour disappears. Overmixing can lead to a tough texture.
- Add Cheese: Fold in about 3/4 cup of your shredded cheese. Save the rest for the topping.
Step 3: Final Assembly and Topping
This is where everything comes together into the recognizable casserole form.
Bringing It All Together
- Combine Zucchini: Add the squeezed, dried zucchini and the cooled cooked onions (if used) to the wet mixture in the bowl.
- Gentle Folding: Use a large spatula to gently fold the zucchini into the egg and cheese mixture. You want to coat all the vegetable pieces evenly without beating the air out of the eggs.
Remember the goal: Everything should be coated in the creamy base, but the mixture should not look soupy. If it looks too wet, it means you skipped or rushed the squeezing step (go back and squeeze more!).
- Transfer to Dish: Pour the entire mixture into your greased baking dish. Spread it out evenly with the spatula.
- The Finishing Touch: Sprinkle the remaining 1/4 cup of cheese evenly over the top. For an extra crunchy top, you can mix the last bit of cheese with 2 tablespoons of dry breadcrumbs or crushed crackers before sprinkling.
Baking Instructions
Place the dish into your preheated 375°F (190°C) oven. Bake for 40 to 50 minutes.
How do you know when it is done? The edges should be golden brown, and the center should no longer look jiggly or wet when you gently shake the pan. If you insert a toothpick into the center, it should come out mostly clean (a little moist is okay, but not raw batter).
Let the casserole rest on the counter for 10 to 15 minutes before cutting and serving. This resting period allows the structure—thanks to those eggs—to fully set. Cutting it too soon leads to collapse.
Variations and Customizations: Making It Your Own
Once you master the basic technique, you can treat this casserole like a highly customizable platform. Think of it like learning how to change your own oil—once you know the basics, you can experiment with different filters and synthetic blends.
Flavor-Boosting Additions
Here are some popular items that mix wonderfully with zucchini and cheese:
- Herbs: Fresh or dried dill, thyme, or basil are fantastic additions. Add 1 teaspoon of dried herb during Step 2.
- Protein Power: Add 1 cup of cooked, crumbled sausage, bacon, or shredded rotisserie chicken for a heartier main dish.
- Spice Kick: A dash of cayenne pepper or a sprinkle of red pepper flakes adds wonderful warmth.
- Different Cheeses: Swap out standard cheddar for Gruyère, Parmesan, or sharp white cheddar for a more complex flavor profile.
Texture Enhancements (The Topping Layer)
The topping is vital for texture contrast. Dry zucchini needs something crunchy on top to balance the creaminess inside.
- Classic Crumble: Mix 1/2 cup breadcrumbs (Panko are crispiest) with 2 tablespoons melted butter and sprinkle over the cheese before baking.
- Cracker Crunch: Crush 1 cup of Ritz or saltine crackers and mix with 2 tablespoons of melted butter. This adds a salty, buttery crust.
- Onion Topping: Use crispy fried onions (like the kind used on green bean casserole) sprinkled on top for the last 10 minutes of baking.
Troubleshooting Common Casserole Issues
Even simple recipes can have hiccups. If your first attempt isn’t magazine-worthy, don’t worry. Most issues stem back to the water content or oven temperature.
Zucchini Casserole Troubleshooting Table
| The Problem | Likely Cause | The Fix for Next Time |
|---|---|---|
| Casserole is watery or soupy. | Zucchini was not squeezed enough after salting. | Allow 45 minutes for salt evacuation; squeeze aggressively using a towel. |
| The top burns before the center cooks. | Oven temperature is too high, or the dish is too shallow. | Test oven with a separate thermometer. If the top browns too fast, loosely cover the dish with foil for the last 20 minutes. |
| Casserole tastes bland. | Insufficient seasoning or not enough salt added initially. | Be brave with salt and pepper. Taste the raw mixture (before baking) and add more seasoning if needed. |
| The texture is rubbery or tough. | Overmixing the batter, especially after adding the flour. | Mix wet ingredients thoroughly, but fold the zucchini in very gently until just combined. |
Storage and Reheating Tips
A delicious casserole usually yields leftovers. Knowing how to store and reheat it properly keeps it tasting great for days.
Storing Leftovers
Once cooled completely, cover the baking dish tightly with plastic wrap or transfer portions into airtight containers. Zucchini casserole keeps well in the refrigerator for 3 to 4 days. For longer storage, freezing is an option.
Freezing Instructions
If you plan to freeze it, it is best to bake it first, let it cool completely, and then slice it into individual or serving-sized portions. Wrap each portion tightly in plastic wrap, then slide them into a heavy-duty freezer bag. Frozen casseroles are good for up to 3 months.
Reheating for Perfect Flavor
Reheating correctly brings back that fresh-from-the-oven taste. Avoid the microwave if possible, as it can make the center steamy and soft.
- Oven Reheat (Best): Preheat your oven to 325°F (160°C). Place the slices or whole casserole in an oven-safe dish. Cover lightly with foil. Bake for 15–20 minutes for slices, or 30–40 minutes for the whole dish, until heated through.
- Air Fryer Reheat (Quick & Crispy): If reheating slices, the air fryer works wonderfully to crisp the edges again! Set it to 350°F (175°C) for about 6–8 minutes.
Making Smart Choices: Quality Ingredients Matter
Just like when choosing the right tires for dependable road performance, the quality of your ingredients impacts the final result of your cooking. Choosing fresh, high-quality components makes a noticeable difference in a simple recipe like this one.
When shopping for zucchini, look for firm squash that feel heavy for their size. Avoid any with soft spots or blemishes. For the best results, use summer squash that is about 6 to 8 inches long; these are less watery and have smaller seeds than the giant ones sometimes found overflowing at the market.
For the dairy components—sour cream and cheese—use full-fat versions if possible. They melt better and provide a richer mouthfeel. If you are concerned about sodium intake, remember that salting the zucchini yourself gives you control over the initial salt level, so you can use lower-sodium cheese.
For those interested in the science behind cooking and how ingredients interact, resources like the Office of Dietary Supplements offer great depth on how food components affect our bodies and texture, which is relevant even in simple home cooking!

Frequently Asked Questions (FAQ) About Zucchini Casserole
- Q1: Can I skip salting and squeezing the zucchini?
- A1: Technically, yes, but this is strongly discouraged. Skipping this step results in a very watery casserole that may not set properly, leaving liquid pooling at the bottom.
- Q2: What is the best type of cheese for this casserole?
- A2: A good melting cheese like sharp Cheddar, Monterey Jack, or Colby works perfectly. For extra savory flavor, mix in some Parmesan.
- Q3: Can I make this dairy-free or vegan?
- A3: Yes! Substitute the eggs with a flax egg mixture (3 tablespoons of ground flaxseed mixed with 9 tablespoons of water, rested for 5 minutes). Replace sour cream with a soy or almond-based plain yogurt, and use your favorite vegan shredded cheese blend.
- Q4: Do I need to peel the zucchini first?
- A4: No, peeling is usually unnecessary. The skin contains nutrients and adds nice color to the finished dish. Just wash it well.
- Q5: How long does the casserole bake?
- A5: Typically, it bakes uncovered at 375°F (190°C) for 40 to 50 minutes, until the center is set and the top is golden brown.
- Q6: Can I use different vegetables?
- A6: This recipe works well as a template. You can swap up to half of the zucchini for shredded yellow squash. If using high-moisture vegetables like mushrooms, they should also be cooked down first to remove excess liquid.
Conclusion: Enjoying Your Homemade Success
You have successfully navigated the steps for making a truly delicious zucchini casserole. See? It was not nearly as complicated as wrestling with a big repair on your transmission! You took a common garden overflow item and transformed it into a creamy, satisfying dish using simple, straightforward methods. The key takeaway is moisture control—once you remember to salt and squeeze that squash, the rest of the assembly is smooth sailing.
Take pride in that beautiful, golden-brown dish coming out of your oven. Whether you serve it up tonight as a fantastic side dish for grilled chicken or save some leftovers for lunch tomorrow, you have created a comforting, homemade success. Keep practicing these simple techniques, and you will build confidence in the kitchen just like you build confidence under the hood. Happy cooking, and enjoy every rich, savory bite of your perfect zucchini casserole!


