Changing Pad Sliding Fix
You set the baby down, reach for a wipe, and the whole pad shifts an inch. Your heart stops for a second. It happens in a split second, and it’s one of those small parenting moments that makes you want to throw the pad across the room. The good news? It’s almost always fixable, and usually with stuff you already own.
This guide walks through the actual reasons pads slide, not just a list of products. You’ll learn how to diagnose your specific setup, apply a 5-minute temporary fix, and then install a permanent solution that survives daily use. We’ll cover adhesive Velcro, heavy-duty dual-lock, non-slip mats, and why suction cups can wreck your furniture. I’ll also show you how to retrofit a pad that didn’t come with straps, plus what to do if you’re dealing with a curved bottom pad.

Munchkin
Munchkin Secure Grip Waterproof Baby Changing Pad,…
- Stable Changing Surface: Xtra-Grip rubber dots help keep the baby changing pad steady on dressers, changing tables and other flat…
- Waterproof, Wipeable Design: Easy-clean diaper changing mat has a waterproof surface that wipes down quickly after messes, helping…
- Contoured Cushioning: Raised sides and cushioned support help keep newborns, infants and toddlers comfortably positioned while you…
As an Amazon Associate I earn from qualifying purchases.
One product that sidesteps most of these problems from the start is the Munchkin Secure Grip changing pad. Its bottom surface uses Xtra-Grip rubber dots that grab the dresser, and it includes built-in safety straps. If you’re shopping new rather than fixing an existing pad, that combination is worth a look. But if you already own a pad that slides, keep reading.
Why Changing Pads Slide (The Real Physics)
Three factors decide whether your pad stays put: the weight of the pad, the friction between the pad bottom and the surface, and the tension of any straps you’re using. Most sliding happens because one of those three is out of balance.
Weight matters more than people think. A lightweight foam pad with a smooth vinyl cover might weigh three pounds. Your baby’s movement during a diaper change easily generates enough lateral force to push that pad around. Heavier pads, like the contoured ones with solid plastic bases, have more inertia and naturally resist sliding.
Friction is the second variable. A pad with a slick plastic bottom on a polished dresser top has almost no grip. The two surfaces slide against each other like ice cubes on glass. Even a small push from a baby’s legs will move it. The fix is always about introducing more friction at that interface, whether through texture, adhesive, or mechanical fastening.
Straps are the third piece. Most changing pads have two straps that buckle over the baby, but those straps only help if they’re actually anchored to something. On many dressers, the straps just wrap around the pad itself, which does nothing to stop lateral movement. If your straps are purely decorative, you’re relying entirely on friction and weight.
One thing I see constantly in parenting forums: people blame the pad when the real issue is the dresser surface. A high-gloss lacquered top or a laminate surface with a slick finish provides almost no grip for anything. Even a heavy pad will slide on those surfaces because the coefficient of friction is so low.
The last piece of the puzzle is the pad’s bottom shape. Flat-bottomed pads slide more than curved ones because they have maximum surface area in contact with the dresser, but no edge to catch on. Curved pads have a slight lip that can grab the front edge of the dresser, which helps. If you have a flat pad, you’ll need to compensate with more aggressive anti-slip measures.
Quick Fixes: The 5-Minute Emergency Stop
Sometimes you need a solution right now, not after a trip to the hardware store. These fixes take under five minutes and use things you probably have in the house.
- Rubber shelf liner. Cut a piece of shelf liner slightly larger than the pad’s footprint and lay it on the dresser. Set the pad on top. The grippy texture holds both surfaces. This is the single best temporary fix because it works on almost any surface and costs a few dollars.
- Yoga mat or mouse pad. A thin rubber mat works the same way as shelf liner. Cut it to size with scissors. It’s thicker than shelf liner, so it also adds a tiny bit of cushioning.
- Wet paper towel trick. Dampen a paper towel, wring it out completely, and place it between the pad and the dresser. The moisture creates a temporary suction effect. This works for about an hour, which is enough to get through one change. It’s not a real solution, but it’s better than nothing in a pinch.
- Double-sided tape. Apply a few strips of double-sided tape to the pad’s bottom corners. It holds for a few uses, but it loses stickiness quickly and leaves residue on your dresser. Use it only if you’re desperate.
- Stack of heavy books. Place a couple of heavy books on the back edge of the pad to add weight. This reduces sliding but makes the pad awkward to use. It’s a stopgap, not a fix.
That shelf liner trick has saved me more than once when visiting family. I keep a folded piece in the diaper bag now. It costs nothing and works on every surface I’ve tried, including granite and glass.
Permanent Solutions: Straps, Velcro, and Dual-Lock
Once you’ve confirmed the pad can stay put with a temporary fix, it’s time to make it permanent. You have three main options, and each has trade-offs.
The best approach depends on your dresser. If you own the dresser and don’t mind a small adhesive residue, Velcro or dual-lock is the gold standard. If you’re renting or want zero marks, a high-friction mat might be enough. Let’s break down each method.
Installing Adhesive Velcro Strips Correctly
Adhesive Velcro is the most common DIY fix, but most people install it wrong. They stick one strip to the pad and one to the dresser, then wonder why it peels off after a week. The problem is usually surface preparation.
Start by cleaning both surfaces with rubbing alcohol. Let them dry completely. Any dust, oil, or polish residue will kill the adhesive’s bond. Then apply the hook side to the pad and the loop side to the dresser. The loop side is softer and less likely to scratch your furniture.
Use at least four strips, one near each corner. Two strips in the middle won’t stop the edges from lifting. Press each strip firmly for 30 seconds. Then wait 24 hours before using the pad. The adhesive needs time to cure, and most failures happen because people skip this step.
For heavy-duty hold, look for industrial-strength Velcro with a 10-pound or higher rating per square inch. The standard craft-store stuff is too weak. I’ve also had good results with 3M Command strips, which use a similar adhesive system and remove cleanly when you’re done. They’re not as strong as industrial Velcro, but they work well for lightweight pads.
One caveat: Velcro on the dresser top will collect lint and dust over time. The loop side especially becomes a magnet for fuzz. You’ll need to clean it periodically with a stiff brush or a piece of tape to keep the grip strong.
Using Heavy-Duty Dual-Lock for a Rock-Solid Grip
If Velcro isn’t cutting it, dual-lock is the nuclear option. Dual-lock is 3M’s product that uses interlocking plastic mushrooms instead of hooks and loops. It’s the same stuff used to mount car dashcams. The hold is significantly stronger than Velcro, and it locks together with an audible click.
Dual-lock comes in different grades. The clear version for indoor use holds about 5 pounds per square inch. The black outdoor version holds more. For a changing pad, the clear version is plenty. Apply it the same way as Velcro: clean both surfaces, apply strips, press firmly, wait 24 hours.
The downside is that dual-lock is harder to separate. You’ll need to peel it apart slowly, which can be tricky if you need to remove the pad for cleaning. The adhesive on the back is also more aggressive, so it can leave residue on finished wood. Test it on an inconspicuous spot first.
For most parents, I’d start with Velcro. Dual-lock is overkill unless you have a very active toddler who manages to shift even a strapped-down pad. But if you’ve tried everything else and the pad still moves, dual-lock will end the problem.
Non-Slip Mats and Liners: Which Actually Work?
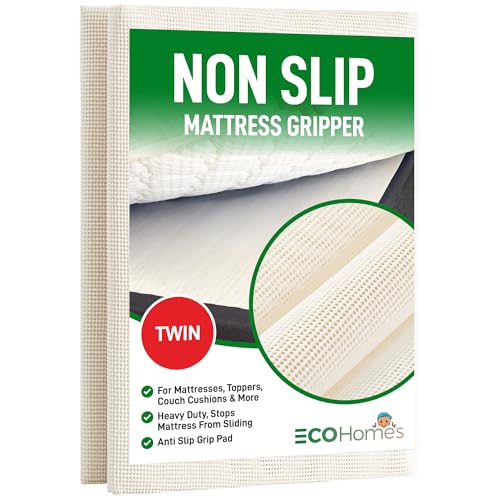
Non-slip mats are the middle ground between temporary and permanent. They don’t require adhesive, so they work on any surface without leaving marks. But they’re only as good as their grip, and quality varies wildly.
The best non-slip mats are made of natural rubber or a similar grippy material. These have a high coefficient of friction and stay put even when wet. Look for mats with a textured surface on both sides. The ones with a smooth top and grippy bottom work best under a changing pad.
Silicone mats are another option. They’re easy to clean and provide good grip, but they can feel slick if the pad’s bottom is also smooth. The silicone-on-silicone interface doesn’t grip as well as rubber-on-plastic.
Here’s a comparison of the most common non-slip options:
| Method | Hold Strength | Damage Risk | Cost | Best For |
|---|---|---|---|---|
| Rubber shelf liner | Moderate | None | $5 | Temporary fixes, travel |
| Natural rubber mat | Strong | None | $15-$25 | Permanent no-adhesive solution |
| Silicone mat | Moderate | None | $10-$20 | Easy cleaning, wet environments |
| Adhesive Velcro | Strong | Residue on removal | $8-$15 | Permanent, owned furniture |
| Dual-lock | Very strong | Residue, possible finish damage | $10-$18 | Extreme sliding, heavy pads |
| Suction cups | Weak | Staining, peeling | $5-$10 | Not recommended |
My honest take: a good natural rubber mat is the best all-around choice. It’s non-destructive, holds well, and you can take it with you when you move. The only time I’d skip it is if your pad slides even with the mat, in which case you need adhesive.
The Suction Cup Trap: When to Avoid Them
Suction cups seem like a clever solution. They’re removable, reusable, and don’t require any installation. But they have a serious hidden problem: they can damage finished wood.
Here’s what happens. Suction cups create a seal against the dresser top. Over time, moisture gets trapped between the cup and the finish. On a sealed wood surface, this can cause the finish to cloud or peel. On unsealed wood, it can raise the grain and leave a permanent ring. I’ve seen photos of dressers with perfect circular marks where suction cups sat for a few weeks.
Beyond the damage risk, suction cups just don’t hold well on porous surfaces. They need a perfectly smooth, non-porous surface to create a vacuum. Most dresser tops are finished wood or laminate, which have tiny imperfections that break the seal. The cup holds for a day or two, then pops off when the baby kicks.
If you’re determined to use suction cups, put them on a smooth glass or acrylic tray first, then place the tray on the dresser. That protects the wood and gives the cups a proper surface. But honestly, you’re better off with a rubber mat or Velcro.
Retrofitting a Pad Without Built-In Straps
Many budget pads skip the straps entirely. If yours didn’t come with them, you can add your own. This is a straightforward DIY project that takes about 20 minutes.
You’ll need a strap kit or a length of nylon webbing, two buckles, and a sewing kit or heavy-duty adhesive. The easiest route is to buy a diaper changing strap kit online. These come with straps that wrap around the pad and buckle over the baby. They’re designed for this exact purpose.
To install, place the strap under the pad, centered where the baby’s waist will sit. Thread the ends up and over the pad’s sides, then buckle them across the baby. The strap should be snug but not tight. You want to prevent the baby from rolling, not restrain them.
For a more permanent solution, sew or glue the straps to the pad’s underside. Use heavy-duty thread and reinforce the stitching. If you’re using adhesive, make sure it’s rated for fabric and plastic. E6000 works well for this.
One thing to note: straps only help if they’re anchored to something solid. If your dresser has a lip or edge, you can hook the straps around it. Otherwise, the straps just keep the baby on the pad, not the pad on the dresser. You’ll still need a non-slip solution underneath.
Surface-Specific Fixes (Wood, Laminate, Glass, Fabric)
The best fix depends on what your dresser top is made of. Here’s how to handle each surface type.
Finished wood. This is the most common surface. Velcro and dual-lock work well, but test the adhesive on a hidden spot first. Some wood finishes react badly to adhesive. If you’re worried about residue, use a natural rubber mat instead. The mat won’t damage the finish and provides plenty of grip.
Laminate. Laminate is slicker than finished wood, so you need more help. Velcro works, but the adhesive may not bond as well to the smooth laminate surface. Clean it thoroughly with alcohol before applying. A rubber mat is also effective, but make sure it has a strong grip on the laminate. Some mats slide on laminate because both surfaces are smooth.
Glass. Glass is the trickiest surface. It’s completely non-porous, so adhesives have trouble bonding. Suction cups actually work on glass, but they still risk staining if moisture gets trapped. Your best bet is a silicone mat, which grips glass well without adhesive. Or use a rubber mat with a textured bottom.
Fabric. If you’re using a changing pad on a fabric surface like a bed or a padded changing table topper, skip the adhesives. They won’t stick to fabric. Instead, use a mat with a grippy bottom that can grab the fabric, or wrap the pad in a fitted sheet that tucks under the mattress. The sheet provides friction and keeps everything in place.
For a more detailed walkthrough of securing a pad to a specific dresser, check out this changing pad guide that covers installation step by step.
Safety Checks After Every Fix
Once you’ve applied your fix, don’t just assume it works. Test it. Push the pad from the sides and the top. Try to shift it with your hand. If it moves at all, the fix isn’t strong enough.
Then do a test with a weighted object. Place a bag of flour or a stack of books on the pad to simulate a baby’s weight. Push the weight from the side. The pad should stay put. If it slides, you need a stronger solution.
Check the straps as well. Buckle them and try to pull the pad away from the dresser. The straps should hold the pad firmly. If they’re loose, adjust the tension.
Finally, inspect the adhesive or mat regularly. Over time, dust and moisture can weaken the grip. Re-clean the surfaces and re-apply as needed. A monthly check takes two minutes and prevents a dangerous surprise.
One more thing: never place a changing pad on a surface that’s uneven or has a gap. The pad needs full contact with the surface to grip properly. If your dresser has a raised edge or a seam, the pad will rock and slide.
When to Replace Your Pad Instead of Fixing It
Sometimes the pad itself is the problem. If your pad is old, warped, or has a cracked base, no amount of Velcro will fix it. Here are the signs it’s time to buy a new one.
If the pad’s bottom is warped or no longer flat, it won’t sit evenly on the dresser. This creates a rocking motion that makes sliding worse. A warped pad is a safety hazard and should be replaced.
If the cover is torn or the foam is compressed, the pad won’t provide adequate cushioning. A baby can roll off a pad that’s lost its shape. Replace it.
If the built-in straps are broken or the buckles are cracked, don’t try to repair them. Straps are a critical safety feature. A broken strap is a reason to replace the whole pad.
If you’re buying a replacement, look for one with a non-slip bottom built in. The Munchkin Secure Grip pad has rubber dots on the bottom and comes with straps, which addresses the two biggest causes of sliding. It’s also waterproof, which makes cleanup easier. Check the current price on Amazon to see if it fits your budget.
If you’re handy, you might also consider fixing the dresser itself. A loose drawer or a wobbly top makes the whole setup unstable. This dresser drawer repair guide covers common issues that affect stability.
What Actually Works: My Final Take
- Diagnose first: check pad weight, surface friction, and strap tension before buying anything.
- Rubber shelf liner is the best $5 emergency fix. Keep a piece in your diaper bag.
- For a permanent fix, adhesive Velcro strips beat everything else for most dressers. Clean surfaces with alcohol and wait 24 hours before use.
- Dual-lock is stronger than Velcro, but it’s harder to remove and can leave residue. Use it only if Velcro fails.
- Natural rubber mats are the best non-destructive option. They work on wood, laminate, and glass without leaving marks.
- Avoid suction cups on finished wood. They stain and peel the finish.
- If your pad has no straps, buy a strap kit and retrofit it. Straps alone won’t stop sliding, so pair them with a friction fix.
- Replace the pad if it’s warped, cracked, or has broken straps. Don’t risk it.
Most sliding pads are fixable in under an hour with basic supplies. The key is understanding why yours slides in the first place. Start with the cheapest fix, test it with weight, and work your way up. Your dresser top and your baby’s safety are worth the few minutes it takes to do this right.
Products related to this article
Sponsored / affiliate links. As an Amazon Associate I earn from qualifying purchases. I may earn additional commission from eligible campaigns.