
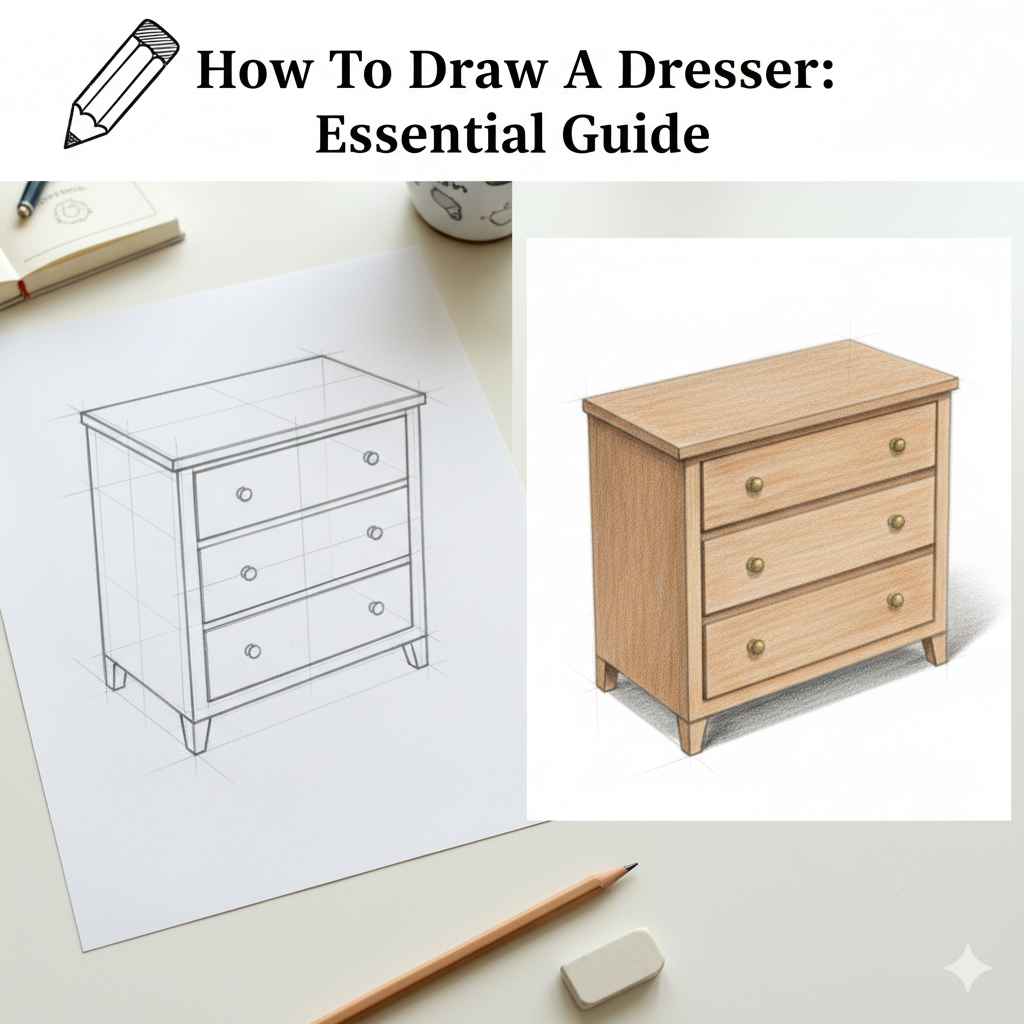
To learn how to draw a dresser, start by sketching the main rectangular box using perspective lines to set the depth. Next, draw the drawers as overlapping rectangles inside the box, ensuring consistent spacing. Finally, add simple details like knobs and shadows to give it a realistic 3D look. This guide breaks down the process simply, step by step.
For a related storage or furniture fix, Paint Finish For A Dresser helps readers compare the next practical option.
Are you trying to sketch a piece of furniture, but the dresser looks flat and awkward? You are not alone. Drawing realistic furniture, especially something boxy like a dresser, can feel tricky. It seems like perspective messes everything up. But drawing a dresser is mostly about mastering simple 3D shapes. Once you get the basic box right, adding the details like handles and drawer fronts becomes easy. This guide will walk you through every step simply, using easy shapes you already know. Get your pencil ready; we will make that dresser look real on paper!
Why Learning to Draw Furniture Matters
If you enjoy sketching scenes, rooms, or still-life setups, furniture is a huge part of that picture. A poorly drawn table or dresser can make a whole drawing look off-balance. Understanding how to draw a dresser isn’t just about furniture; it’s about understanding basic perspective. This skill builds your confidence for drawing anything in a three-dimensional space. It saves you time wondering how those drawers should line up. Think of it like learning the basic chassis of a car—once you have the foundation, everything else falls into place!

Gathering Your Drawing Arsenal (The Right Tools)
You don’t need fancy, expensive tools to start drawing a dresser. Just like checking the right oil viscosity before a drive, having the right basic tools makes the job smoother. Keep it simple at first. You can always upgrade later!
Essential Beginner Tools:
- Pencils: Start with a standard HB pencil for general sketching. A softer pencil (like a 2B) is great for darker lines or shading later.
- Paper: Any smooth drawing paper works fine for practice.
- Eraser: A quality vinyl eraser that doesn’t smudge is your best friend.
- Ruler/Straight Edge: This is crucial for getting those straight perspective lines right, especially for a boxy object like a dresser.
Step 1: Understanding Perspective Basics for Box Shapes
Almost every piece of furniture sits in a three-dimensional world. To make it look real, we use perspective. For a beginner drawing a dresser, one-point perspective or two-point perspective is the way to go. Let’s start with the easiest method for a typical room view: two-point perspective.
Setting Up Your Horizon Line and Vanishing Points
Imagine you are looking at the corner of the dresser. This means the front corner is closest to you, and the sides recede away. This requires two vanishing points (VPs).
- Draw the Horizon Line (HL): Draw a straight horizontal line across your paper. This represents eye level.
- Place the Vanishing Points (VPs): Mark one VP far to the left of your paper and one VP far to the right of your paper, resting on the HL.
- Draw the Forefront Edge: Draw a vertical line somewhere between the two VPs. This is the corner of the dresser closest to the viewer.
Pro Tip: The closer your VPs are, the more distorted (or dramatic) your drawing will look. For a natural look, spread those VPs far apart!
Step 2: Building the Main Body of the Dresser
The main body of the dresser is just a rectangular box sitting at an angle. We use the lines connecting to the vanishing points to establish the top and bottom planes of this box.
- Draw the Bottom Lines: From the top and bottom of your forefront vertical line, lightly draw lines extending toward the left VP and the right VP. These are your primary guide rails.
- Establish Depth: Decide how deep you want the dresser to be. On both the left and right receding lines, draw vertical lines (or lines parallel to the forefront edge) to mark where the back corner will be.
- Close the Box (Top and Back):
- On the left side, draw a light line connecting the top of your side depth mark back toward the right VP.
- On the right side, draw a light line connecting the top of your side depth mark back toward the left VP.
- Identify the Top Plane: Where these last two lines intersect, you have found the top back corner of your dresser. Draw a final vertical line connecting the top of the front edge to this newly found top back corner point.
Result Check: You should now have a clear, three-dimensional rectangular box. Erase all the construction lines that extend past the actual corners of the box. This solid shape is the foundation for all your drawers.
Step 3: Dividing and Drawing the Drawers
This is where many beginners struggle. The key here is consistency. Every drawer must respect the same perspective lines you already drew for the main box.
Measuring and Spacing Drawers
Drawers are essentially smaller boxes stacked inside the larger box. They need to be spaced evenly. Since the dresser is viewed in perspective, the drawers at the top (or further away) will appear slightly shallower or smaller than the drawers near the bottom.
- Determine Drawer Height: Decide how many drawers you want (e.g., three tall drawers, or four smaller drawers over two wide ones). Lightly mark the vertical height for the first drawer along the front edge.
- Draw the Drawer Lines (Following Perspective):
- From the top mark of the first drawer, draw a light guideline extending back toward the appropriate vanishing point (matching the top plane line you drew earlier).
- Repeat this process for the bottom line of that drawer.
- Create the Drawer Front: The actual drawer front is a flat surface. Draw the top and bottom lines of the drawer front following the perspective established in the previous step. This creates the illusion of depth for that single drawer.
- Repeat for All Drawers: Continue this process, working your way down the dresser body. Ensure the vertical spacing you marked in Step 1 remains consistent.
Important Note: When drawing the lines for the next drawer down, make sure the top edge of the next drawer aligns perfectly with the bottom edge of the drawer above it.
Step 4: Adding Details – Knobs and Pulls
Details make the object recognizable. Dresser handles or knobs are easy additions once the main structure is sound. These details must also follow the perspective of the drawer front they sit on.
Drawing Knobs
Knobs are small circles or ovals sitting on the drawer face. Because the drawer face is receding in space, the knob will look like a slightly squashed oval, not a perfect circle.
- Locate the Center: Find the rough center point of your drawer face. Knobs are usually placed slightly below the halfway point vertically.
- Draw the Oval: Draw a small, shallow oval where the knob sits. The narrowest part of the oval should point toward the vanishing point on that side.
- Add Depth (Optional): For a more realistic knob, add a small, darker line along the top edge of the oval to represent where light hits it, and a tiny highlight on the opposite side.
Drawing Pulls (Handles)
Handles are essentially small rectangular prisms sticking out from the drawer.
- Draw two small, closely spaced vertical lines where the handle attaches.
- Draw small, receding horizontal lines connecting the tops and bottoms of those vertical lines, respecting the perspective of the drawer face.
- Darken the edges that face the light source to give the handle dimension.
Step 5: Finalizing the Drawing with Line Weight and Shading
A clean drawing often looks flat because everything is drawn with the same darkness. Line weight and simple shading are what make your dresser pop off the page. This is similar to how a well-maintained car looks shiny because of how light reflects off its curves.
Mastering Line Weight
Line weight means using thicker/darker lines for edges that are closer or more important, and lighter lines for edges that are further away or less structural.
- Thick Lines: Use your darker pencil (or press harder) for the front-most edges, the bottom plane touching the floor, and the outlines of the handles.
- Medium Lines: Use standard pressure for the main outlines of the drawer fronts and the sides.
- Thin Lines: Use the lightest touch for interior lines or edges that recede far into the background.
Basic Shading for Form
Decide where your light source is coming from (e.g., top left). The side facing the light will be lightest, and the side facing away will be darkest.
- Identify Shadow Sides: The bottom edges of the drawers and the side of the dresser away from the light source will be darker.
- Apply Gentle Shading: Use light, even strokes (hatching or circular motions) to shade the bottom edges of the drawers, simulating the shadow cast by the drawer above it.
- Cast Shadow: If the dresser is sitting on the floor, draw a soft shadow extending away from the base, opposite the light source.
Alternative Method: Drawing a Dresser in One-Point Perspective
Sometimes, you might draw a dresser straight-on, where you see the entire front face perfectly flat, and only the sides recede. This is much simpler and uses only one vanishing point.
When to Use One-Point Perspective:
This is perfect if the dresser is flush against a wall or you want a very direct, frontal view, making it look less angled.
- Set the Vanishing Point (VP): Place one VP on the center of your horizon line.
- Draw the Front Face: Draw the front rectangle of the dresser body as a simple, non-perspective rectangle.
- Establish Depth: From the top, bottom, and sides of the front rectangle, draw light lines radiating back toward the single VP.
- Close the Box: Decide how deep you want the dresser. Draw vertical lines going down from your receding lines to close off the sides.
- Draw Drawers: Since the front is flat, all the drawer lines will be perfectly horizontal and vertical. Space them out evenly across the front rectangle.
Comparing Perspective Approaches
Choosing the right method depends on what you want the viewer to see. Think about how you look at furniture in your own home.
| Perspective Type | Best For | Complexity Level | Resulting Look |
|---|---|---|---|
| Two-Point Perspective | Showing the front corner and both sides; room scenes. | Medium | Realistic, angled, three-dimensional. |
| One-Point Perspective | Frontal views, furniture against a wall, quick sketches. | Easy | Flat front, sides receding simply. |
Troubleshooting Common Dresser Drawing Issues
Even with the best guide, things can look “off.” Here are quick fixes for common beginner pitfalls:
Problem 1: Drawers Look Slanted or Uneven
The Fix: You likely did not follow your perspective lines exactly. Go back to Step 3. Erase the current drawer lines and use your ruler to ensure the top and bottom edges of every drawer converge exactly toward the correct vanishing point. Consistency is the secret ingredient!
Problem 2: The Dresser Looks Flat (No Depth)
The Fix: You might have forgotten the receding lines or didn’t apply line weight. Make sure the top and bottom planes of the main box clearly converge toward the VPs. Then, heavily emphasize the edges that are closer to the viewer (the front corners).
Problem 3: Knobs Look Like Perfect Circles
The Fix: Circles only look like circles when they are facing you directly (like in one-point perspective). If you are using two-point perspective, the drawer face is slightly angled away from you. Your knob must be drawn as a shallow oval that leans slightly toward the direction the drawer recedes. If your drawer recedes to the left, the oval should be wider on the left side and pinched on the right.
Drawing Different Styles of Dressers
The technique remains the same, but the details change. Once you master the basic box, you can adapt it for any style.
The Simple Modern Dresser
Modern dressers often ditch handles completely (push-to-open drawers) or use very thin, recessed handles. To draw this:
- Skip Step 4 (Knobs/Pulls).
- Instead of knobs, draw a tiny, thin horizontal line near the bottom edge of each drawer front to imply a recessed finger pull.
- Use very clean, crisp lines and minimal shading. The focus is on perfect geometric form.
The Antique Tallboy (Chest of Drawers)
These are often taller and sometimes have curved feet or decorative molding.
- Start with a Taller Box: Make your initial vertical line (Step 2) much taller.
- Feet: Before you finalize the bottom line, sketch small, simple block shapes underneath the main box for the feet. These feet must also respect the perspective lines. If the dresser recedes left and right, the feet must also recess left and right.
- Molding: Add simple, slightly curved lines along the top and bottom edges of the main body to suggest carved molding. Don’t over-complicate the curves; keep them simple, following the overall perspective shape.
Understanding Light and Shadow on Furniture
For objects with flat planes like dressers, shadows are very geometric. If you look up resources on architectural drawing or interior design sketching (like those from university art departments), you will see this principle emphasized: shadows are precise.
When drawing furniture, keep these three shadow concepts in mind:
- Form Shadow: The area on the object itself that is turned away from the light. On a dresser, this is usually the entire side plane that faces away from your light source.
- Core Shadow: The darkest band within the form shadow where light barely touches. This might be visible along the very bottom edge of a drawer front.
- Cast Shadow: The shadow the object throws onto another surface (like the floor or a wall). This shadow should generally match the angle of the light receding toward the vanishing point on the opposite side.
Finalizing Your Perspective Drawing
You have built the box, marked the drawers, and added the hardware. Now, it’s time to clean up and present your work. A good final pass makes all the difference.
The Clean-Up Checklist:
- Erase Construction Lines: Use your eraser carefully to remove all the light guidelines that connect to the vanishing points, leaving only the actual edges of the dresser visible.
- Darken Final Outlines: Go over the perimeter of the entire dresser (the edges touching the floor and the outer corners) with a darker, confident line.
- Define Drawer Gaps: Redraw the lines separating the drawers slightly darker than the interior lines of the drawer fronts themselves. This separation helps the viewer read the individual drawers.
- Add Environment Context: Even if you are just drawing the dresser, adding a light horizontal line for the floor helps ground the object. If you want to draw it in a room, add the floor and wall lines, ensuring those receding lines also lead back to your original vanishing points. This locks your dresser into the scene.

Frequently Asked Questions (FAQ) for Beginner Dresser Drawing
Q1: What is the easiest perspective to use when drawing a dresser?
A: One-point perspective is the easiest. It works best when you are looking straight at the front of the dresser, as it only requires you to draw straight vertical and horizontal lines for the front face.
Q2: How do I make sure my drawers line up perfectly?
A: Use a ruler and ensure that the top and bottom lines for every drawer extend precisely back to the same vanishing point you used for the top and bottom edges of the main dresser box. Draw very lightly first so you can erase any slip-ups.
Q3: Should I draw the knobs before or after the drawer faces?
A: Always draw the drawer faces first. The knobs sit on the surface of the drawer face. If you draw the knob first, you won’t know where the actual edge of the drawer is, leading to misplaced hardware.
Q4: My dresser looks like a trapezoid, not a 3D box. What went wrong?
A: This usually means you haven’t used perspective correctly on the top plane. In two-point perspective, the lines going toward the left VP and the lines going toward the right VP must meet at a single point on the top surface. If they don’t meet correctly, the top won’t look flat in 3D space.
Q5: How do I make a drawer look like it’s slightly open?
A: Draw the drawer front slightly pulled out. You will draw two extra lines parallel to the main receding lines of the drawer, representing the front edge and the inner side edge of the drawer box that is sticking out toward you. Keep the shadow dark where the open drawer meets the main frame.
Q6: Do I need to use the exact same vanishing points for the floor and the dresser?
A: Yes, absolutely. For consistent perspective, any object resting on the floor or touching the wall in your drawing must share the same horizon line and vanishing points. This is the core rule that keeps your room scene believable.
Conclusion: Confidence in Construction
Learning how to draw a dresser might sound like a small task, but mastering this boxy piece of furniture is a huge win for your understanding of perspective drawing. Remember, everything you sketched today—the main body, the receding sides, and the even drawers—is just combining simple rectangles in 3D space. You started with a simple box, used your ruler to guide the depth using vanishing points, and added details that respected that original structure. Take a moment to look at your drawing. You successfully translated a complex, real-world object onto a flat surface. Keep practicing these foundational steps with other furniture—cabinets, boxes, or even buildings—and you’ll find your entire drawing ability builds quickly. Now, go tackle that entire bedroom scene with the confidence of someone who knows exactly how to place every piece of furniture perfectly!


