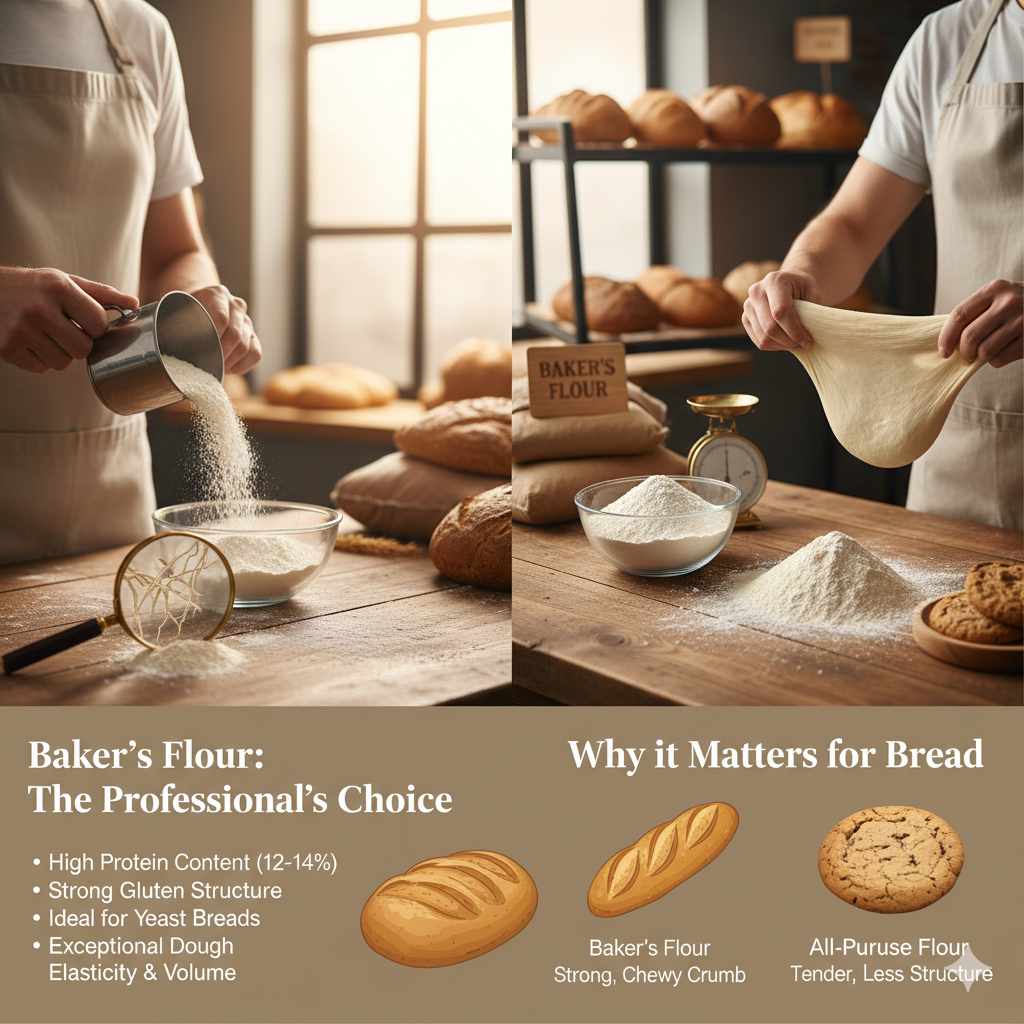
Bakers flour is a finely milled wheat flour, specifically blended to have a lower protein content (usually 8–10%). This protein profile creates soft, tender baked goods like cakes and biscuits because it prevents too much gluten development, resulting in less chewiness.
Ever mixed up a cake batter, and it came out tough instead of light and fluffy? You are not alone! Trying to choose the right flour at the store can feel like reading a complex car manual. It seems like there are ten types for every single recipe. Many home bakers run into trouble simply because they grab the all-purpose bag when the recipe calls for something special. Don’t worry; understanding flour is simpler than you think. We are going to unlock the secrets of Bakers flour together. By the end of this guide, you will know exactly when to use it and why it makes such a big difference in your favorite recipes. Let’s get started simplifying your baking cabinet!
Decoding the Baking Aisle: What Exactly Is Bakers Flour?
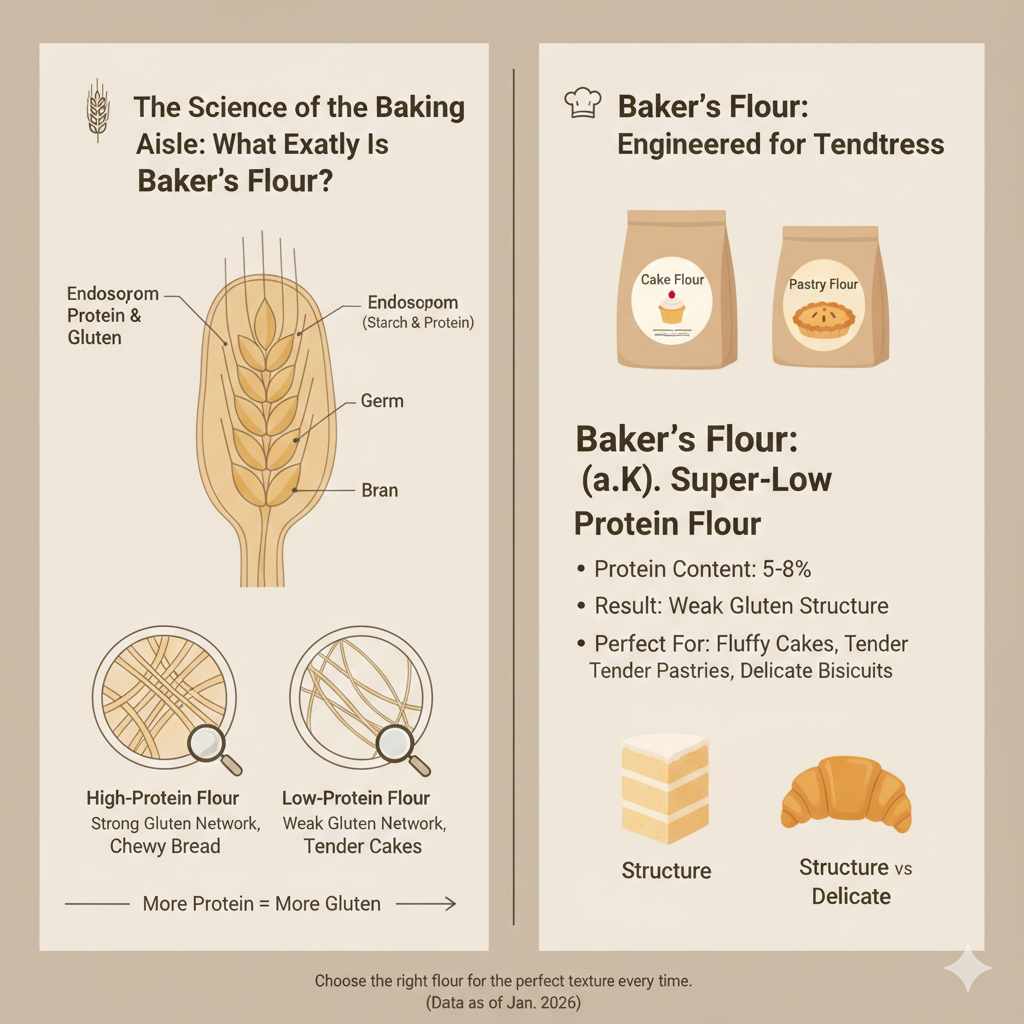
When you look at a bag of flour, you are really looking at ground-up wheat kernels. The most important factor that separates one flour from another is the amount of protein it contains. Think of protein as the glue-maker in your dough; when water mixes with flour protein, it creates gluten.
Bakers flour—often simply labeled as “Cake Flour” or sometimes “Pastry Flour” depending on the milling company—is engineered for tenderness. If you think of baking like building something, you want the right materials. For strong structures (like chewy bread), you want high-protein flour. For delicate decorations (like a fluffy cake), you want low-protein flour. Bakers flour sits firmly in that delicate structure category.
The Science of Protein: Why It Matters So Much
Gluten is what gives bread its structure and chew. When bakers talk about high or low protein levels, they are talking about the potential for gluten formation. More protein equals more gluten potential.
Here is a simple breakdown of what happens when you bake:
- Low Protein Flour (Bakers/Cake Flour): Less protein means less gluten development, even when mixed thoroughly. This results in a soft, fine crumb that melts in your mouth.
- High Protein Flour (Bread Flour): More protein means strong gluten networks are formed. This network traps gases from yeast or baking powder, allowing the dough to rise high and hold its structure, resulting in a chewy texture.
Because Bakers flour is milled from softer wheat varieties (often soft red winter wheat), its natural protein level is lower. This is the secret sauce for tenderness!
Key Differences: Bakers Flour vs. All-Purpose Flour
This is where most beginners get confused. Why buy a special bag when all-purpose (AP) flour seems to do everything?
All-purpose flour is the middle ground—it performs okay in most recipes. But “okay” isn’t the goal when you are aiming for perfection in a delicate cake.
| Flour Type | Typical Protein Range | Best For | Texture Result |
|---|---|---|---|
| Bread Flour | 12% – 14% | Artisan breads, bagels, crusty loaves | Chewy, strong structure |
| All-Purpose Flour (AP) | 10% – 12% | General use, cookies, pancakes | Balanced structure |
| Bakers Flour (Cake/Pastry) | 8% – 10% | Cakes, biscuits, pie crusts, muffins | Tender, light, fine crumb |
Notice how Bakers flour dips below that 10% mark. That small difference is everything when you are looking for a dessert that isn’t dense or rubbery. It’s an intentional choice by the miller to suit delicate applications.
The Essential Uses: When Should You Reach for Bakers Flour?
If you want your baked goods to be light, airy, and supremely tender, Bakers flour is your best friend. Think about recipes where chewiness is actually a bad thing.
Top 5 Uses for Low-Protein Bakers Flour
- Angel Food Cake: This cake relies entirely on whipped egg whites for structure. Low-protein flour ensures those delicate air pockets are not stretched or toughened.
- Chiffon Cake: Similar to Angel Food, Chiffon needs a delicate structure that melts in your mouth.
- Biscuits and Scones: These should be flaky and tender, not tough like pizza dough. Bakers flour keeps the texture soft.
- Pie Crusts: A good pie crust should flake easily. Overdeveloped gluten makes the crust tough to cut through.
- Delicate Muffins: While AP flour works, Bakers flour ensures muffins stay incredibly light, especially if you are using a lighter recipe base.
When a recipe tastes heavy or dense, it is almost always because too much gluten developed, usually from overmixing or using flour that was too high in protein for that specific job.
DIY Hack: Making Bakers Flour at Home (The Substitution Secret)
What if you are in the middle of a recipe, realize you are out of Bakers flour, and the store is closed? Don’t panic! You can simulate the lower protein content of Bakers flour using standard all-purpose flour. This is a fantastic skill to have in your DIY toolkit, much like knowing how to check your tire pressure correctly before a long drive.
The Starch Trick: Lowering the Protein Content
The goal is to reduce the effective protein percentage by introducing a pure starch, which has 0% protein. Cornstarch is the perfect, readily available addition.
Step-by-Step Guide to Creating Substitute Bakers Flour
To mimic the 8–9% protein range of true Bakers flour using standard 10–11.5% AP flour, you need to remove a small amount of the flour and replace it with pure starch.
- Measure Accurately: For every 1 cup of AP flour you need for the recipe, measure out exactly 1 cup (8 tablespoons) of AP flour.
- Remove Flour: Take 2 tablespoons of that measured AP flour out of the cup.
- Add Starch: Replace those 2 tablespoons with 2 tablespoons of cornstarch.
- Sift Thoroughly: This is the most crucial step. Sift the mixture together (the AP flour and cornstarch) at least 5 to 10 times. Do not just whisk them; you need to incorporate the fine starch evenly into the protein structure of the flour for the best result.
This simple adjustment effectively lowers the protein content by about two percentage points, moving your AP flour into the “Bakers Flour” territory. This technique is widely accepted by baking experts for substituting cake or pastry flour in a pinch.
A Note on Bleached vs Unbleached Flour
When you look at real Bakers or Cake flour in the store, it is usually bleached. Bleaching isn’t just about color; it chemically changes the flour. It helps weaken the gluten structure even further and allows the proteins to absorb more liquid.
When you use the cornstarch substitution trick above, you are mimicking the protein change, but the texture improvement from bleaching is still slightly missing. However, for almost all home baking situations, the starch substitution provides excellent results!
Achieving Perfect Gluten Control: Simple Mixing Tips
Choosing the right flour is only half the battle. The way you mix your batter determines how much gluten actually develops. Since Bakers flour is designed to minimize gluten, you need mixing habits that support that goal.
How Overmixing Ruins Tender Baked Goods
Think of gluten strands like tiny rubber bands. When you mix, you stretch those rubber bands. If you stretch them too much (overmix), they become tough and restrictive. This is excellent for a sturdy sourdough loaf but catastrophic for a light sponge cake.
Tips for Gentle Mixing (When Using Bakers Flour)
- Use Medium-Low Speed: If using a stand mixer, stick to the lowest speed setting that still incorporates the ingredients.
- Stop When Just Combined: Mix until you no longer see streaks of dry flour. As soon as that happens, stop the mixer. A few lumps are totally fine!
- Fold Gently: When adding dry ingredients to wet ingredients (or vice versa), switch to hand-mixing using a rubber spatula. Use a “folding” motion—cutting down the center and sweeping up the side of the bowl—to incorporate air rather than developing structure.
Bakers flour gives you more leeway than high-protein flour, but gentle handling always pays off for the tenderest results possible.
Where Does Bakers Flour Fit in the World of Wheat?
Understanding where this flour comes from helps connect it back to the wider world of agriculture and milling—a topic as complex as understanding engine displacement in cars, but fascinating once you grasp the basics.
Wheat varieties are generally classed based on their hardness and protein content. Bakers flour comes from the softest wheats.
The Hardness Spectrum of Wheat
Understanding the primary types helps put everything into perspective:
- Hard Red Winter Wheat: This is the primary source for most All-Purpose and Bread flours. It grows well across large swathes of the US, including states like Kansas and Oklahoma.
- Hard Red Spring Wheat: This is the highest protein wheat, famously used for the toughest breads in places like the Dakotas.
- Soft Red Winter Wheat: This is the champion for bakers flour. Grown in warmer, wetter climates (like the Southeast US), the kernels are naturally softer and lower in starch. This lower innate hardness is why they mill into superb cake flour.
When you buy Bakers flour, you are buying a product specifically sourced from these low-protein, soft wheat varieties and milled to an exceptionally fine consistency. For more on US wheat production standards, you can refer to resources maintained by agricultural bodies, like those detailing grain quality standards [USDA Agricultural Marketing Service].
Storage Secrets: Keeping Your Bakers Flour Fresh
Flour, like any dry staple ingredient, can go bad. Because Bakers flour has a slightly higher fat content (from the way softer wheat is processed) and is so finely milled, it can sometimes turn rancid faster than bread flour if stored improperly.
Proper storage is key to ensuring your delicate recipes don’t end up tasting “off.” Think of it like preserving the life of your car’s synthetic fluids; proper handling ensures maximum performance.
4 Golden Rules for Flour Storage
- Keep it Cool: Store flour in a dark, cool pantry (below 70°F is ideal). Heat speeds up the process where fats in the flour can oxidize and spoil.
- Keep it Dry: Humidity causes clumping and promotes mold growth. Ensure containers are airtight.
- Airtight Containers are Mandatory: Transfer the flour out of the paper bag it came in. Use heavy-duty plastic containers, glass jars, or high-quality food storage bins. This prevents moisture ingress and infestation (pantry moths love flour!).
- Label and Date: Always use a piece of tape to mark the date you opened the bag on the container. While many flours last 6–12 months, using it within 6 months ensures the best possible flavor and performance.
If you find flour smells musty, sour, or “off,” do not use it. It’s cheap to replace flour; it’s expensive to waste ingredients on a ruined cake!
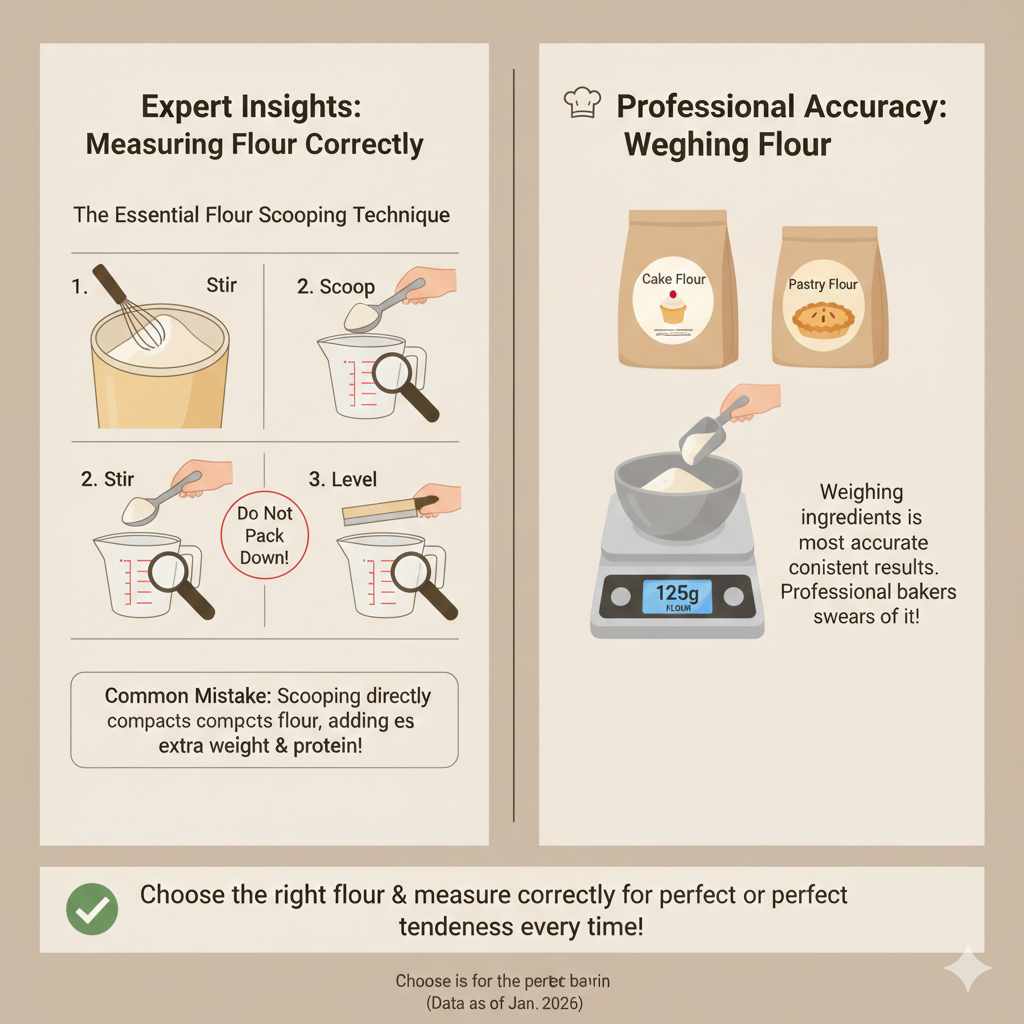
Measuring Flour Correctly: The Final Key to Tenderness
Even with the perfect Bakers flour, if you scoop it straight out of the bag using your measuring cup, you are compacting it. This adds extra flour to your recipe, increasing the overall protein ratio and making your final product heavier.
This is perhaps the most common mistake beginners make in baking. If you measure engine oil using a dirty dipstick, you’ll overfill the reservoir; if you measure flour incorrectly, you’ll over-protein your cake!
The Essential Flour Scooping Technique (Stir, Scoop, Level)
- Stir: Before measuring, use a fork or whisk to gently fluff up the flour in its container. This aerates it.
- Scoop: Use a spoon to lightly scoop (dollop) the flour into your dry measuring cup. Do not pack it down or press it into the cup.
- Level: Use a straight edge (like the back of a non-serrated knife or a bench scraper) to sweep the excess flour off the top of the measuring cup. Do not tap the cup on the counter before leveling.
If your recipe calls for flour by weight (grams or ounces), use a digital kitchen scale. Weighing ingredients is the most accurate method, something professional bakers swear by for consistency across every batch.
FAQ: Beginner Questions About Bakers Flour
Q1: Can I use self-rising flour instead of Bakers flour?
A: Sometimes, but only if you adjust the recipe. Self-rising flour already contains salt and baking powder. It usually has a protein content similar to AP or sometimes even lower. If the recipe already calls for leavening agents, skip the self-rising flour, or you will have a chemical reaction disaster!
Q2: Is Bakers flour the same as cake flour?
A: In most home baking contexts, yes. Commercial product labeling varies, but Bakers flour is generally used interchangeably with cake flour, both indicating a low-protein (8% to 10%) finely milled product designed for tenderness.
Q3: What happens if I use bread flour in a cake recipe?
A: Your cake will likely be dense, tough, and chewy rather than light and tender. The high protein content in bread flour develops too much gluten structure for a delicate cake batter.
Q4: Does the temperature of the flour matter?
A: Yes. For most cake and pastry recipes, ingredients are meant to be at room temperature (around 70°F). Cold flour can inhibit ingredients like butter or eggs from emulsifying properly, leading to a denser final product, regardless of the protein level.
Q5: Can I use regular whole wheat flour in place of Bakers flour?
A: Absolutely not. Whole wheat flour contains the wheat germ and bran, which interfere with gluten formation and absorb liquid differently. It will result in a very heavy, gritty texture in delicate baked goods.
Q6: How long does Bakers flour last once opened?
A: If stored correctly in an airtight, cool, dark pantry, it should perform well for 6 to 9 months. For best results in delicate recipes, try to use it within 6 months of opening.
Conclusion: Confidence in Your Cupboard
Understanding what flour you are holding is the difference between a frustrating baking experience and complete success. Bakers flour isn’t some mysterious ingredient reserved for professionals; it’s simply a low-protein tool designed specifically to maximize tenderness in your cakes, biscuits, and pastries.
Remember the core principle: Lower protein means less chew, which is exactly what you want for a melt-in-your-mouth dessert. Now you know its primary uses, how to substitute it in a pinch using cornstarch, and the critical need for gentle mixing techniques.
Don’t let the baking aisle intimidate you any longer. Next time you reach for a recipe that demands softness, grab that bag labeled for cakes or pastry. With this knowledge, you can approach your next baking project confidently, knowing you have mastered one of the true essential secrets of baking!