
Replace your door handle easily with this simple DIY guide! In about an hour, you can refresh your doors, improve functionality, and boost your home’s style. This step-by-step process needs only basic tools and is perfect for beginners wanting a beautiful, updated look.
Ever found yourself wrestling with a sticky, loose, or just plain outdated door handle? It’s a small detail, but a stubborn door handle can be surprisingly frustrating, impacting both the function and the overall charm of your room. Don’t let a finicky handle get you down! Replacing a door handle is a surprisingly simple DIY project that can make a big difference. With just a few common tools and this easy guide, you’ll be enjoying a smooth-working, stylish new handle in no time. Get ready to feel empowered as we walk you through each step, transforming your doors with confidence.
Why Replace Your Door Handle?
Door handles are more than just functional hardware; they’re an often-overlooked design element that contributes significantly to your home’s aesthetic. While a loose or broken handle is an obvious reason for replacement, there are many other compelling reasons to update this essential fixture.
Boosting Your Home’s Style
Think of your door handles as the jewelry for your doors. An old-fashioned, worn-out handle can detract from even the most beautifully decorated room. Updating to a modern, sleek design can instantly elevate the look and feel of a space, making it feel more cohesive and stylish. Whether you’re going for a minimalist vibe, a rustic farmhouse feel, or a touch of modern glamour, the right door handle can tie the entire look together.
Enhancing Functionality and Safety
Beyond aesthetics, functionality is key. Handles that are loose, stiff, or difficult to grip can be a nuisance for everyone, especially children, the elderly, or those with mobility issues. A new handle operates smoothly, making it easier to open and close doors. For exterior doors, ensuring a robust and reliable handle also contributes to your home’s security. For interior doors, a well-functioning handle ensures privacy and ease of use.
The Affordability of a Quick Upgrade
Compared to larger renovation projects, replacing a door handle is incredibly budget-friendly. It’s a small investment that yields a noticeable return in both style and function. Many attractive options are available at affordable price points, making it an easy way to refresh multiple doors without breaking the bank. It’s a perfect project for renters looking to personalize their space without permanent changes (always get landlord approval for any modifications).

What You’ll Need: Tools and Materials
Gathering your supplies before you begin is key to a smooth and stress-free DIY experience. Thankfully, replacing a door handle is a straightforward process that doesn’t require specialized tools. Most of what you need is likely already in your toolbox!
Essential Tools for the Job
- Screwdriver Set: You’ll likely need both Phillips head and flathead screwdrivers. Most modern door handles use Phillips screws, but it’s good to be prepared.
- Pliers (Optional): Sometimes, a stubborn screw or part might need a little extra grip.
- Measuring Tape (Optional): If you’re buying a new handle, you might need to measure the backset (the distance from the edge of the door to the center of the doorknob hole) or borehole diameter. Your new handle’s packaging usually specifies these dimensions.
- Safety Glasses: Always a good idea to protect your eyes from any potential flying debris.
- Work Gloves: To protect your hands.
Choosing Your New Door Handle
Selecting the right replacement handle is part of the fun! Consider these factors:
- Style and Finish: Decide on a look that complements your home’s decor. Finishes like brushed nickel, polished chrome, oil-rubbed bronze, matte black, or brass are popular choices.
- Type of Handle: Interior doors often use knob sets or lever sets. Lever sets are generally easier to operate.
- Functionality: For interior doors, you can choose passage (no lock), privacy (with a lock for bathrooms/bedrooms), or dummy (for closets or where a handle is needed but no latch). For exterior doors, you’ll need a keyed lock.
- Handing (for lever handles): Some lever handles are “handed,” meaning they are designed to be used on the left or right side of the door. Most are reversible, but always check the packaging.
You can find a wide variety of door handles at home improvement stores, hardware stores, and online retailers. A great resource for understanding lock types and hardware is the Construction Specifications Institute (CSI), though for basic DIY, the packaging of your new handle will provide all necessary information.
Step-by-Step: How to Replace a Door Handle
Ready to dive in? This guide breaks down the process into simple, manageable steps. You’ll be amazed at how quickly you can achieve a professional-looking result!
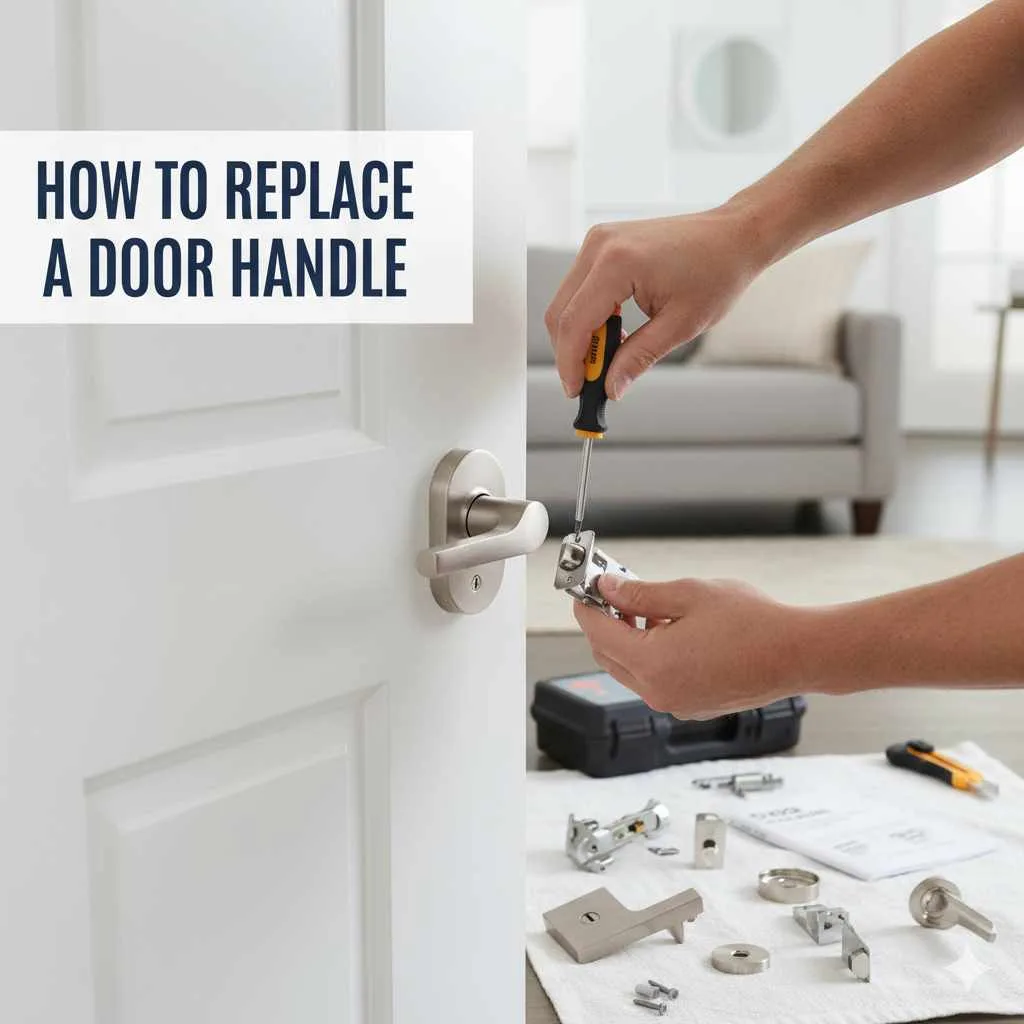
Step 1: Remove the Old Door Handle
This is where you’ll need your screwdriver! Most door handles are attached with visible screws on the interior side of the door.
- Locate the Screws: Look for two screws on the side of the interior door handle.
- Unscrew Them: Using the appropriate screwdriver, carefully unscrew these screws. Keep them in a safe place – you might need them for the new hardware, or they can be a handy spare.
- Separate the Handles: Once the screws are removed, the two halves of the handle (the interior and exterior pieces) should separate easily. If one side is stuck, try gently wiggling it or using a flathead screwdriver to carefully pry it away from the door. Be gentle to avoid damaging the door’s finish.
- Remove the Latch Assembly: On the edge of the door, you’ll see a metal plate covering the latch mechanism. There are usually two screws holding this plate in place. Unscrew these and pull out the entire latch assembly.
Step 2: Clean the Door Area
With the old handle removed, take a moment to clean the area where it was mounted. Dust and grime can accumulate over time. A quick wipe with a damp cloth will ensure your new handle is installed on a clean surface, giving it a professional finish.
Step 3: Install the New Latch Assembly
Your new door handle likely came with a new latch assembly. This is the part that extends from the door to keep it closed.
- Insert the New Latch: Slide the new latch mechanism into the hole on the edge of the door. Make sure the flat side of the latch (if applicable) faces the correct direction for the door to close properly.
- Secure the Latch Plate: Align the faceplate of the latch with the door’s edge and the screw holes. Secure it with the screws provided with your new handle. Ensure it sits flush with the door edge.
Step 4: Attach the New Door Handle
Now for the exciting part – installing your beautiful new handle!
- Position the Exterior Handle: Place the exterior half of the new door handle onto the door, feeding the connecting spindle (the metal rod that links both sides) through the latch mechanism.
- Align the Interior Handle: Position the interior handle on the opposite side of the door. Ensure the spindle from the exterior handle fits snugly into the interior handle’s mechanism.
- Secure with Screws: Align the screw holes on both handles. Insert the new screws (usually provided) and tighten them using your screwdriver. Tighten them evenly; don’t overtighten, as this can strip the screws or damage the door.
- Test the Handle: Before fully tightening, test the handle to ensure it operates smoothly and the latch retracts and extends correctly. Once you’re satisfied, tighten the screws firmly.
Step 5: Install the Strike Plate (If Necessary)
The strike plate is the metal piece on the door frame that the latch engages with. Your new handle might come with a slim-profile strike plate, or you might want to replace the old one if it’s worn or doesn’t align well.
- Align the Strike Plate: Close the door to see where the latch bolt hits the frame. Position the new strike plate so the hole aligns perfectly with the latch bolt.
- Mark and Screw: If you’re replacing an existing plate, unscrew the old one and use the new one in its place. If you’re installing in a new spot or the old one doesn’t fit, use a pencil to mark the screw holes. Drill pilot holes if needed (especially in hardwood) and screw the new strike plate into place.
Step 6: Final Check and Finishing Touches
Give everything a final check. Ensure the handle turns smoothly, the latch engages properly with the strike plate, and all screws are snug. If your new handle set came with decorative trim pieces or rosettes, install those now according to the manufacturer’s instructions. They simply snap or screw into place to cover the mounting screws for a clean, finished look.
Troubleshooting Common Door Handle Issues
Even with clear instructions, sometimes things don’t go perfectly. Here are a few common hiccups and how to fix them:
- Handle is Loose: The screws may not be tightened enough. Try tightening them gently. If they’re still loose, the screw holes in the door might be stripped. You can try using longer screws or filling the holes with wood glue and toothpicks (let dry completely) before re-screwing.
- Latch Sticks or Doesn’t Retract Fully: This usually means the latch isn’t aligned correctly with the strike plate or the strike plate isn’t positioned properly on the frame. Check that the latch moves freely in its housing. Adjust the strike plate position on the frame if needed. You can also try a bit of dry lubricant (like graphite powder) for the latch mechanism.
- Door Won’t Latch Properly: Similar to the above, the issue is likely misaligned strike plate or latch. Ensure the strike plate is deep enough into the door frame so the bolt can fully engage.
- Screws Won’t Go In: If you’re encountering resistance, you might need to drill small pilot holes for the screws, especially in very hard wood.
A helpful resource for understanding common hardware issues and solutions can often be found on the manufacturer’s website for your specific door handle model, or general DIY forums.

Comparing Door Handle Types
Choosing the right door handle involves understanding the different types available and what works best for various needs. Here’s a quick look at some common options:
| Handle Type | Description | Best For | Pros | Cons |
|---|---|---|---|---|
| Knob Sets | Round or oval shaped, classic design. Require a twisting motion to operate. | Interior doors, traditional aesthetics. | Widely available, affordable, classic look. | Can be difficult to operate for some, especially with wet hands or if mobility is an issue. |
| Lever Handles | Lever-shaped, easier to grip and operate with a downward push. | High-traffic interior doors, bathrooms, bedrooms, doors requiring ADA compliance (Americans with Disabilities Act). | Easy to use, stylish modern look, good for accessibility. | Can be slightly more expensive than knobs, require more precise installation for proper function. |
| Smart Locks | Electronic locks that can be operated via keypad, smartphone app, or fingerprint scanner. | Exterior doors for enhanced security and convenience. | Keyless entry, remote access, enhanced security features, activity logs. | Higher cost, require power source (batteries), potential electronic malfunctions or cybersecurity concerns. |
| Mortise Locks | High-security locks that are installed into a pocket (mortise) cut into the door’s edge. Often feature robust deadbolts and ornate handles. | Older homes seeking historical accuracy, high-security exterior doors. | Very secure, durable, aesthetically pleasing for vintage looks. | Complex installation requiring a mortise cut, can be expensive, may require specialized locksmiths for repair. |
| Entry Locks (with Keys) | Designed for exterior doors; combine a doorknob or lever with a deadbolt for security. | All exterior doors. | Provide reliable security against forced entry. | Depend on keys, which can be lost or duplicated. |
Frequently Asked Questions About Replacing Door Handles
Do I need a special tool to remove a door handle?
No, for most standard interior and exterior door handles, you only need a common screwdriver set (Phillips head and flathead). Some older or specialized handles might have hidden screws or require a small Allen wrench, but this is rare for basic replacements.
How do I know if I’m buying the right size replacement handle?
The most critical measurements are the “backset” (the distance from the edge of the door to the center of the doorknob hole) and the borehole diameter (the size of the hole the knob passes through). Most standard doors have a 2 3/8-inch or 2 3/4-inch backset. Check the specifications on your new handle’s packaging; they are usually designed to fit standard door preparations.
Can I replace just the doorknob, or do I need the whole set?
In most cases, it’s best to replace the entire set, including both interior and exterior handles, the spindle, and the latch mechanism. This ensures all parts are compatible and function smoothly together. While you might be able to swap just a knob, the internal mechanism and latch often need to be replaced as a unit for proper operation.
How do I ensure the new handle fits my door?
Measure your current door’s backset and borehole size before buying a new handle. Most new handles are designed to fit standard boreholes (typically 2 1/8 inches) and common backsets (2 3/8 or 2 3/4 inches). If your door has unusual dimensions, you might need to look for specialty hardware or consult a hardware professional.
What if my new handle’s screws don’t line up with the old holes?
This can happen if you’re switching from a knob to a lever, for example. The latch assembly screws usually align, but the handle mounting screws might not. If the holes don’t match, you can either fill the old holes with wood filler or dowels and drill new pilot holes in the exact spot needed, or you may need to purchase a handle set designed for your door’s existing hole configuration. Sometimes, a decorative rose or trim plate can cover slightly misaligned holes. You can learn more about door hardware standards from organizations like the Builders Hardware Manufacturers Association (BHMA).
How do I tell left-handed from right-handed lever handles?
Many lever handles are reversible and will work on either side of the door. For those that aren’t, the lever will typically point downwards when the door is seen from the outside and the door is closed. Always check the product description or packaging for instructions on handing, though most residential levers are universal.
Can I replace an exterior door handle with a smart lock?
Absolutely! Replacing an exterior door handle with a smart lock is a very popular upgrade. Smart locks are designed to fit standard door preparations for exterior locksets, usually the same ones that accommodate traditional knobs and levers. Ensure the smart lock you choose is compatible with your door’s thickness and existing borehole if you want to avoid re-drilling.
Conclusion
See? Replacing a door handle is a completely achievable DIY project that doesn’t require a degree in engineering! You’ve learned how to identify what you need, confidently remove the old hardware, and install your new, stylish handle with ease. This simple upgrade can genuinely enhance the look and feel of your home, making your doors not just functional but also a lovely part of your décor. From the smooth operation of a new latch to the attractive finish of your chosen handle, you’ve brought a touch of refreshed style and comfort into your living space. So go ahead, tackle that next door, and enjoy the satisfaction of a job well done!


