
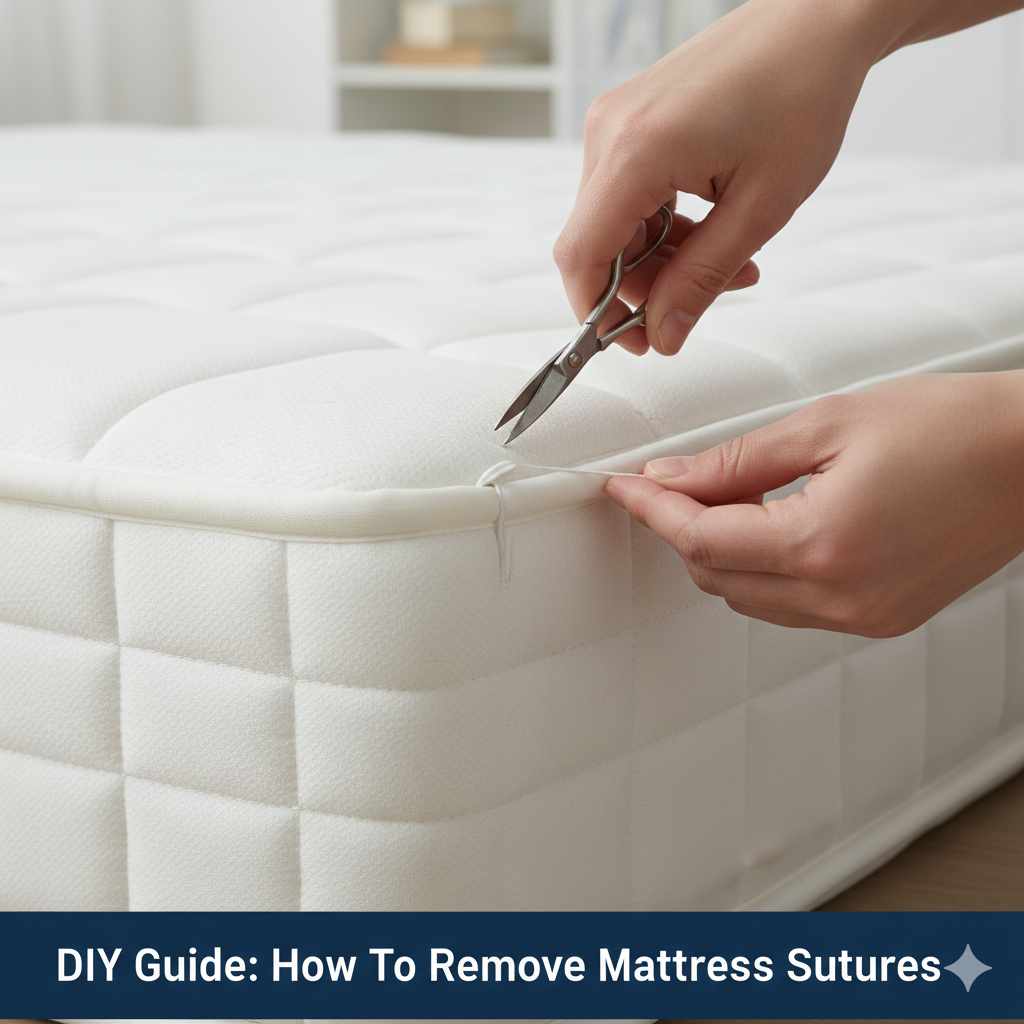
To safely remove mattress sutures, you need a clean pair of sharp, small scissors or a razor blade, good lighting, and clean hands. Gently cut the thread only on one side of the knot, pulling the loose end gently to slide the knot out without damaging the fabric. Always check for infection first!**
We’ve all been there—you get a new mattress, or perhaps you’re inspecting an older one, and you see those little, stubborn threads holding the ticking (the outer fabric) together. These are often called mattress sutures, or sometimes tufting stitches. They look tough, almost like tiny seatbelt stitches, and trying to remove them can feel like you’re about to accidentally tear the whole mattress open! It’s frustrating when you want to clean around them or adjust the cover. Don’t worry; taking these out is much simpler than it looks, provided you have the right tools and patience. This guide will walk you through everything clearly, step-by-step, so you can tackle those tough threads confidently and keep your mattress looking great.
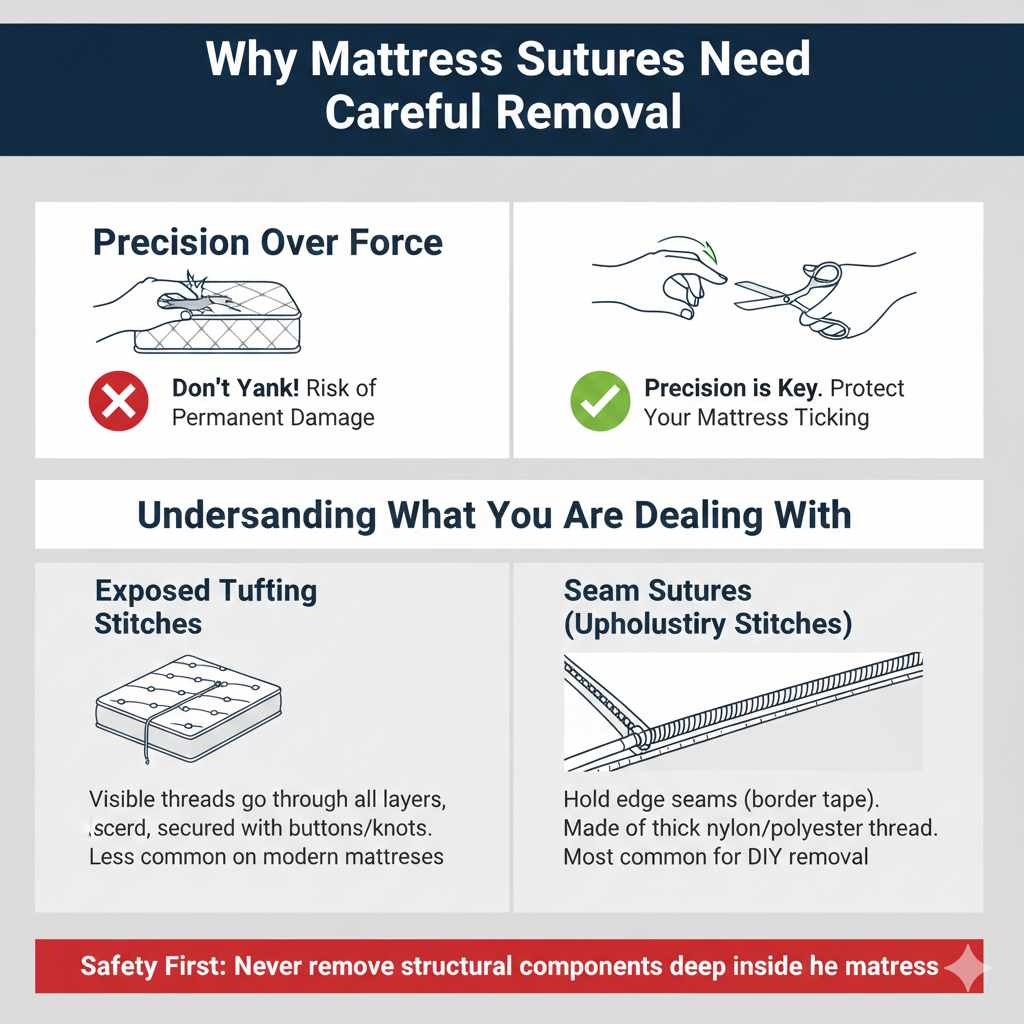
Why Mattress Sutures Need Careful Removal
Mattress sutures serve a very important job in keeping the stuffing, padding, and layers secured inside the mattress ticking. These heavy-duty threads prevent shifting and maintain the shape and comfort of your sleep surface over years of use. While they are strong, the fabric they go through—the ticking—is often thinner than you might think. If you yank, pull too hard on the knot, or use the wrong tools, you risk creating a permanent hole or a run in the fabric. That’s why precision beats brute force every time when handling mattress sutures.
Understanding What You Are Dealing With
Before you grab scissors, let’s quickly identify what these stitches usually look like. Mattress sutures fall into two main categories:
- Exposed Tufting Stitches: These are the visible threads that go all the way through the mattress layers, often secured with plastic buttons or tightly knotted on the surface. These are less common on modern, soft-top mattresses but appear on older, firmer models.
- Seam Sutures (Upholstery Stitches): These are the ones most people encounter. They hold the edge seams (the border tape) or decorative panels together. They look like standard, very tight sewing stitches, often made of thick nylon or polyester thread.
For home DIY, we usually focus on removing the visible seam sutures when we need to access a small area or repair a tear near the edge. Safety first—never attempt to remove sutures that hold structural components deep inside the mattress unless you are a professional upholsterer.
Gathering Your Essential Mattress Suture Removal Toolkit
To remove mattress sutures safely, you need the right tools. Think small, sharp, and precise. Using large household scissors is a recipe for disaster; you will likely cut the mattress fabric accidentally. Here is your recommended toolkit:
| Tool | Purpose | Why It’s Important |
|---|---|---|
| Small, Sharp Scissors (Embroidery or Nail Scissors) | For precise cutting of the thread. | Allows you to snip very close to the fabric without damaging it. |
| Razor Blade or Craft Knife (Optional) | For carefully slicing through thick knots or stiff thread. | Handles very dense, hard-to-cut threads found in heavy-duty seams. |
| Tweezers or Hemostat Pliers | For grasping and pulling the cut thread ends. | Provides a steady grip on slippery nylon threads. |
| Rubbing Alcohol or Antiseptic Wipes | For cleaning hands, tools, and the area after the repair. | Reduces the risk of introducing bacteria into any small needle holes. |
| Bright Light Source (Lamp or Headlamp) | Essential for seeing the individual tiny stitches. | Ensures you only cut the thread you intend to remove. |
Safety Note: Always handle sharp tools with care. If you are uncertain about using a razor blade, stick to very small, sharp scissors.
Step-by-Step Guide: How to Remove Mattress Sutures Safely
Follow these steps carefully. Remember, the goal is to remove the thread without leaving any damage on the beautiful outer fabric of your mattress. Good lighting and a steady hand make all the difference.
Step 1: Preparation and Safety Check
Before touching anything, make sure the area is safe and clean. This process involves sharp objects, so preparation is key to a smooth job. If you are having work done on the mattress due to a spill or stain, ensure the area is completely dry first. Moisture can weaken threads and make the fabric harder to manage.
- Wash and Dry Your Hands: This is critical. You don’t want to transfer dirt or oils onto the clean mattress fabric.
- Set Up Good Lighting: Position a bright lamp or work light so that the area where the suture is located is clearly illuminated. You need to see the difference between the thread and the fabric weave.
- Clear the Area: Move any loose bedding or nearby objects away from your workspace to prevent accidents.
Step 2: Locate and Examine the Stitches
Mattress sutures are usually held in place by a tight knot. You need to find this knot. These stitches often run in a line where two pieces of fabric meet, like along the piping or border.
- Trace the line of the thread. You are generally looking for the place where the thread appears to begin or end—this is usually a knot.
- Examine how the stitch is woven. Is it one long, continuous thread, or are there many small, connected stitches? For seam repairs, it’s usually a long line of individual stitches held tight by the tension.
Step 3: Cutting Only One Side of the Thread
This is the most important step. If you cut both sides of a stitch, you might just pull the thread deeper into the mattress material, making it impossible to remove cleanly. You only want to sever the thread outside the main body of the mattress fabric.
- Isolate a Single Stitch: Choose the stitch closest to the tightest knot, or simply choose one stitch in the middle of the section you want to remove.
- Insert the Tip: Carefully slide the very tip of your small, sharp scissors under the thread. You must lift the thread just slightly off the surface of the fabric before cutting.
- Make a Tiny Cut: Snip the thread cleanly, leaving a small piece of thread attached to the fabric on one side of your cut. You are essentially cutting the loop or web that holds the knot down. Do not saw at the thread; a single, clean snip is best.
Pro Tip on Tool Choice: For upholstery threads, which are often made of extremely durable polyester yarn (similar to what is used in outdoor gear), you might find that a sturdy pair of nail clippers or small wire cutters works wonders—but only use them if they can get very close to the surface without scraping the fabric!
Step 4: Loosening and Removing the Thread
Once a single section is cut, the rest should mostly unravel with gentle persuasion.
- Use Tweezers: Gently grasp the tiny, loose end of the thread you just cut using your tweezers or pliers.
- Pull Steadily: Pull the thread slowly and steadily away from the mattress. The remaining stitches should start to loosen and slide out of the fabric weave like pulling a loose thread from a sweater.
- Work in Sections: If you are removing a long run of sutures, you may need to snip every few stitches along the way to keep the tension manageable, always pulling the loosened thread away from the mattress body.
- Avoid Tugging the Fabric: If you feel significant resistance, stop pulling! Go back and make sure you have enough slack from cutting the thread in the right spot, or snip another stitch nearby.
Step 5: Final Inspection
Once the bulk of the thread is out, inspect the area. You might have small pieces of thread remaining deep in the weave, or perhaps a couple of tiny holes where the needle went in.
- Use the tip of your tweezers or a toothpick to gently tease out any remaining thread fragments that are still visible on the surface.
- If you made any accidental nicks or small tears in the ticking, consult a professional upholstery repair service on mending these specific fabric types. For very minor openings, sometimes a specialty fabric adhesive can reinforce the area once everything is dry.
When Sutures Are Part of Tufting (Button Stitches)
If the “sutures” are actually the thick cord anchoring tufting buttons deep within the mattress, the procedure is vastly different and generally not recommended for beginners. These deep anchor points are what give firm mattresses their structure.
According to best practices in mattress assembly, these tufts create compression essential for support. Removing them structurally weakens the mattress. If you find these, you might be mistaking them for simple seam stitches. A key indicator:
- Seam Sutures: Run along the edge or border tape, holding two edge panels together.
- Tufting Cords: Pass from the top surface, through all layers, and come out the bottom, often secured by a hard plastic fixture or a tight knot on the top surface.
If you must remove a tufting stitch (for example, if the cord is fraying externally), it is crucial to immediately secure the area. Experts often advise applying a strong fabric glue or using a heavy-duty upholstery needle and matching thread to temporarily re-anchor that section immediately after cutting one side, as the internal layers can shift quickly. For guidance on professional upholstery techniques, resources such as those provided by organizations like the Upholstery Organization often detail the stability required in bedding construction.
Tips for Handling Difficult Mattress Materials
Modern mattresses use a huge variety of materials, from breathable knitted fabrics to thick faux-leather borders. The material greatly affects how easily the sutures come out.
Dealing with Looped or Knitted Fabrics
If your mattress cover is a loosely woven knit (common on pillow-top models for breathability), cutting the thread can cause the entire area to unravel like a snagged sweater. This is the trickiest material.
- Pre-Secure the Area: Before cutting, use a piece of painter’s tape (low adhesion) to carefully tape down the fabric immediately on either side of the suture you plan to cut. Place the tape across the suture, creating a small border.
- Cut Inside the Tape: Cut the thread right in the middle of the taped section. The tape helps hold the surrounding loops in place, preventing them from running loose when the tension is released by cutting the thread.
- Remove Tape Carefully: After the thread is completely pulled out, slowly peel the painter’s tape away.
Working with Very Thick, Waxed Threads
Some heavy-duty mattresses use thick, sometimes waxed, thread for exceptional durability. These are tough to clip.
- Use Razor/Blade Gently: If scissors fail, use a new, sharp razor blade or craft knife. Hold the blade almost parallel to the mattress surface. Only use the tip of the blade to gently slice through the thread where it loops over the top. Do not drag the blade across the fabric.
- Lubrication (Use Sparingly): For extremely stiff nylon threads, a tiny drop of sewing machine oil applied only to the thread near the knot might help loosen its grip on the surrounding fibers, though this should be used with extreme caution to avoid staining the fabric.
Common Mistakes to Avoid When Removing Sutures
Even with the best intentions, beginners often make a few predictable slips. Knowing them beforehand helps you avoid them completely. Think of these as the “Don’ts” of mattress surgery!
| Mistake | The Result | How to Prevent It |
|---|---|---|
| Pulling Hard on the Knot | The stitching around the knot pulls deep into the mattress, creating a puckered, noticeable defect. | Always cut the surrounding thread first; never pull the knot itself. |
| Using Dull or Large Scissors | Accidentally snipping the mattress ticking fabric instead of just the thread. | Use precision tools like embroidery scissors or nail scissors only. |
| Cutting Both Sides of the Stitch | The thread becomes trapped mid-layer, making complete removal impossible without causing more damage. | Cut only one side of the thread loop, allowing the rest to slip out easily. |
| Working in Poor Light | Missing a tricky loop or cutting the fabric accidentally. | Use a focused, bright lamp to clearly see the thread weave clearly. |
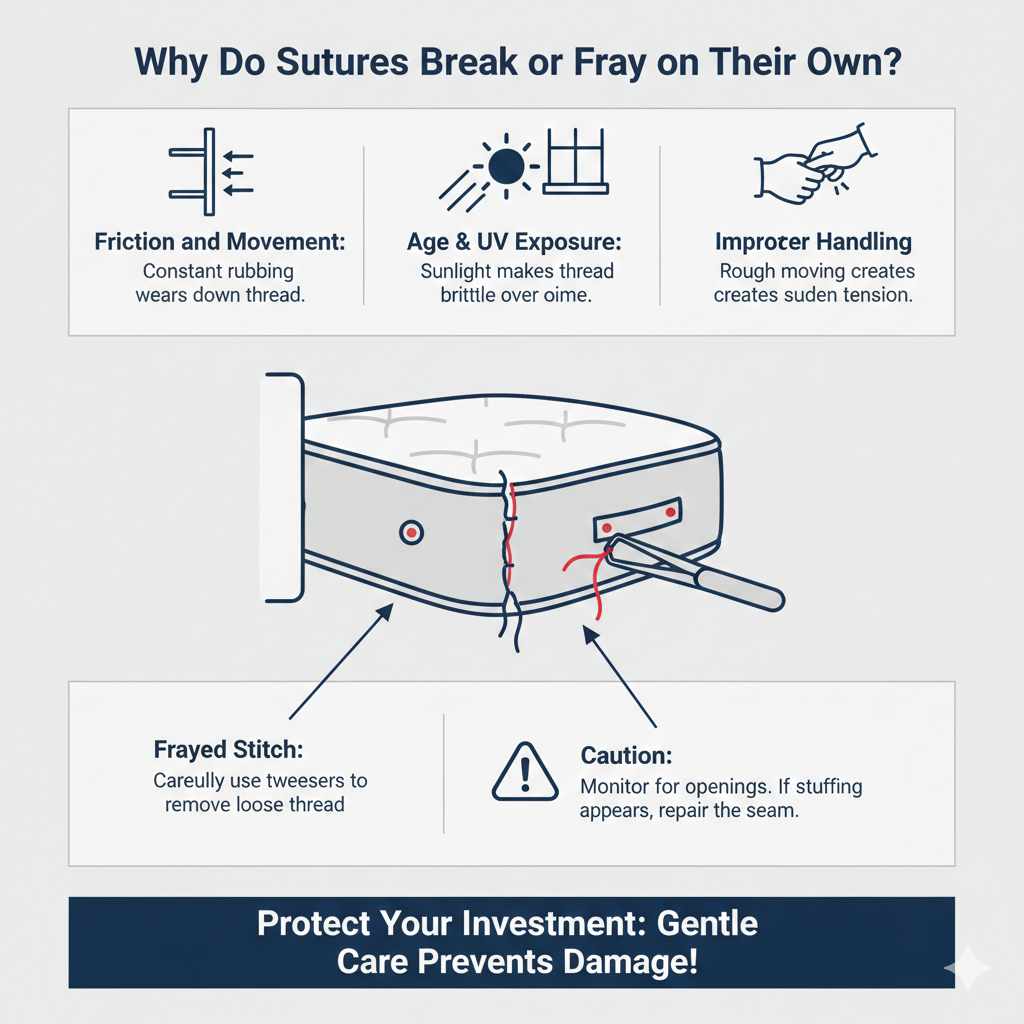
Why Do Sutures Break or Fray on Their Own?
Sometimes you don’t even need to remove them—they break themselves! If you see a frayed stitch, it’s usually due to one of three things:
- Friction and Movement: If the mattress rubs heavily against a bed frame or wall, the persistent friction can wear down the thread polymers until they snap.
- Age and UV Exposure: Over many years, especially if the mattress is near a window, UV light exposure can degrade the quality of the polyester or nylon thread, causing it to become brittle and break under normal stress.
- Improper Handling: Moving or cleaning the mattress roughly can place sudden, sharp tension on the most stressed stitches along the seams.
If a suture breaks naturally, you usually have more freedom to carefully pull the remaining length out using tweezers, as the tension holding it tight is gone. However, if the break has caused a minor opening in the seam, you should monitor it closely for signs of internal material starting to poke through.
Frequently Asked Questions (FAQ) About Mattress Sutures
Q1: Is it safe to remove mattress sutures?
Yes, removing simple, exposed seam sutures is generally safe to do yourself, provided you use small, sharp tools and work slowly. Avoid cutting any deep tufting stitches that anchor the internal structure.
Q2: What if I accidentally cut a tiny hole in the mattress fabric?
If the hole is minuscule (smaller than a pinhead), monitor it for cleanliness. For slightly larger nicks, you may need a professional upholstery patch or repair kit designed for thick fabrics. Do not try to sew it closed yourself unless you have heavy-duty upholstery needles, as standard sewing needles will bend or break.
Q3: How can I stop new mattress threads from fraying?
Prevent friction! Make sure your mattress isn’t rubbing hard against the walls or a rough wooden bed frame. If the mattress is constantly sliding, use rug pads or non-slip mats between the mattress and the box spring or foundation.
Q4: Should I pull the knots out completely?
No. If you can slide the entire knotted section out cleanly, that is ideal. However, if tugging releases the knot but leaves the thread buried deep, it’s better to snip the thread right next to the knot so only the protruding loop is removed, leaving the remaining buried thread intact.
Q5: Do these stitches affect my mattress warranty?
Removing visible external stitching generally won’t void the warranty unless that removal directly causes structural failure (like removing a main tuft anchor). If you are only snipping a few loose threads on the border tape, you should be fine, but it’s always best to check your specific warranty terms.
Q6: Can I use nail clippers instead of small scissors?
Yes, nail clippers, especially the small, sharp ones, can be surprisingly effective for cutting thick mattress thread because they apply a strong, consistent cutting force close to their pivot point, similar to small wire cutters.
Conclusion: Confidence in Your Quick Mattress Fix
Tackling those pesky mattress sutures doesn’t require a full upholstery kit or specialized training. By approaching the task with the right, gentle tools—small scissors, good light, and patience—you can successfully remove the offending threads without causing any unwanted damage to your mattress ticking. Remember the key takeaway: always cut only one side of the thread, pull gently, and never force it if you meet serious resistance. Taking care of these small details helps keep your sleep surface looking neat and feeling stable for years to come. You’ve got this—simple maintenance like this keeps your bed looking factory-fresh!


