Quick Summary: Putting up a TV stand is straightforward! Gather your tools, follow the step-by-step instructions in your manual, and secure all parts correctly. You’ll have your TV safely supported and looking great in no time.
Hey there, DIYers! Ever stared at a flat-pack box and felt a wave of dread? You’re not alone. Putting together furniture, especially something as important as a TV stand, can seem a bit daunting at first. But trust me, with a little patience and the right guidance, it’s totally doable. You don’t need to be a master builder to get your new entertainment center assembled and ready for movie night.
This guide is here to break down the process into simple, manageable steps. We’ll cover everything from unpacking to the final securing touches. Think of me as your friendly mechanic for furniture – I’ll help you navigate the instructions, pick out the right tools, and avoid common pitfalls. By the end, you’ll feel confident in your ability to tackle this project and enjoy your new, stable TV stand.
Why Your TV Stand Matters: More Than Just a Shelf
Your TV stand isn’t just a piece of furniture; it’s the foundation for your viewing experience. A properly assembled stand ensures your television is stable, preventing accidents and damage. It also helps organize your media devices, cables, and decor, giving your living space a clean and tidy look. When you assemble it right, you gain peace of mind, knowing your expensive electronics are secure.
Before You Begin: The Essential Prep Work
Just like checking your tire pressure before a long drive, a little preparation goes a long way when assembling a TV stand. Skipping this part is like trying to fix an engine without the right tools – it’s just going to make things harder and riskier.
1. Unbox and Inventory Everything
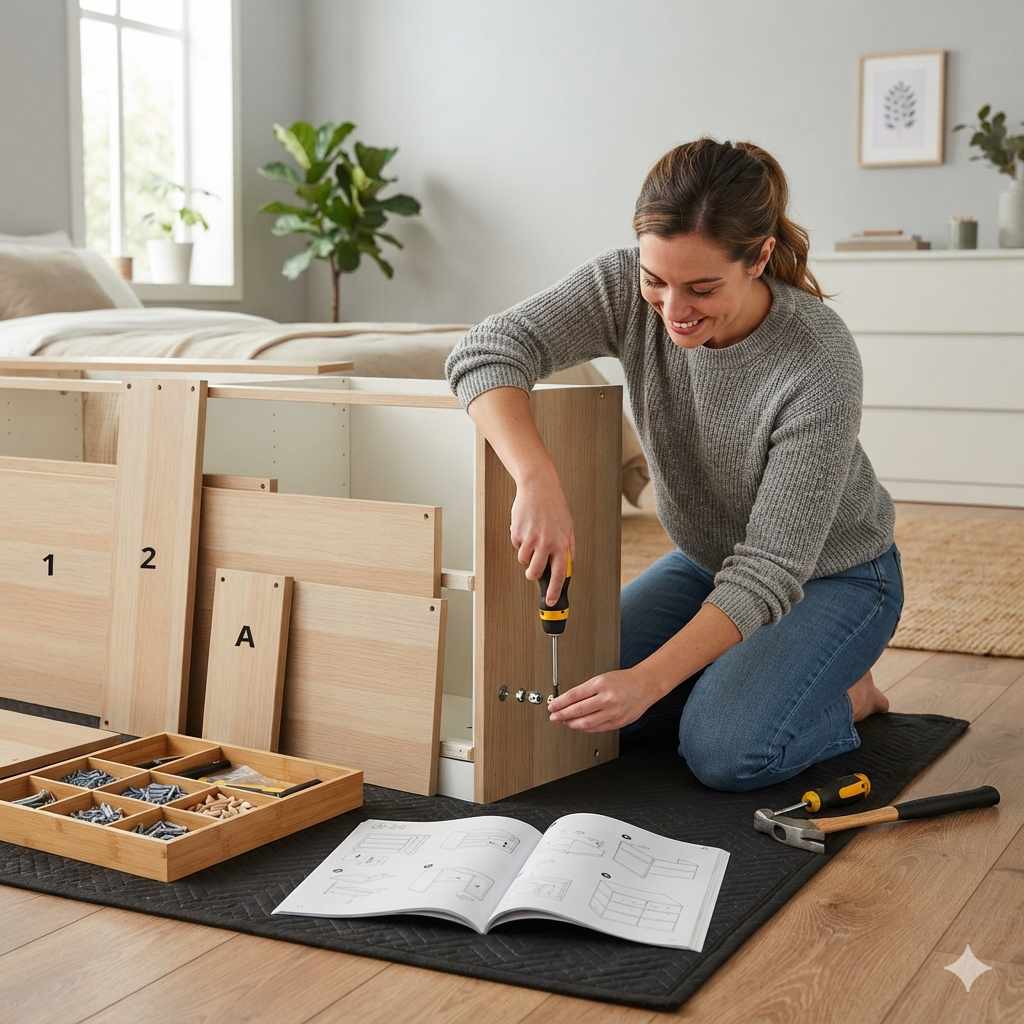
The moment of truth! Carefully open the box. Lay out all the pieces on a clean, soft surface (like a blanket or the cardboard from the box itself) to avoid scratches. Now, find that instruction booklet – it’s your roadmap. Go through the parts list and make sure you have every screw, dowel, panel, and bracket. If anything is missing or damaged, contact the manufacturer right away. Don’t try to improvise; it can lead to instability later.
2. Gather Your Tools
Most TV stands come with the necessary Allen wrench (that L-shaped hex key), but you might need a few other common household tools to make the job smoother and more secure. Having the right tools ready means you won’t be stopping midway to hunt for them.
Here’s a helpful list of what you might need:
- Phillips Head Screwdriver: For most screws. A magnetic tip is a lifesaver!
- Flat Head Screwdriver: Less common, but good to have.
- Allen Wrench (Hex Key): Usually included, but having different sizes can be helpful.
- Hammer: For gently tapping in dowels or the back panel (be careful!). A rubber mallet is even better to prevent damage.
- Measuring Tape: To ensure correct placement and spacing.
- Level: Crucial for making sure your stand is perfectly straight.
- Safety Glasses: Always a good idea when working with tools.
- Someone to Help: Especially for larger stands, an extra pair of hands makes a huge difference and keeps things safer.
3. Clear Your Workspace
You’ll need enough room to lay out parts and assemble the stand without bumping into furniture or tripping over cords. Clear a generous area around where the stand will eventually be placed. This makes it easier to maneuver pieces and reduces the risk of accidental damage to your belongings or the new stand.
4. Read the Instructions (Yes, Really!)
I know, I know. Nobody loves reading manuals. But just like understanding the owner’s manual for your car, reading the TV stand instructions before you start is key. Familiarize yourself with the diagrams, the order of assembly, and any specific warnings. This prevents mistakes that are frustrating to fix later.

Step-by-Step: Assembling Your TV Stand
Now for the main event! Follow these steps carefully. Remember, take your time. Rushing is the enemy of good DIY.
Step 1: Attach Connectors and Foundations
Often, the first step involves attaching small pieces like dowels, cam locks, and cam bolts into pre-drilled holes on the main panels (like the sides or bottom). Dowels are usually wooden pegs that help align parts. Cam bolts are metal screws that cam locks (round metal discs) grip onto to secure panels together. Make sure dowels are tapped in gently and cam bolts are screwed in straight.
Tip: If you’re using a hammer for dowels, place a piece of cloth or cardboard over the dowel to avoid damaging the wood.
Step 2: Assemble the Main Frame
This is where your stand starts to take shape. Connect the side panels to the bottom panel, and then add the top panel. You’ll likely use those cam locks you inserted earlier. Insert the cam lock into the larger hole, making sure the arrow or opening points towards the cam bolt. Then, use a screwdriver to turn the cam lock clockwise. You should feel it tighten as it grips the bolt. Don’t overtighten, but ensure it’s snug.
Step 3: Install Shelves and Dividers
If your stand has fixed shelves or internal dividers, now is the time to install them. These often slide into grooves or attach using similar dowel and cam lock systems. Make sure shelf supports (little pegs that hold adjustable shelves) are inserted at the desired height if your shelves are adjustable.
Step 4: Attach the Back Panel
The back panel is often a thin piece of fiberboard. It’s usually slid into grooves or attached with small nails or screws. This panel is vital for the stand’s structural integrity and helps keep it square. If you’re nailing it, use plenty of nails spaced evenly. If it slides into grooves, ensure it’s fully seated before moving on.
Pro Tip: Many back panels have pre-drilled holes for cable management. Make sure these are oriented correctly!
Step 5: Add Doors and Drawers (If Applicable)
If your TV stand includes doors or drawers, this can be the trickiest part.
- Doors: Attach the hinges to the doors first, then to the main unit. You might need to adjust the hinges later to make sure the doors hang straight and close properly.
- Drawers: Assemble the drawer boxes, attach the drawer slides to the drawers and the stand, and then carefully slide the drawers into place.
Step 6: Attach Feet or Base
Depending on the design, you might need to screw on feet, legs, or a base frame. Make sure these are attached securely, as they bear the weight of the entire stand and your TV.
Step 7: Final Tightening and Leveling
Once everything is assembled, go back and gently re-tighten all screws and cam locks. This ensures maximum stability. Then, place a level on the top of the stand. If it’s not level, you might be able to adjust the feet (if they have leveling screws) or use shims to compensate. A level stand is crucial for preventing your TV from sliding.
Securing Your TV to the Stand (Optional but Recommended)
Many modern TVs are designed to be wall-mounted, but if you’re using a stand, it’s wise to consider securing the TV to it, especially if you have children or pets, or live in an earthquake-prone area. Most TV stands and TVs come with anti-tip hardware.
Using Anti-Tip Straps: A Simple Safety Measure
Anti-tip straps are essentially strong straps that connect your TV to the back of the stand or the wall. They are designed to prevent accidental toppling.
- Locate Anchor Points: Find the pre-drilled holes on the back of your TV and on the back of your TV stand.
- Attach Brackets: Screw the brackets (provided with the anti-tip kit) to the TV and the stand.
- Connect Straps: Thread the straps through the brackets and secure them.
- Adjust Tension: Ensure the straps are snug but not so tight they put undue stress on the TV or stand.
For more robust wall anchoring, you might need to use wall anchors appropriate for your wall type (drywall, plaster, concrete). Always follow the specific instructions that come with your anti-tip kit, as they can vary.
Looking for authoritative advice on earthquake preparedness, including furniture tipping hazards? Check out resources from FEMA or your local emergency management agency. For example, Ready.gov offers comprehensive information on earthquake safety.
Troubleshooting Common TV Stand Assembly Issues
Even with the best intentions, you might run into a snag or two. Here are some common problems and how to fix them:
Problem: Parts Don’t Align Perfectly
Solution: Double-check that you’re using the correct panels and that they are oriented the right way (e.g., finished edges facing outwards). Sometimes, loosening screws slightly, aligning the parts, and then re-tightening can help. Ensure dowels are fully seated.
Problem: Cam Locks Won’t Tighten
Solution: Make sure the cam bolt is screwed in straight and sticking out enough. Ensure the arrow on the cam lock is pointing towards the bolt entry hole before you turn it. If the cam lock is stripped, you might need to contact the manufacturer for a replacement.
Problem: Wobbly Stand
Solution: This is usually due to loose screws or an uneven floor. Go back and tighten all fasteners. Use a level and adjust the feet or add shims under the base if the floor is uneven. Make absolutely sure the back panel is securely attached, as it provides significant stability.
Problem: Doors/Drawers Aren’t Straight
Solution: For doors, the hinges often have adjustment screws. Consult your manual to find them and use them to fine-tune alignment. For drawers, check that the drawer slides were installed correctly and are parallel. Ensure no debris is obstructing the slides.

Maintenance for Your TV Stand
Once your stand is assembled and your TV is safely in place, a little ongoing care will keep it looking good and functioning well.
- Cleaning: Dust regularly with a soft, dry cloth. For smudges or spills, use a slightly damp cloth with water or a cleaner specifically designed for the material of your stand. Avoid harsh chemicals.
- Check Fasteners: Periodically (every few months), check that screws and cam locks are still tight, especially if the stand is moved or experiences vibrations.
- Weight Limits: Be mindful of the manufacturer’s weight limit for the stand and for the top surface. Overloading can cause structural damage.
Frequently Asked Questions (FAQ) about TV Stands
Q: How long does it typically take to assemble a TV stand?
A: Most standard TV stands can be assembled in 1-3 hours. It depends on the complexity, size, and your experience level. Taking your time will lead to a better result.
Q: Do I need a drill to assemble a TV stand?
A: Usually not! Most flat-pack furniture comes with all necessary hardware and tools like an Allen wrench. A drill can sometimes speed things up, but use it with caution on a low torque setting to avoid stripping screws or damaging the material.
Q: What’s the most common mistake people make when assembling furniture?
A: Not reading the instructions thoroughly or mixing up similar-looking parts. It’s also common to overtighten screws, which can damage the material.
Q: Can I assemble a TV stand by myself?
A: For smaller, lighter stands, yes. However, for larger units, having a second person is highly recommended for lifting, holding, and overall safety.
Q: What should I do if I strip a screw or damage a part?
A: If it’s a minor cosmetic issue, you might be able to live with it. For structural damage or stripped screws that compromise stability, contact the manufacturer for replacement parts immediately. Don’t try to force it.
Q: Are anti-tip kits always necessary?
A: While not always mandatory, anti-tip kits are strongly recommended, especially if you have children or pets, or live in an area prone to earthquakes. They significantly improve safety.
Conclusion: Enjoy Your New Setup!
You did it! You’ve successfully navigated the assembly process and have a solid, stable TV stand ready for action. Remember, the key to successful DIY projects is patience, preparation, and following instructions. You’ve gained valuable experience and saved yourself time and money. Now, the best part: setting up your TV, arranging your media components, and kicking back to enjoy your favorite shows or games on your newly assembled setup. Congratulations on a job well done!