
Quick Summary: Measuring recessed lighting is simple! Generally, measure the diameter of the visible trim at its widest point. For accuracy, measure the length and width of the opening in the ceiling. These measurements help you find correct trim kits, bulbs, and ensure a perfect fit for your fixtures.
Hey there, home design enthusiast! Ever found yourself staring up at those sleek, modern recessed lights and wondering, “How on earth do I even measure these things?” It’s a common question, and honestly, it can feel a bit puzzling at first. Whether you’re planning a lighting upgrade, replacing a burnt-out bulb, or just curious about your home’s details, knowing how to get the right measurements is key. Don’t worry; it’s much easier than you think! I’m here to walk you through it, step-by-step, so you can tackle this task with confidence and make your lighting projects a breeze.
We’ll cover everything from the simple outer trim measurement to the more detailed opening dimensions. Ready to become a recessed lighting measurement pro? Let’s dive in!
Why Measuring Recessed Lighting Matters
You might be thinking, “Why bother measuring my lights? Can’t I just guess?” Well, not quite! Accurate measurements are super important for a few key reasons:
- Getting the Right Parts: The most common reason to measure is when you need replacement parts. This could be a new trim kit to refresh the look of your lights, a different style of baffle, or even a new bulb. If the trim size is wrong, it simply won’t fit or will look awkward.
- Bulb Compatibility: While most recessed light bulbs use standard bases (like E26/E27), the physical size of the bulb matters. Some fixtures have tight spaces, and you need to ensure the new bulb physically fits inside the housing without touching critical components or being impossible to screw in.
- Planning New Installations: If you’re adding new recessed lights or reconfiguring existing ones, knowing the exact size of the fixture housing (the part inside the ceiling) and the desired trim size is crucial for both purchasing the correct cans and ensuring proper spacing.
- Aesthetic Consistency: When you have multiple recessed lights in a room, you want them to look uniform. Measuring helps ensure that any new trims or fixtures you buy match the existing ones perfectly, maintaining a cohesive and polished look.
- Safety First: Using the wrong size bulb or trim can sometimes pose a safety risk, like overheating if a bulb is too close to the housing material or improper insulation. Correct measurements help avoid these potential hazards.
So, as you can see, taking a few moments to grab your tape measure can save you a lot of frustration and ensure your lighting projects are a success!

What You’ll Need: A Simple Toolkit
Gathering your tools before you start makes the process smooth and efficient. For measuring recessed lighting, you don’t need anything fancy. Here’s what’s helpful:
- A Tape Measure: A standard retractable tape measure is perfect.
- A Ladder or Step Stool: To safely reach your lights. Make sure it’s stable!
- A Pencil and Paper (or your phone): To jot down your measurements.
- A Flashlight (optional but helpful): To get a better look inside the fixture if needed.
That’s it! With these simple items, you’re ready to go. Safety is paramount when working with ladders, so always ensure yours is on a sturdy, level surface and have someone spot you if possible.
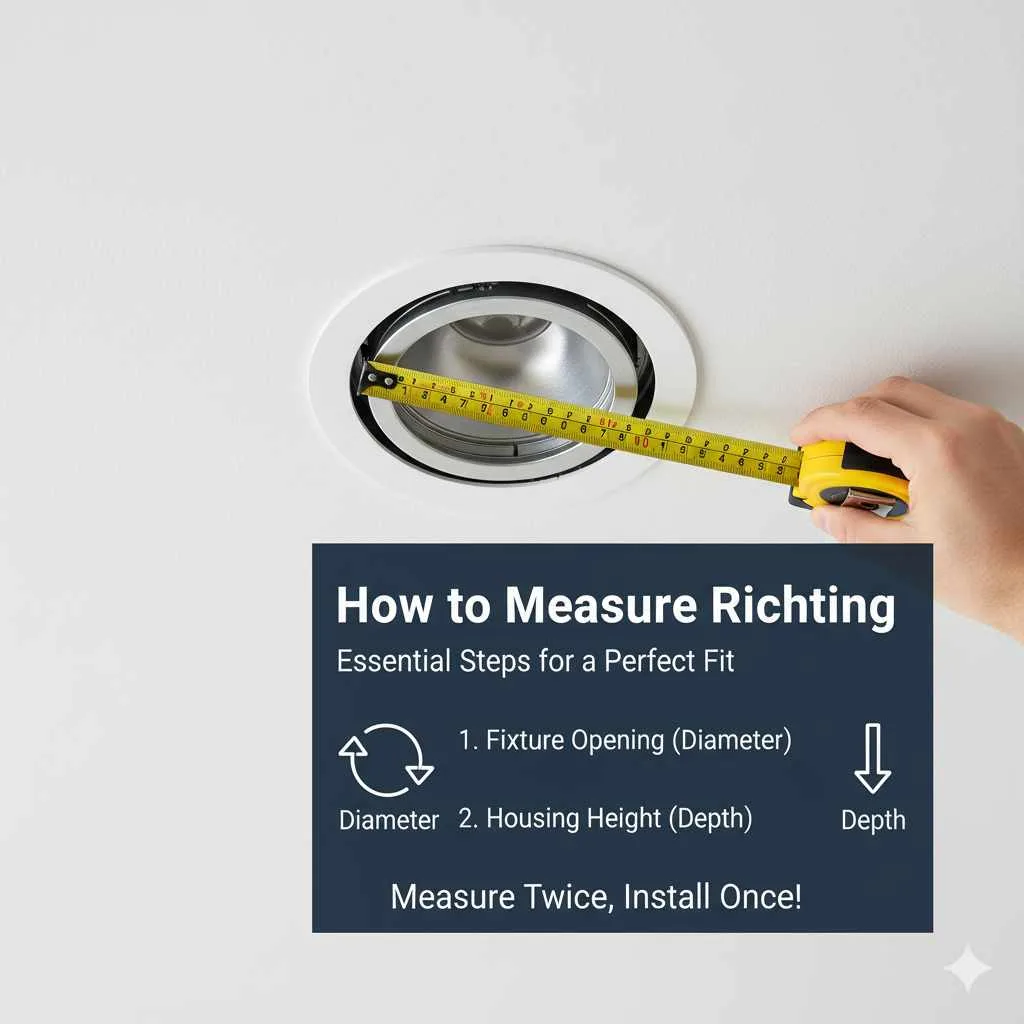
How to Measure Recessed Lighting: Step-by-Step
There are two main ways we measure recessed lighting, and understanding both will give you complete confidence. The trim size is what most people see, but the housing size is critical for purchasing new fixtures.
Method 1: Measuring the Visible Trim
This is the most common measurement and is usually what manufacturers refer to when describing trim sizes (e.g., 4-inch, 6-inch). It’s the part you see from the floor.
- Safety First: Ensure your ladder is secure.
- Locate the Trim: This is the decorative ring around the light that meets the ceiling.
- Measure the Diameter:
- Place the end of your tape measure at one edge of the visible trim.
- Stretch the tape measure across the widest part of the trim to the opposite edge.
- Read the measurement. For most recessed lights, this will be roughly 4, 5, or 6 inches across.
- Record Your Measurement: Note down this diameter. It’s your primary indicator for compatible trim kits and bulbs.
Tip: It might not be a perfect circle! Measure across a couple of different points to get the most accurate average diameter.
Method 2: Measuring the Ceiling Opening (Housing Size)
This measurement tells you the size of the actual can or housing that is installed inside your ceiling. This is crucial if you are replacing the entire recessed light fixture (the can itself).
- Safety First: Again, ensure your ladder is stable.
- Remove the Trim (if possible): Gently pull down or twist the trim to detach it from the housing. Many trims are spring-loaded. If it’s difficult, don’t force it – you can often estimate this measurement.
- Locate the Opening in the Ceiling: Once the trim is removed, you’ll see the hole in the ceiling where the fixture sits.
- Measure the Opening:
- Use your tape measure to find the length and width of this opening.
- For the most common round housings, you’ll measure the inside diameter of the opening.
- For older or less common square housings, measure the length and width of the inside opening.
- Record Your Measurements: Note down the diameter (for round) or length and width (for square) of the opening. This is the size of the recessed light housing.
Why this measurement is important: If you’re buying a new recessed light fixture (the entire can and trim assembly), you need to match this housing size. For example, a “6-inch recessed light can” typically fits into a ceiling opening that is approximately 6 inches in diameter.
Important Note on Sizing: The nominal size (like 4-inch or 6-inch) often refers to the trim size, but there’s a relationship to the housing size. A 4-inch trim usually goes with a 4-inch housing, and a 6-inch trim with a 6-inch housing. However, the actual hole in the ceiling might be slightly smaller or larger depending on the manufacturer and type of housing. Measuring both the trim and the opening provides the most complete picture.
Specific Measurements for Different Parts
Let’s break down what you might be measuring for:
Trim Kits
When buying a new trim kit, the size you need (e.g., 4-inch, 6-inch) almost always refers to the diameter of the visible trim you measured in Method 1. The packaging will state what size housing it’s designed for, which should correspond to the opening you measured in Method 2.
LED Bulbs (Retrofit Recessed Lights)
If you’re upgrading to LED bulbs that fit into your existing recessed cans, you generally need to know:
- Bulb Base Type: Most are standard E26 (medium screw base).
- Bulb Diameter: While the tape measure diameter of the trim gives you a good idea, some LED retrofit kits are designed to fit specific trim sizes. The product description will usually specify “fits 4-inch housings” or “fits 6-inch housings.”
- Bulb Height/Length: Ensure the LED bulb isn’t too tall for the fixture. You can measure the depth of the housing if you have removed the trim.
For more on LED lighting, the U.S. Department of Energy’s Energy Star program offers fantastic resources on energy-efficient lighting options.
Recessed Lighting Housing Cans (New Installations/Replacements)
If you’re installing new recessed lights or replacing the entire can, you’ll likely buy a “housing” and a “trim” separately or as a kit. The size designation (e.g., 6-inch IC rated housing) refers to the diameter of the housing that fits into the ceiling opening. You’ll need to match this to the hole you cut or already have in your ceiling (Method 2).
Common Recessed Lighting Sizes and Their Measurements
Recessed lighting comes in standard sizes, which makes shopping much easier. Here’s a general guide:
| Nominal Size (Commonly Referred To) | Typical Trim Diameter (Method 1) | Typical Ceiling Opening Diameter for Housing (Method 2) |
|---|---|---|
| 3-inch | ~3 to 3.5 inches | ~3.5 to 4 inches |
| 4-inch | ~4 to 4.5 inches | ~4.5 to 5 inches |
| 5-inch | ~5 to 5.5 inches | ~5.5 to 6 inches |
| 6-inch | ~6 to 6.5 inches | ~6.5 to 7 inches |
| 8-inch | ~8 to 8.5 inches | ~8.5 to 9 inches |
Important Caveat: These are general guidelines! Different manufacturers have slight variations. Always measure your specific fixture, and if buying for replacement, try to find any branding or model numbers on the existing housing for the most accurate match.
What If My Lights Aren’t Standard Sizes?
It’s rare, but you might have older or custom-sized fixtures. In these cases:
- Measure with Precision: Use your tape measure very carefully for both Method 1 and Method 2.
- Look for Manufacturer Marks: Sometimes, there’s a sticker or embossed name inside the housing. Searching online for that manufacturer and “recessed lighting trims” or “recessed cans” might help.
- Consider Universal Trims: Some manufacturers offer trim kits with adjustable springs or baffles designed to fit a range of opening sizes.
- Consult Professionals: If you’re really stuck or planning a major replacement, a local electrician or lighting specialist can identify the fixture or recommend the best course of action. For general advice on electrical safety and standards, the Consumer Product Safety Commission (CPSC) offers valuable safety information.
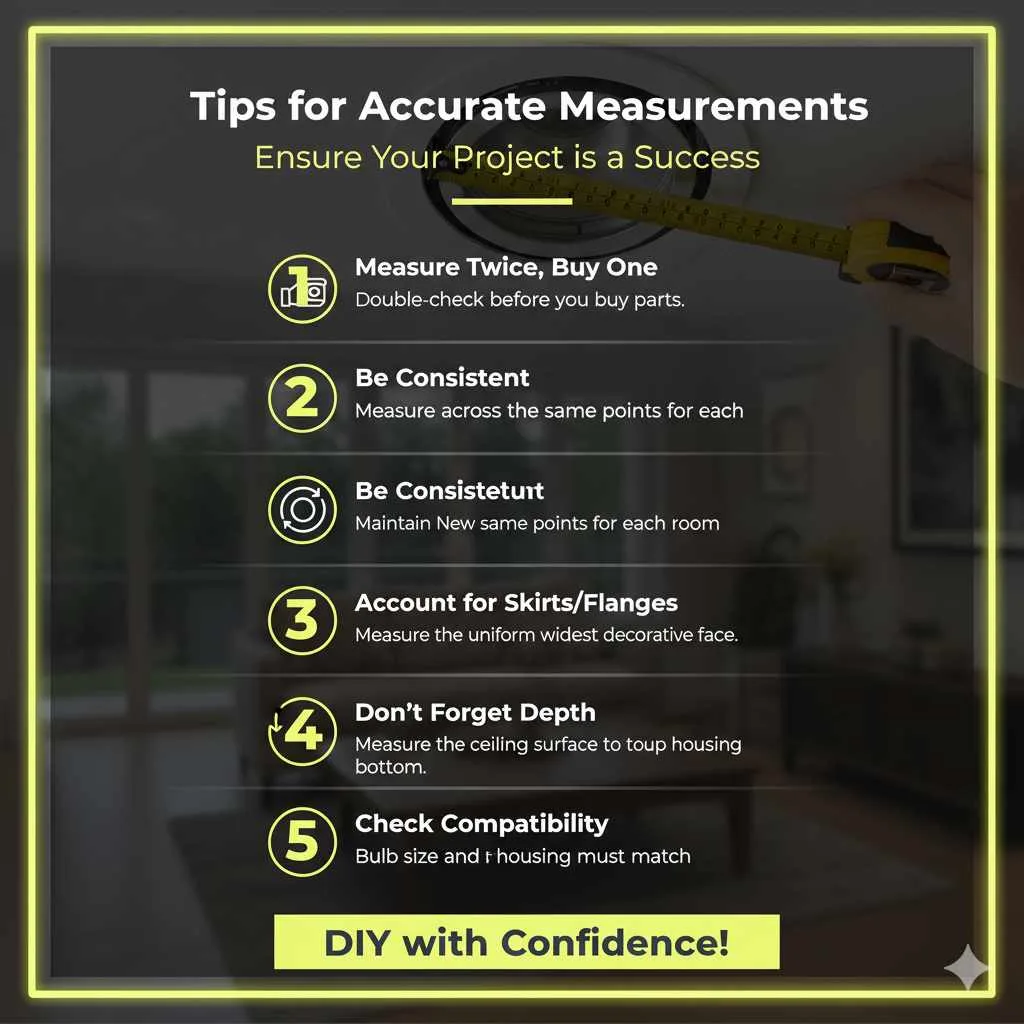
Tips for Accurate Measurements
Even with simple steps, a few extra tips can ensure your measurements are spot on:
- Measure Twice, Buy Once: This old adage is perfect for DIY. Double-check your measurements before you head to the store or place an online order.
- Be Consistent: Try to measure across the same points for each light if you have multiple.
- Account for Skirts/Flanges: Some trims have a slight lip or flange that extends beyond the main diameter. Typically, you’ll measure the widest part of the decorative face.
- Don’t Forget Depth: If you’re buying bulbs or some specialized trims, the depth of the housing can be important. Measure from the ceiling surface to the bottom of the housing if possible.
FAQ: Your Recessed Lighting Measurement Questions Answered
What is the difference between trim size and housing size?
The trim size is the diameter of the visible decorative ring around the light fixture that meets the ceiling. The housing size refers to the actual metal can or box installed inside the ceiling. The nominal size (e.g., 6-inch) usually refers to both, meaning a 6-inch trim fits a 6-inch housing, which fits into a roughly 6-inch hole in the ceiling.
How do I know if I need IC or non-IC rated housings?
IC stands for Insulation Contact. An IC-rated housing is designed to be installed where it will be in direct contact with building insulation. A non-IC rated housing (or “Chicago plenum” if rated for air handling spaces) cannot be in contact with insulation. If you are installing a new housing and there is insulation in your ceiling, you need an IC-rated one. If you’re replacing an existing housing, look at the old one; if it was in direct contact with insulation, you need an IC-rated replacement.
Can I convert my old incandescent recessed lights to LED?
Yes, often you can! The most common way is by using LED “retrofit” recessed lighting kits or LED bulbs designed to fit into existing housings. These usually have a standard E26 screw base. Ensure the LED bulb or kit is the correct physical size for your housing diameter and depth.
What tools are essential for measuring recessed lights?
You’ll primarily need a standard retractable tape measure. A stable ladder or step stool is also crucial for safe access. A pencil and paper (or phone) to record your measurements are also helpful.
My recessed light trim looks like a square; how do I measure that?
If you have square recessed lighting, measure the length and width of the visible trim at its widest points. Similarly, measure the length and width of the square opening in the ceiling for the housing size. Most square trims are designed to fit square housings.
Do I need to turn off the power before measuring?
While measuring itself doesn’t require turning off the power, it’s always a good practice to have the lights turned off at the switch for safety when you’re working near the fixtures, especially if you plan to touch or remove any parts like the trim. For any electrical work beyond simple measurement, always turn off the corresponding circuit breaker.
How do I order the right trim if I don’t know the housing size?
When buying a trim kit, look at the product description. It will typically state what size housing it’s designed for (e.g., “for 6-inch recessed housings”). If you’ve measured your existing trim diameter (Method 1) and it’s around 6 inches, you’ll likely need a trim kit designed for a 6-inch housing. If you can, measure the opening in the ceiling (Method 2) for confirmation.
Conclusion: Lighting Up Your Home With Confidence
See? Measuring recessed lighting really isn’t a daunting task at all! With a simple tape measure and these clear steps, you’re equipped to get the precise dimensions you need, whether for stylish new trims, energy-saving LED upgrades, or even planning a whole new lighting scheme. Knowing how to accurately measure the visible trim and the ceiling


