How to Get Rust Off a Blackstone Griddle Safely
Getting rust off a Blackstone griddle is a common challenge for outdoor cooking enthusiasts, but it doesn’t have to ruin your cooking surface. This guide will walk you through safe and effective methods to restore your griddle, ensuring delicious meals for years to come. Proper maintenance is key to preventing rust and enjoying your Blackstone to its full potential.
Simply put, safely removing rust from your Blackstone griddle involves cleaning the affected area with a degreaser and abrasive tool, then immediately re-seasoning the entire surface to protect it from future corrosion. Follow these steps to restore your griddle and keep it in top cooking condition.
Key Takeaways
- Blackstone griddle rust removal requires a multi-step process starting with cleaning and ending with thorough re-seasoning.
- Use appropriate abrasive tools and natural degreasers to avoid damaging the griddle surface during rust removal.
- Re-seasoning is crucial after rust removal to create a protective, non-stick layer and prevent recurrence.
- Regular maintenance, including proper cleaning and oiling after each use, is the best defense against rust.
What is Blackstone Griddle Rust?
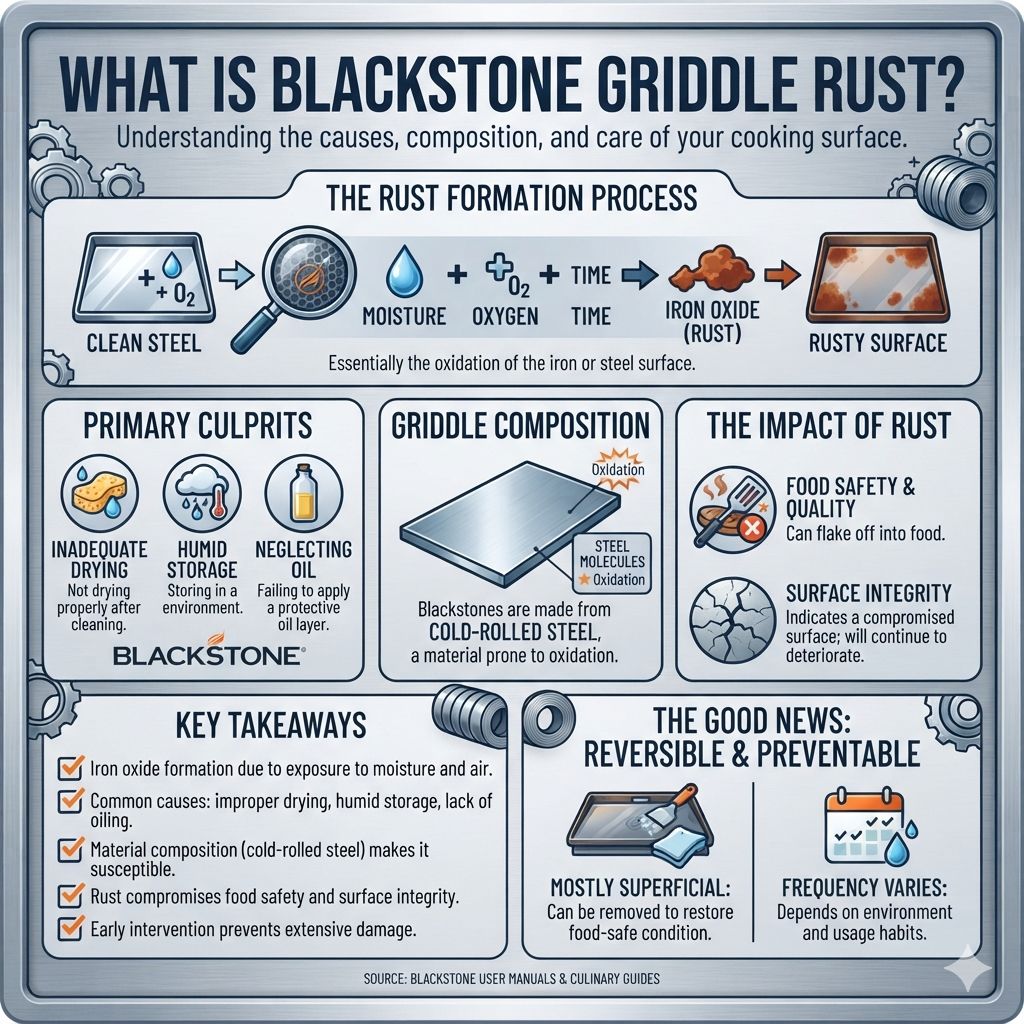
Blackstone griddle rust is essentially the oxidation of the iron or steel surface of your cooking griddle. When iron or steel is exposed to moisture and oxygen over time, a chemical reaction occurs, forming iron oxide, which we commonly recognize as rust. This often appears as reddish-brown patches on the griddle’s surface.
The primary culprit behind rust on a Blackstone griddle is inadequate care. This can include not drying the griddle properly after cleaning, storing it in a humid environment, or neglecting to apply a protective layer of oil after cooking. Even seemingly minor oversight can lead to the development of this unwelcome blemish.
Understanding the composition of your griddle is key. Blackstone griddles are typically made from cold-rolled steel, a material prone to oxidation if not properly maintained. The goal of rust removal is not just aesthetic; rust can flake off into your food and, more importantly, indicates a compromised cooking surface that will continue to deteriorate if left untreated.
- Iron oxide formation due to exposure to moisture and air.
- Common causes: improper drying, humid storage, lack of oiling.
- Material composition (cold-rolled steel) makes it susceptible.
- Rust compromises food safety and surface integrity.
- Early intervention prevents extensive damage.
The good news is that most rust on Blackstone griddles is superficial and can be effectively removed with the right techniques. The process aims to restore the surface to its original smooth, food-safe condition. This involves physical removal of the rust particles and chemical treatment to ensure complete eradication.
The frequency of rust appearing often depends on environmental factors and usage habits. For instance, a griddle used daily and meticulously cleaned and oiled will likely experience less rust than one used sporadically and left uncovered outdoors. Factors like rainfall, humidity, and even proximity to salt air can accelerate the rusting process.
Why is Removing Rust Important?
Removing rust from your Blackstone griddle is paramount for several critical reasons, all centered around food safety, cooking performance, and the longevity of your equipment. Ignoring rust can lead to a cascade of problems that diminish your grilling experience and potentially pose health risks.
Firstly, rust particles are not food-safe. Ingesting small flakes of iron oxide can lead to minor digestive discomfort for some individuals. More importantly, the areas where rust forms are often rough and uneven, creating hot spots and sticking points that hinder your ability to cook food evenly and prevent it from adhering to the surface.
This can lead to burnt food and a frustrating cooking session.
Secondly, rust indicates a breakdown in the griddle’s protective layer, known as the seasoning. If rust is present, it means that moisture has reached the bare metal. If left untreated, this can lead to deeper pitting and more significant damage, potentially compromising the structural integrity of the griddle over time.
A severely rusted griddle may eventually become unusable.
- Food Safety: Prevents rust particles from contaminating food.
- Cooking Performance: Ensures an even, non-stick cooking surface.
- Equipment Longevity: Stops rust from causing irreparable damage and pitting.
- Aesthetic Appeal: Restores the clean, professional look of your griddle.
- Preventing Future Rust: Removing existing rust is the first step in proper maintenance.
The seasoning on your griddle is a polymerized layer of oil that creates a natural non-stick surface and acts as a barrier against moisture. Rust is a sign that this barrier has been breached. Therefore, addressing rust is not just about cleaning; it’s about rebuilding that essential protective layer to ensure your griddle is both safe and effective for cooking.
Furthermore, a rusted griddle can affect the flavor of your food. While some argue that certain types of seasoning contribute unique flavors, rust itself does not impart a desirable taste. Instead, it can lead to off-flavors and detract from the natural deliciousness of the food you’re cooking.
Important: Never use harsh chemical rust removers not designed for food-grade surfaces, as these can leave behind toxic residues. Stick to food-safe methods.
What You Need for Rust Removal
Gathering the right tools and cleaning agents is crucial before you begin the process of removing rust from your Blackstone griddle. Having everything on hand will make the task more efficient and less frustrating. The approach involves both physical abrasion and proper re-seasoning.
For the initial cleaning and rust removal, you’ll need something abrasive. A stiff-bristled brush, a scraper (a metal spatula or a dedicated griddle scraper works well), and potentially some steel wool or a scouring pad are essential for scrubbing away the rust. It’s important to use these tools carefully to avoid scratching the underlying metal too deeply.
For cleaning agents, opt for food-safe options. A good quality degreaser or even a simple mixture of baking soda and water can help lift grease and loosen rust. For a more aggressive approach, a specialized griddle cleaner designed for rust removal can be effective, but always ensure it’s safe for cooking surfaces.
Some people also find success with natural acids like vinegar, though it should be used sparingly and thoroughly rinsed.
- Abrasive Tools: Stiff-bristled brush, metal scraper, steel wool (fine grade), or scouring pad.
- Cleaning Agents: Food-safe degreaser, baking soda, dish soap, white vinegar (use with caution and rinse thoroughly).
- Gloves: To protect your hands from grease and rust.
- Paper Towels or Rags: For wiping and drying.
- Cooking Oil: For re-seasoning the griddle (high smoke point oils like vegetable, canola, or flaxseed oil are recommended).
- Spatulas/Scrapers: For scraping and spreading oil during seasoning.
- Optional: A Blackstone griddle cover for future protection.
Beyond the cleaning supplies, you’ll need plenty of cooking oil for the re-seasoning process. This is non-negotiable, as it rebuilds the protective layer that prevents future rust. High smoke point oils are best, as they polymerize at high temperatures, creating a durable, non-stick coating.
Finally, ensure you have a plan for ventilation. While most cleaning agents are not toxic, the scrubbing process can create dust and residues. It’s best to do this outdoors or in a well-ventilated area.
Having a designated workspace where you can make a bit of a mess is also helpful.
How to Remove Rust From a Blackstone Griddle: Step-by-Step
The process of removing rust from your Blackstone griddle can be broken down into manageable steps. Consistency and thoroughness are key to achieving the best results and ensuring your griddle is ready for your next culinary adventure.
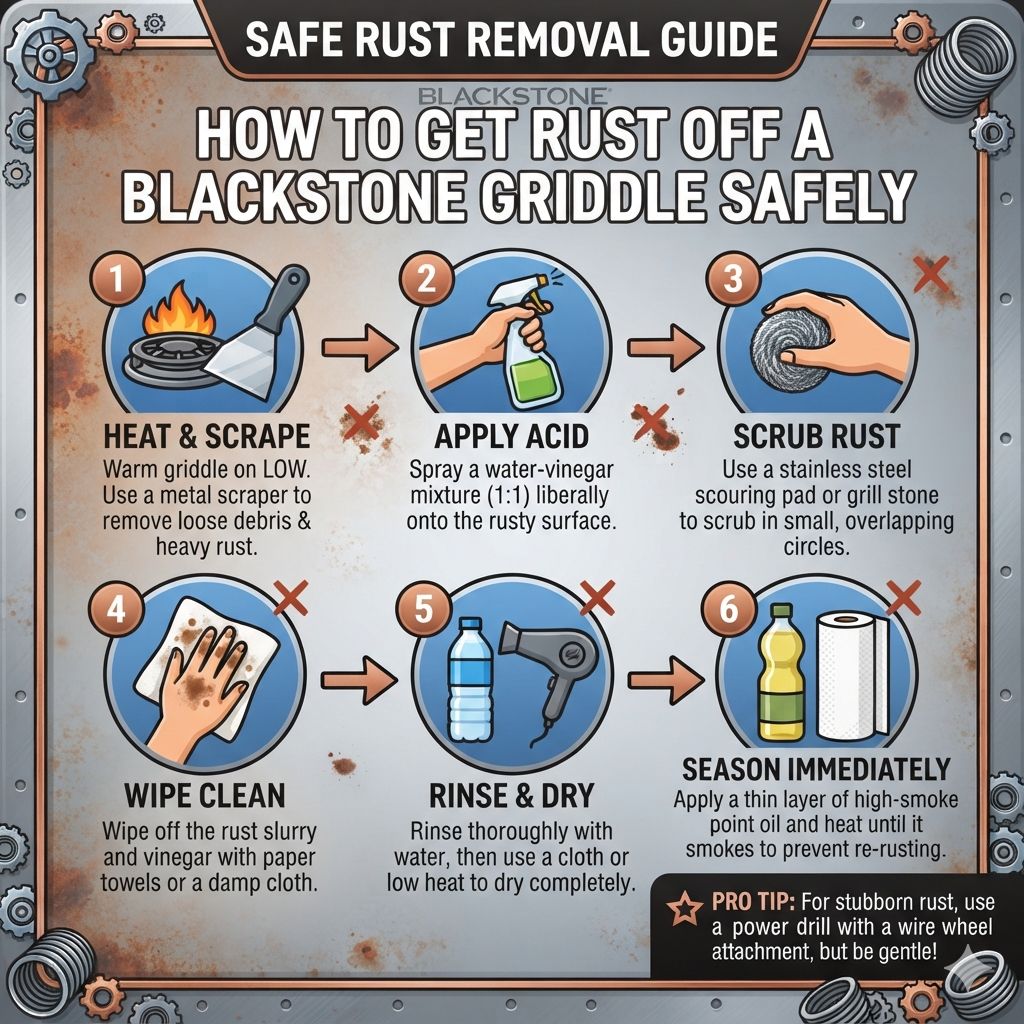
Begin by ensuring the griddle is completely cool. Never attempt to clean a hot griddle, as this can cause burns and potentially warp the metal. Once cool, start by scraping off any loose debris or large rust flakes.
Use a metal spatula or a dedicated griddle scraper at a shallow angle to avoid gouging the surface.
Next, apply your chosen cleaning agent. If using a degreaser, follow the product instructions. For a natural approach, sprinkle baking soda over the rusted areas and add a little water to form a paste, or pour a small amount of white vinegar directly onto the rust.
Let it sit for 10-15 minutes to allow it to break down the rust.
- Cool Down: Ensure the griddle is completely cool before starting.
- Scrape Loose Debris: Use a metal spatula or scraper to remove any large rust flakes or loose debris.
- Apply Cleaner: Distribute your chosen cleaner (degreaser, baking soda paste, or vinegar) over the rusted areas.
- Scrub Vigorously: Use a stiff brush, steel wool, or scouring pad to scrub the rusted spots. Apply firm pressure.
- Wipe Clean: Wipe away the residue with paper towels or rags. Repeat scrubbing and wiping until all visible rust is gone.
- Rinse Thoroughly: If you used vinegar or a strong degreaser, rinse the griddle thoroughly with water to remove all traces of the cleaning agent.
- Dry Immediately: This is critical. Use dry paper towels or rags to dry the griddle completely. You can even heat it on low for a few minutes to evaporate any residual moisture.
- Re-season: Immediately proceed to the re-seasoning process.
After scrubbing, wipe down the entire surface with clean paper towels or rags to remove the dissolved rust and cleaning agent. You may need to repeat the scrubbing and wiping process several times to ensure all traces of rust are gone. If stubborn rust remains, you might need to use finer-grade steel wool and apply more pressure.
Once you’ve scrubbed all the rust away and wiped the surface clean, it’s absolutely essential to dry the griddle completely. Moisture is the enemy of iron and steel. Use dry paper towels or shop rags to absorb all visible water.
For extra assurance, turn the griddle on to a low heat setting for a few minutes to allow any hidden moisture to evaporate. This step is non-negotiable before proceeding to seasoning.
Warning: Do not let the griddle air dry after cleaning. Residual moisture is the primary cause of new rust formation. Always dry immediately and thoroughly.
Re-Seasoning Your Blackstone Griddle After Rust Removal
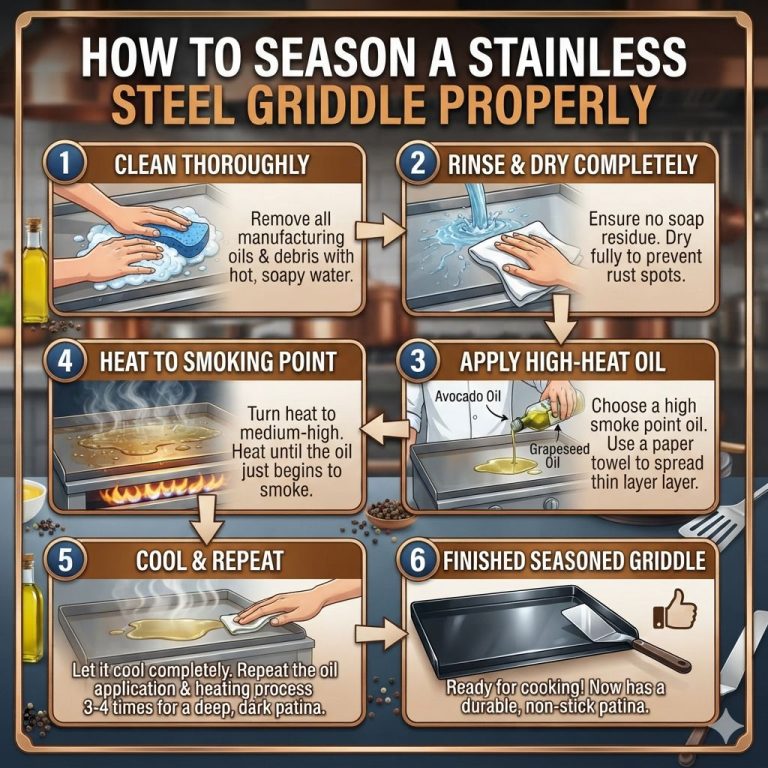
The re-seasoning process is arguably the most critical step after removing rust. It rebuilds the protective barrier that prevents rust from returning and creates that coveted non-stick surface. This process essentially polymerizes oil onto the metal, creating a durable coating.
Start by applying a thin, even layer of your chosen cooking oil across the entire surface of the griddle. It’s important to use a high smoke point oil like vegetable oil, canola oil, flaxseed oil, or grapeseed oil. Avoid olive oil as it has a lower smoke point and may not polymerize as effectively.
Use a paper towel or a clean rag to spread the oil, ensuring you coat every square inch, including the sides.
Once the oil is applied, heat the griddle to a high temperature, just above the smoke point of the oil you used. This is typically around 400-450°F (200-230°C). Let the oil smoke and cook for 30-60 minutes.
During this time, the oil will break down and bond with the metal, creating a hard, protective layer.
- Apply Thin Layer of Oil: Spread a very thin, even coat of high smoke point cooking oil over the entire griddle surface.
- Heat the Griddle: Turn the griddle to high heat, slightly above the smoke point of your chosen oil (approx. 400-450°F / 200-230°C).
- Cook for 30-60 Minutes: Allow the oil to smoke and polymerize. This is the crucial bonding stage.
- Cool Down: Let the griddle cool completely.
- Repeat: Repeat steps 1-4 at least 3-5 times for optimal results.
- Buff and Re-oil: After the final cycle, let it cool, then lightly buff with a clean paper towel and apply another very thin coat of oil for storage.
After the initial seasoning cycle, allow the griddle to cool down completely. You’ll notice the surface has changed color, likely appearing darker and more uniform. For the best results, repeat this entire seasoning process at least three to five times.
Each layer builds upon the last, creating a stronger, more durable, and non-stick surface.
The more you season, the better the results. Some experts recommend up to six or more layers of seasoning for a griddle that has undergone rust removal. After the final seasoning cycle and cooling, give the griddle a light buff with a clean paper towel and apply a final, very thin coat of oil.
This final layer will protect the seasoning while it’s in storage.
Common Mistakes to Avoid During Rust Removal
Several common mistakes can hinder the effectiveness of your rust removal efforts or even cause further damage to your Blackstone griddle. Being aware of these pitfalls can save you time, effort, and potential headaches.
One of the most frequent errors is not drying the griddle thoroughly enough after cleaning. As mentioned, moisture is the primary driver of rust. Even a small amount of residual water can lead to new rust patches forming very quickly, sometimes within hours.
Always ensure the griddle is bone dry before proceeding to seasoning.
Another mistake is being too aggressive with abrasive tools. While you need to scrub to remove rust, using overly coarse steel wool or scraping too forcefully can leave deep scratches on the metal surface. These scratches can become areas where food sticks and can be difficult to season properly.
Opt for finer grades of steel wool or a griddle scraper designed for the task.
- Incomplete Drying: Leaving moisture behind after cleaning.
- Overly Aggressive Scrubbing: Using tools that scratch or gouge the metal.
- Using Non-Food-Safe Cleaners: Employing chemicals that leave toxic residues.
- Skipping Re-Seasoning: Not re-seasoning the griddle after rust removal.
- Applying Oil Unevenly: Creating thin spots in the seasoning layer.
- Not Heating to Sufficient Temperature: Oil won’t polymerize properly if the griddle isn’t hot enough.
- Storing Without Oiling: Neglecting a protective oil layer for storage.
Many users also make the mistake of using cleaning agents that are not designed for food-grade surfaces. Harsh chemical rust removers intended for cars or industrial equipment can leave behind toxic fumes or residues that are dangerous to consume. Always stick to natural methods or products specifically labeled as safe for cookware.
Skipping the re-seasoning step entirely or doing it inadequately is perhaps the biggest blunder. Rust removal strips away the existing seasoning. Without proper re-seasoning, the bare metal is exposed and highly susceptible to rust, rendering your cleaning efforts futile and potentially damaging the griddle further.
A minimum of three to five seasoning cycles is generally recommended.
Warning: Never use a wire brush that can leave small metal bristles embedded in the griddle surface. These can break off into food.
Preventing Future Rust on Your Blackstone Griddle
Prevention is always easier than cure, and this holds true for rust on your Blackstone griddle. Implementing a consistent maintenance routine will save you from future rust removal headaches and keep your griddle in optimal condition for years to come. Proper care after every use is key.
The most effective way to prevent rust is by always ensuring your griddle is clean and dry after each cooking session. After you’ve finished cooking and the griddle has cooled slightly, scrape off any food debris. Then, use a bit of water and a stiff brush or scraper to clean the surface.
Immediately after cleaning, dry the griddle thoroughly with paper towels or a clean rag.
Once the griddle is dry, apply a very thin layer of cooking oil across the entire surface. This oil acts as a protective barrier against moisture and air, preventing oxidation. Use a high smoke point oil and spread it thinly with a paper towel, making sure to cover every inch.
Wipe off any excess oil so there’s just a light sheen.
- Clean After Every Use: Scrape and wash the griddle after each cooking session.
- Dry Thoroughly: Always ensure the griddle is completely dry immediately after cleaning.
- Apply a Thin Layer of Oil: Coat the entire surface with a high smoke point oil after drying.
- Use a Cover: Invest in a good quality Blackstone griddle cover to protect it from the elements when not in use.
- Store in a Dry Place: If possible, store your griddle in a shed or garage, away from high humidity.
- Perform Seasonal Seasoning: Even with regular maintenance, consider a full re-seasoning once or twice a year.
- Check for Moisture: Periodically inspect the griddle and its cover for any signs of moisture buildup.
Using a good quality Blackstone griddle cover is also a significant preventative measure. A cover shields your griddle from rain, dew, dust, and other contaminants that can accelerate rusting. Ensure the cover is breathable to prevent condensation from forming underneath.
Storing your griddle in a dry environment, if feasible, can make a substantial difference. Avoiding areas with high humidity, such as damp basements or open patios constantly exposed to the elements, will significantly reduce the risk of rust. For those in particularly humid climates, consider using desiccants inside the griddle cover.
Understanding Blackstone Griddle Seasoning Levels
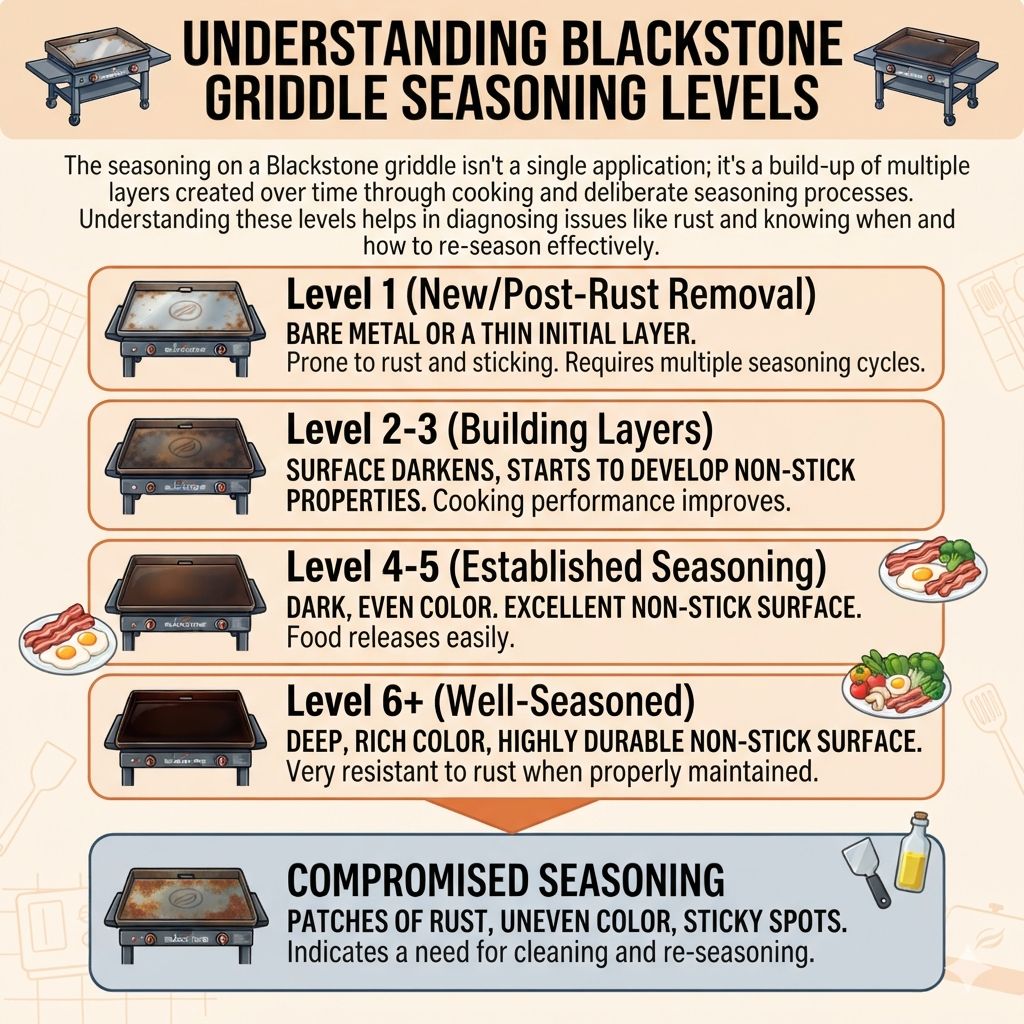
The seasoning on a Blackstone griddle isn’t a single application; it’s a build-up of multiple layers created over time through cooking and deliberate seasoning processes. Understanding these levels helps in diagnosing issues like rust and knowing when and how to re-season effectively.
A new Blackstone griddle typically comes with a factory seasoning. This is a good starting point, but it’s usually not as robust as seasoning built up over many uses. The goal of the initial seasoning process (especially after rust removal) is to replicate and improve upon this factory layer, creating a foundation for future cooking.
The first few layers of seasoning after rust removal or for a new griddle are crucial. These layers are often lighter in color and may feel slightly less non-stick. It’s during this phase that consistency is key; daily or frequent light cooking and diligent oiling help build these initial layers.
A properly seasoned griddle will have a dark, slightly glossy appearance and a smooth surface.
- Level 1 (New/Post-Rust Removal): Bare metal or a thin initial layer. Prone to rust and sticking. Requires multiple seasoning cycles.
- Level 2-3 (Building Layers): Surface darkens, starts to develop non-stick properties. Cooking performance improves.
- Level 4-5 (Established Seasoning): Dark, even color. Excellent non-stick surface. Food releases easily.
- Level 6+ (Well-Seasoned): Deep, rich color, highly durable non-stick surface. Very resistant to rust when properly maintained.
- Compromised Seasoning: Patches of rust, uneven color, sticky spots. Indicates a need for cleaning and re-seasoning.
As you cook more, especially with fatty meats, the natural oils and fats from the food contribute to the seasoning. This ongoing process creates a complex, polymerized layer that becomes increasingly durable and non-stick. A well-seasoned griddle can last for many years with proper care.
The presence of rust is a clear indicator that the seasoning layer has been compromised or breached. This means that either the original seasoning wasn’t robust enough, or it was damaged by moisture. The act of removing rust essentially strips away the affected seasoning layers, requiring you to start the building process anew from that point.
Frequently Asked Questions
What is the best way to remove light surface rust from a Blackstone griddle?
For light surface rust, start by heating the griddle slightly (not hot, just warm) to loosen any contaminants. Then, use a stiff brush or a gentle scouring pad with a bit of cooking oil or degreaser to scrub the rusted areas. Wipe clean and immediately dry thoroughly before applying a thin coat of oil.
Can I use steel wool on my Blackstone griddle?
Yes, you can use steel wool, but it’s best to use a fine-grade steel wool (like #0000) to avoid scratching the surface too deeply. Always use it with a cleaning agent and follow up with thorough drying and re-seasoning. Avoid using coarse steel wool, which can cause permanent damage.
How often should I re-season my Blackstone griddle?
After rust removal, re-season at least 3-5 times immediately. For regular maintenance, it’s good practice to apply a thin layer of oil after every use. A full re-seasoning session (multiple layers) is recommended periodically, perhaps seasonally or if you notice the non-stick properties diminishing.
What kind of oil should I use for seasoning?
High smoke point oils are ideal for seasoning. Popular choices include vegetable oil, canola oil, grapeseed oil, and flaxseed oil. Flaxseed oil creates a very hard layer but can be more prone to chipping if not applied correctly.
Vegetable and canola oils are consistent and readily available.
My Blackstone griddle still has dark spots after rust removal and seasoning. Is this normal?
Yes, dark spots can be normal and often indicate areas where the seasoning is deeper or where certain cooking oils or foods have reacted with the surface. As long as these dark spots are smooth and food releases easily, they are usually a sign of a well-developed seasoning. If they are rough or sticky, further seasoning may be needed.
Final Thoughts
Safely removing rust from your Blackstone griddle is achievable with patience and the right approach. By following the step-by-step guide, you can restore your griddle’s surface and ensure it’s ready for many delicious meals. Remember that consistent cleaning, proper drying, and regular oiling after each use are your best defenses against future rust.
Products related to this article
Sponsored / affiliate links. As an Amazon Associate I earn from qualifying purchases. I may earn additional commission from eligible campaigns.