
Quick Summary:
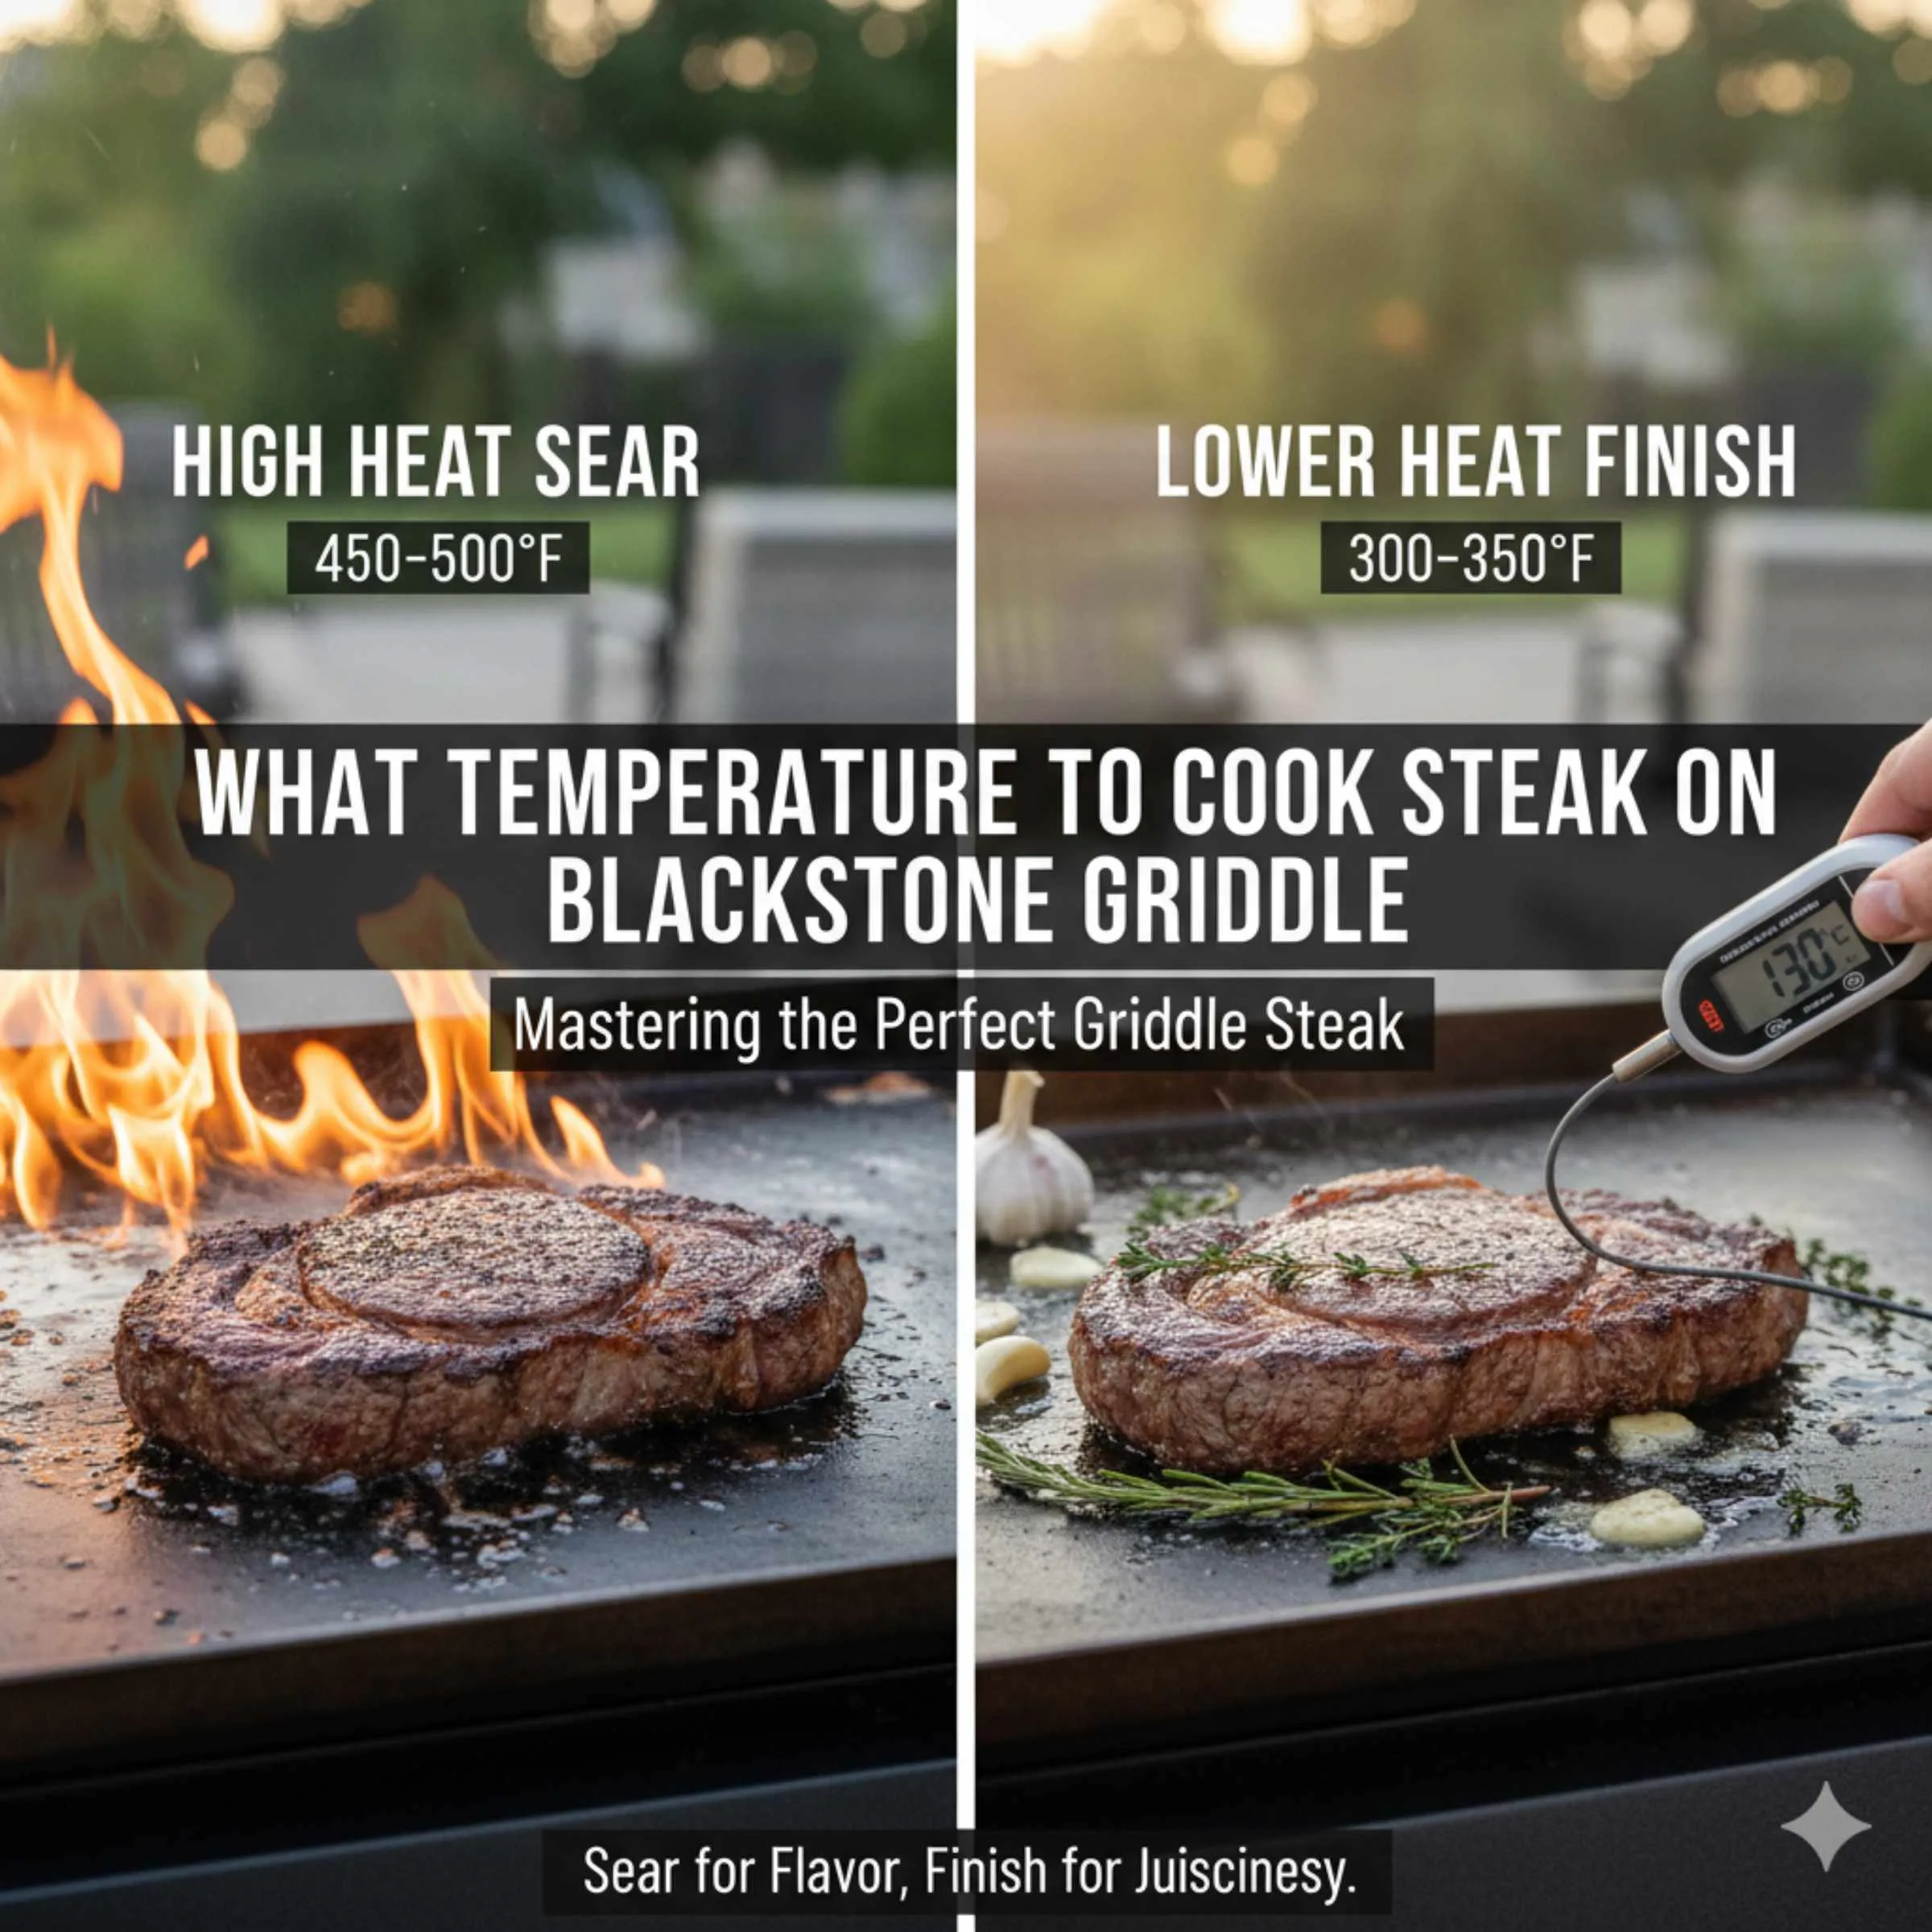
The proven best temperature to cook steak on a Blackstone griddle is a two-stage approach: preheat the entire surface to 500°F, then create a searing zone around 550°F on the direct heat and a gentler finishing zone near 375°F–400°F. This method ensures a perfect crust followed by even internal cooking.
Cooking a steak on your Blackstone griddle can feel like magic. You get that amazing, restaurant-quality sear right in your backyard. But if your steak comes out gray or burnt on the edges, the heat setting is usually the tricky spot. Knowing exactly what temperature to use stops the guesswork. Many folks just crank the knobs to high and hope for the best, but that often leads to uneven results. Don’t worry! We are going to walk through the simplest, most reliable way to master your Blackstone’s heat zones. By the end of our chat, you will feel totally confident controlling the temperature for your next perfect steak dinner.
Mastering the Blackstone Griddle: The Secret to Steak Perfection
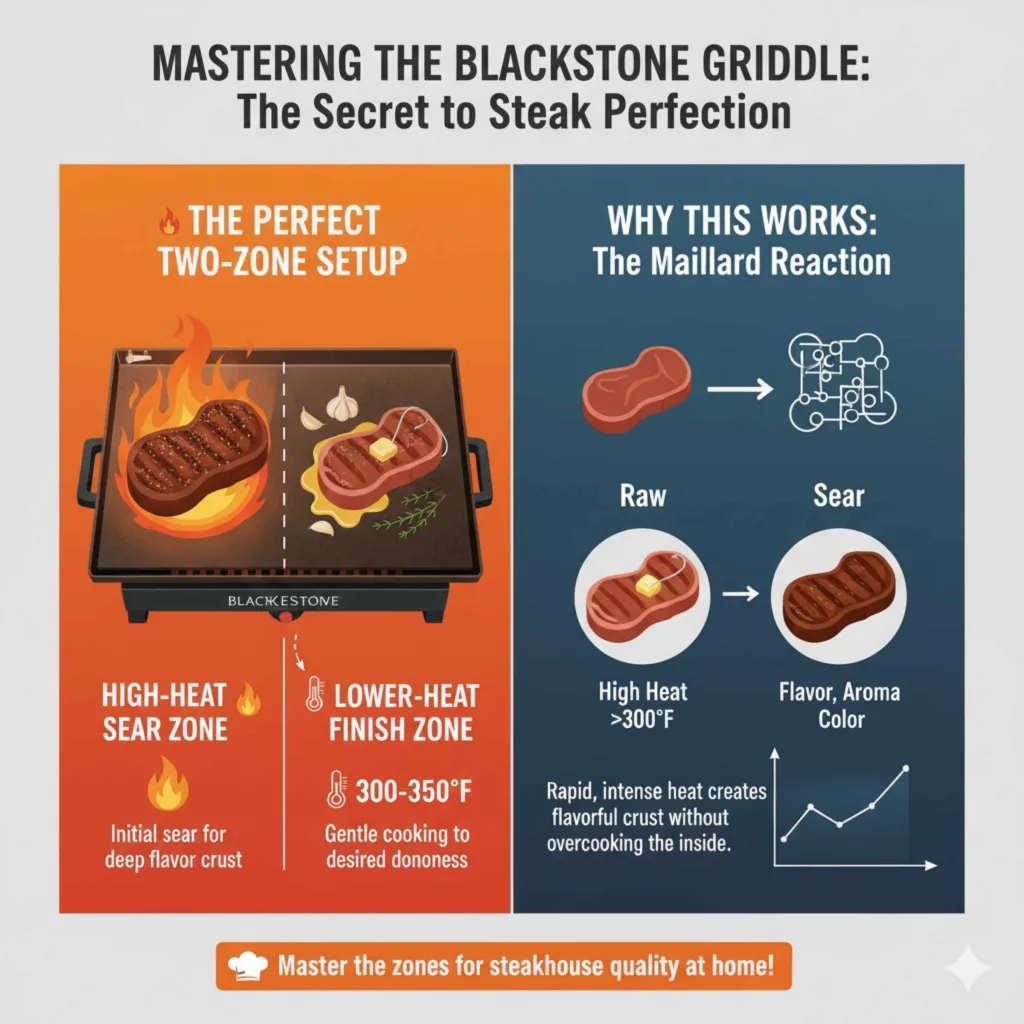
Using a Blackstone griddle is one of the fastest ways to cook great food outside. Unlike traditional grills with hot and cool spots, the flat surface gives you amazing control. However, that control demands we understand the heat. A steak needs very high heat to sear—that crispy, flavorful brown crust—but too much heat applied for too long will dry out the middle. We are chasing the Maillard reaction, which happens best above 300°F, but we need finesse. If you treat your griddle like a single oven temperature, you’ll miss out on true steakhouse results. Our goal is a steady, high-heat sear followed by regulated gentle cooking. Let’s break down how to set that up for success.
Understanding Your Blackstone Heat Zones
Your Blackstone isn’t just one big burner. It’s usually made up of two, three, or even four separate burners underneath a thick steel top. This is your biggest advantage! You can create different temperature areas, which cooks call “zones.” Think of it like having a high-speed fast lane and a slow lane on a highway.
The High Heat Zone (The Searing Lane)
This is where the magic starts. For a phenomenal crust (or “bark”), you need intense, direct heat. This zone is achieved by turning the burners under that area to their highest setting, often running between 500°F and 550°F on the steel surface. This high temperature rapidly evaporates surface moisture, allowing the delicious browning reactions to occur instantly.
The Medium/Low Heat Zone (The Finishing Lane)
Once you have that beautiful crust, you need to bring the internal temperature up without burning the outside. This is where the lower heat zone comes in. By turning the adjacent burner set to medium or low, you create a gentler area, typically ranging from 350°F to 400°F. This allows the inside (the core) of the steak to reach your target doneness (like medium-rare) safely.
Step-by-Step: Preparing the Blackstone Griddle for Searing
Getting the temperature right starts before the steak even hits the flat top. Just like checking your car’s oil before a long trip, preparing the surface is non-negotiable for great cooking results. Following this preheat process is key to ensuring you hit those target temperatures accurately.
Step 1: Clean and Season Your Griddle
If you haven’t used your Blackstone recently, give it a quick wipe-down. A clean surface prevents off-flavors. If you have a seasoned griddle, even better! Seasoning repels sticking and helps everything cook evenly.
Step 2: The Full Preheat Ritual
This is the most important step for hitting the high searing temperature consistently. You must heat the entire steel plate evenly.
- Light all burners on your Blackstone to high.
- Allow the griddle to preheat for a full 15 to 20 minutes. This ensures conduction heat saturates the thick steel top, not just the areas directly above the flames.
- Use an infrared (IR) thermometer or the printed temperature gauge on your grill lid (if available) to check the surface temperature across the whole cooking area. You are aiming for the entire surface to stabilize around 500°F.
Step 3: Setting Your Temperature Zones
Once everything is fully hot (after those 15–20 minutes), it is time to set your zones:
- Searing Zone: Keep the burner(s) directly under your intended searing spot on high. Test this area—it should register between 525°F and 550°F on your thermometer. This is your high-speed cooking lane.
- Finishing Zone: Turn the adjacent burner (or the necessary portion of the next burner) down to low or medium-low. This area should settle around 375°F to 400°F.
This precise setup lets you move the steak from intense heat to gentle heat without wasting time adjusting knobs constantly.
The Proven Best Temperature Chart for Steak Doneness
Knowing the right surface temperature is only half the battle. The other half is knowing what temperature you want the steak to reach inside. We use an instant-read meat thermometer, just like a mechanic uses a diagnostic tool to check engine temps—it removes all the guesswork. For the best results, pull the steak off the heat about 5 degrees before your target, as it will continue cooking while resting (carryover cooking).
Here is the recommended internal temperature chart:
| Doneness Level | Pull Temp (Off Heat) | Resting Target Temp (Final) | Characteristics for Your Steak |
|---|---|---|---|
| Rare | 120°F | 125°F | Very red center, barely warm |
| Medium-Rare (Recommended) | 128°F | 130°F–135°F | Warm red center, juicy and tender |
| Medium | 135°F | 140°F–145°F | Pink center, firmer texture |
| Medium-Well | 145°F | 150°F–155°F | Slightly pink to no pink center |
| Well Done | 155°F+ | 160°F+ | No pink, fully cooked through (we don’t recommend this!) |
As a friendly recommendation from someone focused on reliability—most steak lovers find the Medium-Rare range (130°F–135°F) offers the absolute best texture and juiciness on cuts like Ribeye or New York Strip. Anything over Medium starts losing those precious juices rapidly.
Cooking Times: Linking Temperature to the Clock
Once your Blackstone is properly zoned (550°F sear zone, 375°F finish zone), you can estimate timing, but always trust your thermometer over the clock. These times are for a standard 1-inch to 1.5-inch thick steak.
Phase 1: The High-Heat Sear (Crust Development)
Place your seasoned steak directly onto the hottest part of the griddle (525°F–550°F).
- Sear for 2 to 3 minutes per side.
- Aim for a deep, mahogany brown crust.
- You should hear an aggressive, satisfying sizzle the whole time.
After searing both sides, the internal temperature will likely still be low (around 90°F). Now, it is time to move it to the gentle zone.
Phase 2: The Gentle Finish (Internal Cooking)
Move the steak gently over to the 375°F–400°F zone. This is where we focus on hitting that perfect internal temperature.
- Place the steak on the cooler side of the griddle.
- Begin checking the internal temperature with your digital probe every 2 minutes.
- Flip the steak every 2–3 minutes in this zone to ensure even cooking on both faces.
The time it takes in this zone depends heavily on the thickness (gauge) of your steak. A thick 2-inch steak will take much longer than a thin 1-inch steak, which is why relying on the temperature chart (like checking engine diagnostics!) is far safer than guessing.
Pro Tips for Achieving True Steakhouse Quality on Your Blackstone
Every great setup needs a few reliability tweaks. Think of these as the alignment checks for your engine—small adjustments that make a huge difference in performance. These tips will help you move from simple home cooking to achieving professional-level results every time you fire up the griddle.
Tip 1: Thickness Matters (Start with 1.5 Inches)
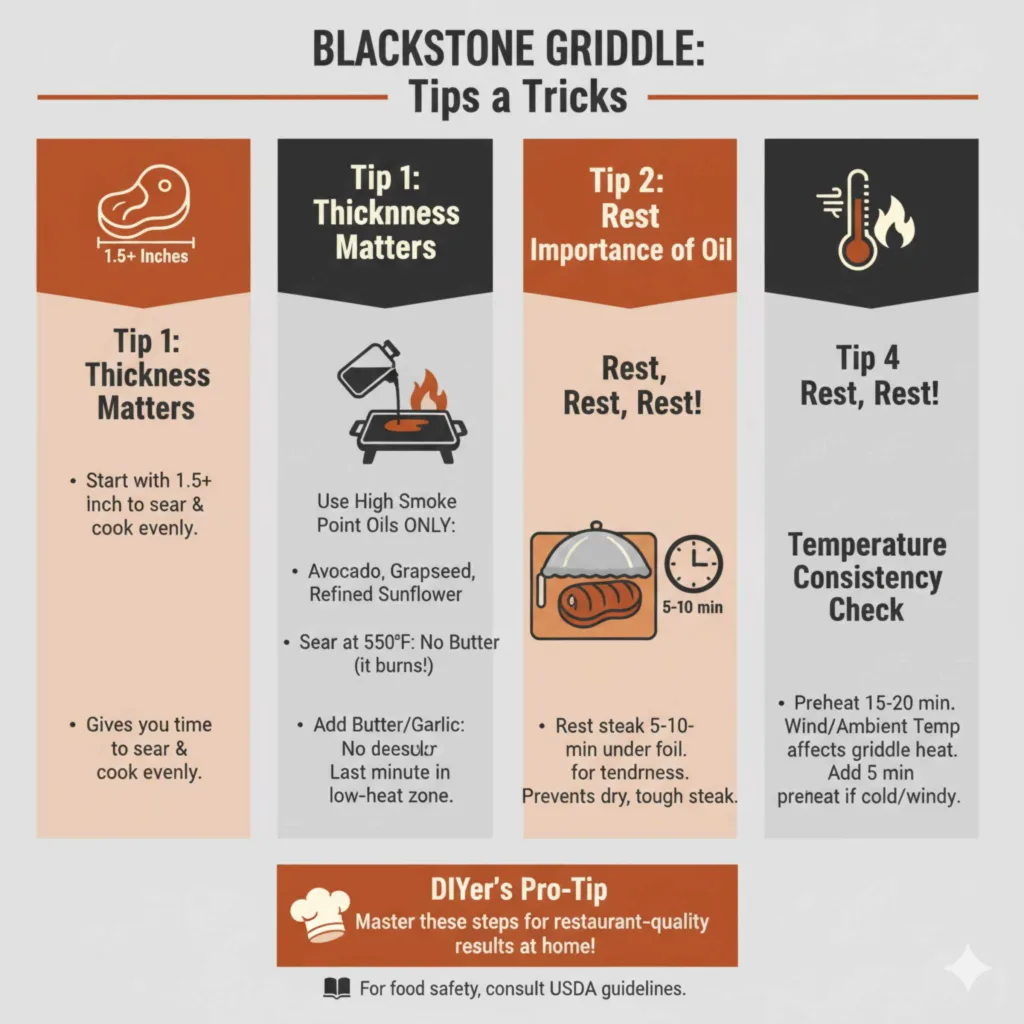
Thicker steaks are much more forgiving on the Blackstone. A thin steak hits medium-rare almost instantly on the sear side, leaving no time for the other side to heat up evenly. For beginners, buy a steak that is at least 1.5 inches thick; this gives you the necessary thermal mass to maneuver between zones effectively.
Tip 2: The Importance of Oil (High Smoke Point Only)
Do not skip the fat! Oil helps transfer that searing heat directly to the steak and prevents sticking. You must use an oil with a high smoke point, as the griddle surface is much hotter than most home ovens. Using low-smoke-point oils results in burning oil flavor, which ruins the sear.
Recommended Oils for Blackstone Searing:
- Avocado Oil (Smoke point around 520°F)
- Refined Sunflower Oil
- Grapeseed Oil
If you want exceptional flavor, try adding butter and aromatics (like garlic and thyme) only during the last minute in the lower heat zone, basting the top of the steak. Because butter burns below 300°F, never use it during the initial 550°F sear!
Tip 3: Rest, Rest, Rest!
This is the most common rookie mistake, similar to driving off immediately after turning off a hot engine. When you pull that steak off the 550°F surface, the internal cooking process continues (carryover cooking) due to retained heat. If you cut into it immediately, all the delicious, built-up moisture rushes onto your cutting board instead of staying in the meat. Let the steak rest on a clean cutting board, tented loosely with foil, for 5 to 10 minutes before slicing. This allows the muscle fibers to relax and reabsorb the juices, leading to a spectacularly tender steak. For further reading on food safety and temperature measures, consult resources from organizations like the USDA Food Safety and Inspection Service.
Tip 4: Temperature Consistency Check
If your Blackstone surface temperature seems low, remember that ambient air temperature affects performance, especially on windy days. Ensure your initial 15–20 minute preheat is thorough. If you feel heat loss, give the burners an extra five minutes to stabilize the heavy steel mass.
Troubleshooting Common Blackstone Steak Temperature Issues
Even with the best plan, things sometimes go sideways. When your steak doesn’t turn out quite right, it’s usually a simple temperature adjustment issue. Let’s look at what might be going wrong and how to fix it—think of this as diagnosing dashboard lights.
| Problem Symptom | Likely Cause (Temperature Related) | Dustin’s Fix |
|---|---|---|
| Steak is gray, not brown (No Sear) | Surface temperature was too low (under 450°F) or oil smoked immediately. | Ensure a full 15-minute preheat before placing the meat down. Use oil with a higher smoke point. |
| Outside burned, inside raw | The sear time was too long, or the finishing zone heat was still too high (over 450°F). | Immediately move to the lower heat zone sooner. Make sure the finishing zone is below 400°F. Max 2-3 minutes per side on the sear. |
| Steak is tough or chewy | Steak was severely overcooked (over 150°F internal) or rested too briefly. | Use the thermometer religiously and pull the steak 5 degrees early. Always rest for 10 minutes. |
Remember: The Blackstone heats from the bottom up. If the surface is cold, the heat hasn’t worked its way through the entire steel plate yet. Patience during preheating saves you from ruined steaks later!
Frequently Asked Questions (FAQs) About Blackstone Steak Temps
Q1: Do I need an expensive infrared thermometer for my Blackstone?
A great handheld infrared thermometer is very helpful for checking the surface anywhere, but it’s not strictly required to start. Using a high-quality instant-read meat thermometer that measures internal temperature is the most crucial tool. You can learn the high setting by watching how fast bacon cooks, but an IR thermometer removes all doubt about surface heat consistency.
Q2: Should I sear first or cook first on the Blackstone?
Always sear first! Searing requires the highest heat (500°F+) to create the crust. If you try to cook the steak through on medium heat first, you will cook the entire center before the outside even begins to brown properly, leading to a dull, gray exterior.
Q3: Can I use a dome lid while cooking the steak on the griddle?
Yes, the dome lid is fantastic, especially for thicker steaks (over 1.75 inches). Using the dome with a little water (creating a steam environment) allows you to finish the internal cooking faster and more evenly, mimicking an oven effect over the direct heat. Use the dome only during the gentle finishing phase, not during the initial high-heat sear.
Q4: What is the best seasoning blend for a Blackstone steak?
Keep it simple when you are focusing on heat management. A heavy coating of coarse kosher salt and freshly cracked black pepper applied liberally before cooking works best. The high heat will bring out the flavor perfectly. Avoid pre-made blends with sugars, as sugar burns rapidly at 550°F.
Q5: How thick should my steak be for the best Blackstone results?
For the easiest time managing the two-zone heat method, aim for steaks between 1.25 inches and 1.75 inches thick. Thinner steaks cook too fast, making zone transitions difficult. Thicker steaks are more forgiving but require more time on the cooler side.
Q6: Why does my Blackstone seem to have only two temperatures: burning or cold?
This usually means your burner knobs are not calibrated evenly, or your preheat time was too short. Ensure all burners are running on high for at least 15 minutes to saturate the entire cooktop with heat before adjusting any knob to low. A true low setting on a Blackstone should still hold a temperature around 300°F–350°F on the steel surface.
Conclusion: Confidence in Control
Mastering the Blackstone griddle temperature for steak isn’t about guesswork; it’s about setting up reliable zones. We found that the proven best technique involves establishing a rock-solid 500°F–550°F searing area and a gentler 375°F–400°F finishing area. By respecting these heat levels, searing aggressively for 2–3 minutes per side, and then moving the steak to the lower heat to achieve your target internal temperature (checked with a reliable thermometer), you eliminate almost all variables.
Remember the final, crucial steps: oil choice, no sugar in your rub, and that mandatory 10-minute rest period. You now have the knowledge to achieve that perfect, crisp, mahogany crust that locks in all the juicy flavor inside. Go ahead, fire up that Blackstone, dial in those zones with confidence, and enjoy the best steak you’ve ever cooked outside. Perfect results are now just a predictable part of your grilling routine!


