How to Fix a Sofa With Broken Springs: Easy DIY Solutions
A sagging sofa with broken springs is more than an eyesore, it’s uncomfortable, and over time, can damage the sofa’s frame or fabric. Many people believe fixing a sofa with broken springs means buying a new one or calling a professional.
But with some basic tools and a clear plan, you can repair most spring problems yourself and bring back your sofa’s support and comfort. Learning how to fix a sofa with broken springs not only saves money, but also gives your favorite seat new life.
Most people overlook the importance of sofa springs until they fail. Springs are the hidden heroes inside your couch, creating the bounce and support you expect. When they break, the sofa loses its shape and comfort, making even a short sit unpleasant.
Repairing these springs isn’t as hard as it sounds, but it does require care, patience, and attention to detail. This article explains everything you need, from identifying spring problems to buying the right replacement parts and doing the repair step by step.
You’ll also learn how to avoid common mistakes, and when it’s smarter to call an expert.
Understanding Sofa Springs And Common Problems
Not all sofas use the same spring system. Knowing which type is inside your sofa helps you plan the right repair. Most residential sofas have one of these main spring types:
- Coil springs: Also called eight-way hand-tied springs, these are round, heavy-gauge coils tied together with twine. They’re found in high-quality sofas and give a bouncy, durable feel.
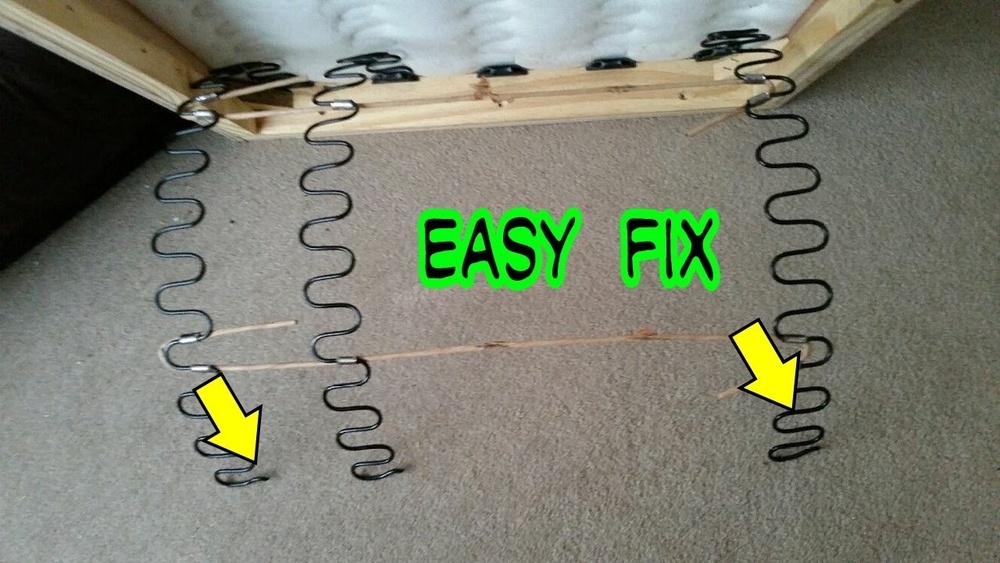
- Sinuous springs: These are S-shaped metal wires running across the seat base. They are common in modern sofas and are easier and cheaper to repair.
- Webbing: Some sofas, especially older or European models, use woven jute or synthetic webbing instead of metal springs for support.
Common spring problems include:
- Broken or snapped springs: A clear break in the metal, often causing a visible dip or sag in one spot.
- Detached springs: One or both ends of the spring have come loose from their anchor points but the spring itself isn’t broken.
- Stretched or worn springs: Springs have lost tension and no longer support weight evenly.
- Damaged clips or ties: The hardware that holds the springs in place is missing or bent.
Pro Tip: If your sofa has a single sagging spot, it’s usually one or two springs. If the whole seat sags, several springs or the frame may be weak.
Tools And Materials Needed
Before you start, gather all necessary tools and materials. Having everything on hand makes the process smoother and reduces the risk of damaging your sofa further.
Essential tools:
- Screwdriver (flat-head and Phillips)
- Needle-nose pliers
- Heavy-duty wire cutters
- Staple remover or flat pry bar
- Hammer
- Tape measure
- Work gloves (to protect your hands from sharp metal)
- Flashlight (for dark sofa interiors)
Materials:
- Replacement springs (match the type and size to your sofa)
- Spring clips or fasteners (for sinuous springs)
- Twine or spring tie cord (for coil springs)
- Upholstery staples or tacks
- Heavy-duty fabric (if the dust cover needs replacing)
- Spring stretcher tool (optional, but helpful for tight springs)
If you’re unsure about the spring size, remove one and bring it to a hardware or upholstery supply store. Many online retailers also sell repair kits for common sofa brands.

Credit: www.reddit.com
Step-by-step Guide To Fixing Broken Sofa Springs
1. Remove The Sofa Cover And Access The Springs
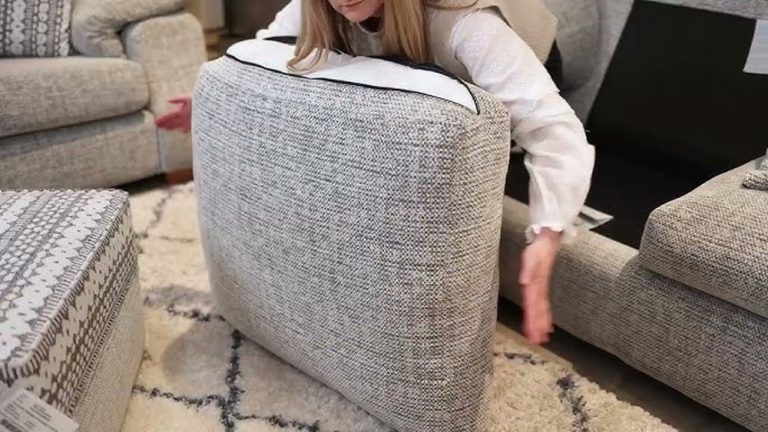
Start by clearing a space to work and turn the sofa upside down or on its back. Most sofas have a thin fabric layer underneath (the dust cover) attached with staples or tacks.
- Use a staple remover or flat screwdriver to gently pry off the dust cover. Keep these staples or tacks for reuse if they are in good condition.
- Shine a flashlight inside to check the spring layout. Take photos for reference before removing any parts.
Pro Tip: Label any screws or hardware you remove, especially if you need to take off legs or panels for better access.
2. Identify And Inspect The Damaged Springs
With the interior exposed, gently press on the seat cushions to spot the problem area from below.
- Look for any broken, bent, or detached springs.
- Check for missing or damaged clips, twine ties, or webbing.
- Inspect the surrounding wood frame for cracks or signs of wear; sometimes, spring problems are a sign of bigger frame issues.
Sometimes a spring may look fine but is stretched out of shape. Compare it to neighboring springs to spot subtle problems.
3. Remove The Broken Or Detached Spring
- For sinuous springs: Use needle-nose pliers to unhook the spring from its clips or brackets at both ends. If the clips are bent or broken, remove those as well.
- For coil springs: Cut or untie the twine holding the spring in place, then unhook the spring from its anchor points.
- For webbing: If the webbing is torn, cut it free from the frame.
Always wear gloves, old springs can be sharp and may snap back when released.
4. Install The Replacement Spring Or Repair Detachment
Match the new spring to the old one in length, gauge, and style. If you’re reattaching a loose spring, check the clips or fasteners.
- For sinuous springs: Hook the new or repaired spring into the clips at both ends. Use a spring stretcher tool to pull the spring tight, if needed, before attaching.
- For coil springs: Anchor the base of the spring to the sofa frame, then tie the top with new twine, mimicking the original pattern. If several springs are loose, retie them together for even support.
- For webbing: Stretch new webbing strips tightly across the frame, securing each end with heavy-duty staples or tacks.
Pro Tip: Springs must be under tension to support weight. If the replacement is loose, remove and reinstall it more tightly.
5. Test The Repair Before Reassembly
Before closing the sofa, press down on the repaired area to test support and bounce.
- Compare the firmness to other sofa sections.
- Sit gently on the sofa to check for noise or sagging. If you hear creaks or see unevenness, double-check your work.
Only when you’re confident the repair is solid should you move to the final step.
6. Replace The Dust Cover And Reassemble
- Reattach the dust cover fabric, using the original staples or tacks, or new ones if needed.
- Reinstall any panels or legs you removed.
- Turn the sofa upright and put the cushions back in place.
Your sofa should now feel as good as new, or at least much better than before.
Comparing Spring Types For Diy Repair
Not all springs are created equal when it comes to home repair. Here’s a quick comparison to guide your expectations.
| Spring Type | Ease of Repair | Durability After Repair | Tools Needed |
|---|---|---|---|
| Coil Springs | Moderate | High | Twine, Pliers |
| Sinuous Springs | Easy | Medium-High | Pliers, Clips |
| Webbing | Easy | Medium | Stapler, Scissors |
Sinuous springs are usually easiest for beginners because they require fewer tools and steps. Coil springs give the best support if repaired well but can be tricky to retie. Webbing is simple but may not last as long, especially in high-use sofas.

Credit: artisanupholstery.ca
Mistakes To Avoid When Fixing Sofa Springs
Even with good instructions, some common mistakes can ruin your repair or even your sofa.
- Using the wrong size spring: Always match the old spring exactly, or the seat may sit unevenly.
- Forgetting to check the frame: If the wood is cracked, no spring fix will hold for long.
- Overstretching springs: Too much tension can snap new springs quickly.
- Ignoring hardware: Replace any broken clips or ties. Reusing weak parts often leads to another failure soon.
- Skipping the test: Always check your work before closing up the sofa.
In my experience, the most overlooked step is testing with weight, people finish the repair, reassemble everything, and only then realize there’s still a problem.
When To Call A Professional
DIY repair works well for a few broken springs or simple detachment. But sometimes, hiring an expert is the best choice:
- If more than three springs are damaged, especially in a high-end or antique sofa.
- When the frame is cracked, warped, or the wood feels soft.
- If the upholstery is delicate, expensive, or hard to remove without damage.
- When you feel uncomfortable working with tools or heavy furniture.
Professional repair can cost anywhere from $100 to $500 depending on the issue and the sofa’s value, but it may protect your investment in the long run.

Credit: www.youtube.com
Cost Comparison: Diy Vs. Professional Repair
How much can you really save by fixing your sofa springs yourself? Here’s a basic cost comparison for a typical repair:
| Repair Type | DIY Cost (Approx.) | Professional Cost (Approx.) | Time Required |
|---|---|---|---|
| 1-2 Sinuous Springs | $20 – $40 | $120 – $200 | 1-2 hours (DIY) |
| 3+ Coil Springs | $40 – $80 | $200 – $500 | 2-4 hours (DIY) |
These estimates do not include the cost of special tools, which are often reusable. If your sofa is valuable or has sentimental value, paying a professional might make sense.
Tips For Maintaining Sofa Springs After Repair
To keep your sofa in good shape and delay future repairs, follow these maintenance tips:
- Rotate and flip cushions regularly to distribute weight evenly.
- Don’t jump or stand on the sofa; sudden force can bend or break springs.
- Clean under the cushions and frame to prevent dirt and debris buildup, which can wear down springs and clips.
- Check for new sags or noises every few months, and address small problems before they get worse.
- Keep your sofa dry; moisture can cause rust or weaken webbing and twine.
Pro Tip: Place a thin plywood board under the cushions if your sofa is old or used daily. This spreads weight and reduces stress on the springs.
Signs That Your Sofa Needs More Than Spring Repair
Sometimes, a broken spring is just the first sign of bigger trouble. If you notice any of these issues, a full sofa rebuild or replacement may be better:
- The frame wobbles or creaks even after spring repair.
- Springs break repeatedly, or the same area sags again soon.
- Upholstery is torn, stained, or worn through in several places.
- The sofa feels uncomfortable even after fixing the springs.
In these cases, consider whether investing in a new sofa is more cost-effective than ongoing repairs.
Sourcing Quality Replacement Parts
Finding the right springs and hardware is key to a successful repair. Here’s where to look:
- Upholstery supply stores: Many cities have specialty shops selling springs, clips, twine, and webbing.
- Online retailers: Search for “sofa spring repair kit” or your sofa brand for compatible parts.
- Local furniture repair shops: Some will sell parts or give advice even if you’re not hiring them for the whole job.
Be sure to match the spring size and type exactly. Don’t guess or substitute hardware if you’re not sure. Quality parts last much longer and restore your sofa’s support.
Example: Fixing A Sinuous Spring Sofa
Let’s walk through a real-life repair using the steps above:
A family’s three-year-old sofa started sagging on one side. After removing the dust cover, they found one sinuous spring had snapped at the end clip.
- They bought a replacement spring and new clips for $25.
- Using pliers, they removed the old spring and installed the new one, making sure it was tight and secure.
- After testing with weight, they stapled the dust cover back and put the sofa upright.
The repair took about 90 minutes and restored the sofa’s comfort. The family saved about $150 compared to a professional fix.
Environmental Impact: Repair Vs. Replacement
Repairing a sofa instead of replacing it is better for the environment. The Environmental Protection Agency (EPA) reports that furniture is a major source of landfill waste, with millions of couches discarded every year.
By fixing springs, you keep bulky items out of landfills and reduce demand for new raw materials. Many sofa parts, including springs and wood, can be recycled or reused as well.
For more on the environmental benefits, see the EPA’s guide on furniture waste reduction.
Frequently Asked Questions
How Do I Know If My Sofa Springs Need Replacing Or Just Reattaching?
If the spring is broken, bent, or stretched out of shape, it needs replacing. If it is simply loose at the end or has slipped out of its clip, reattaching may be enough. Compare the suspect spring to those around it.
If it looks very different or feels weak, replacement is best.
Can I Mix Different Types Of Springs In One Sofa?
Mixing spring types (like adding sinuous springs to a coil spring sofa) isn’t recommended. Each spring system supports weight differently, and mixing them can create uneven seating and may damage the frame. Always use the same type and size as the original.
What If I Can’t Find A Matching Replacement Spring?
If you can’t find an exact match, measure the old spring’s length, width, and gauge (thickness) and look for the closest option. Some specialty stores can custom-make springs if you bring a sample. Never force an ill-fitting spring, as it can damage your sofa.
Is It Safe To Repair A Sofa With Rusted Or Old Springs?
Rusted springs lose strength and may snap unexpectedly. If most of the springs are rusty, it’s safer to replace all of them or consult a professional. Handling old springs can also expose you to sharp edges, always wear gloves.
How Long Should A Sofa Spring Repair Last?
With Quality Parts And Careful Installation, A Repaired
Products related to this article
Sponsored / affiliate links. As an Amazon Associate I earn from qualifying purchases. I may earn additional commission from eligible campaigns.