
Quick Summary: To effectively clean your wood kitchen table, always start by dusting, then use a soft cloth dipped in mild soap and warm water for general cleaning. For tougher messes, use specialized wood cleaners sparingly. Always dry immediately and never soak the wood to prevent damage.**
That beautiful wood kitchen table is the heart of your home. It sees everything—spills, homework, family dinners, and maybe even a little rogue paint. Seeing it look dull or sticky can be frustrating. You want it clean, but you worry about using the wrong stuff and ruining that lovely finish. Don’t stress! Cleaning wood doesn’t need harsh chemicals. With simple tools you probably already have, we can get your table shining safely. This guide shows you the best, proven ways to tackle everyday dirt and those stubborn messes, keeping your wood looking great for years.
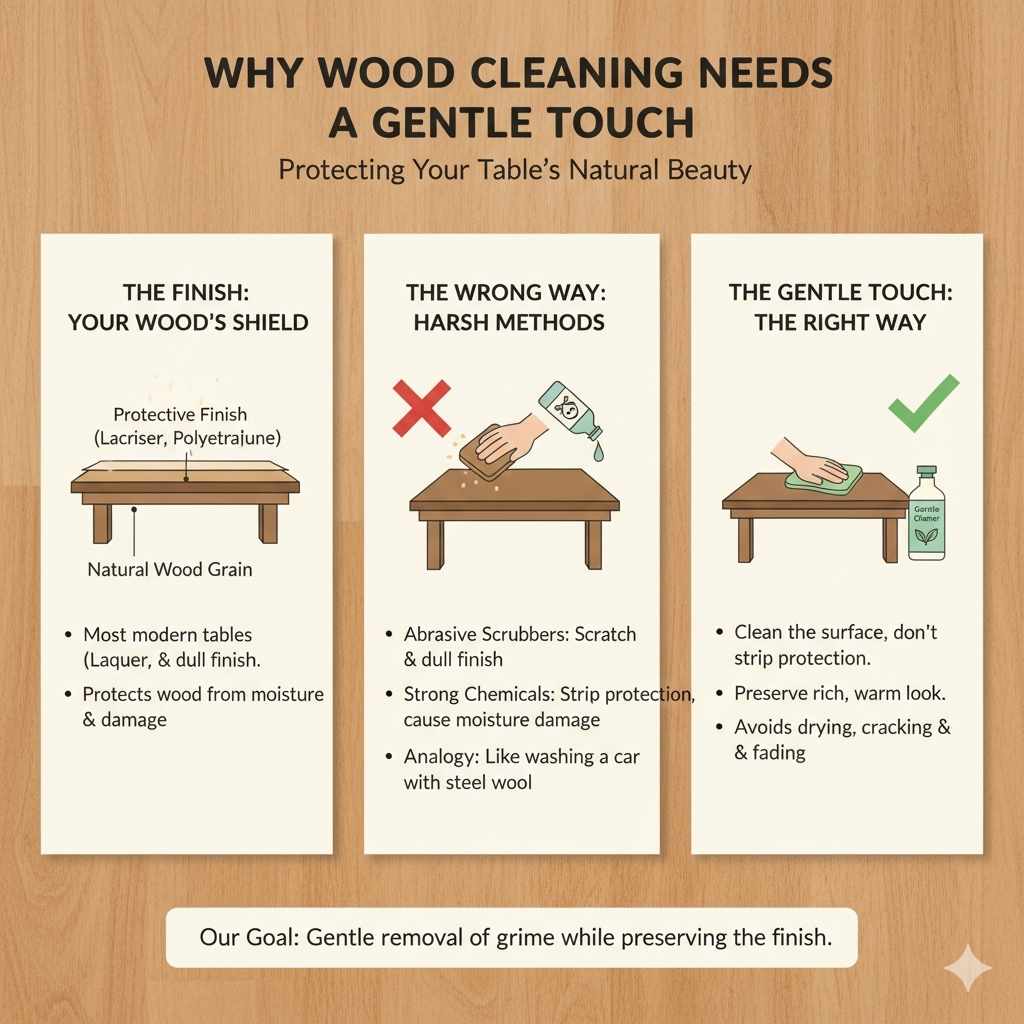
Why Wood Cleaning Needs a Gentle Touch
Wood is natural, and like any natural material, it reacts to its environment. The secret to cleaning wood kitchen tables lies in understanding the finish. Most modern tables have a protective layer—like lacquer, varnish, or polyurethane. This finish shields the wood underneath. If you use abrasive scrubbers or strong chemicals, you can scratch or dull this top coat, letting moisture seep in and cause real damage. We want to clean the surface, not strip the protection.
Think of it like washing your car’s paint job. You wouldn’t use steel wool, right? The same gentle logic applies here. Harsh cleaners can dry out the wood over time, leading to cracks or fading. Our goal is gentle removal of grime while preserving that rich, warm look.
Gathering Your Starter Cleaning Kit (Keep It Simple!)
You don’t need a shelf full of expensive products to properly clean your wood table. Most great cleaning jobs use items you might already have in your pantry or cleaning caddy. Having the right, gentle tools ready makes the whole process much easier and safer for your table.
Essential Tools for Wood Table Cleaning
- Soft, lint-free cloths (Microfiber works best).
- A slightly abrasive cloth for very tough spots (like an old toothbrush or the gentle side of a sponge).
- A clean bucket or bowl for mixing water.
- Mild dish soap (clear, dye-free is ideal).
- Distilled white vinegar (great for cutting grease).
- Olive oil or mineral oil (for conditioning, if needed).
- A soft dust cloth or feather duster.
Step-by-Step: The Proven Best Way to Clean Your Wood Table
Follow these steps in order. This systematic approach ensures you remove surface debris before applying any liquid, which prevents grinding grit into the wood’s finish. This is the core technique trusted by furniture care experts.
Step 1: Daily Dusting and Debris Removal
This is the most important, yet often skipped, step. Dust is abrasive! If you wet a dusty table, you are essentially sanding it lightly with dirty water. Always start here, especially before a deeper clean.
- Use a dry, soft microfiber cloth or a feather duster.
- Wipe down the entire surface, paying special attention to the edges where crumbs collect.
- If you have intricate carvings or legs, use a soft brush (like a clean paintbrush or a soft toothbrush) to gently sweep debris out of crevices.
Step 2: The Mild Soap & Water Wipe-Down (For General Grime)
For sticky spots, food residue, or general dullness, a diluted cleaning solution is perfect. This is safe for almost all sealed wood finishes.
- Mix a very small amount of mild dish soap (just a couple of drops) into a bowl of warm water. The water should barely look soapy.
- Dip your soft cloth into the solution. Wring it out thoroughly! The cloth should be damp, not dripping. Excess water is the enemy of wood.
- Wipe the table surface in the direction of the wood grain. Working with the grain prevents streaks and helps lift dirt trapped in the texture.
- For stubborn spots, gently rub the area in a small circle, still using light pressure.
- Crucial Step: Immediately follow up with a second, clean cloth dampened only with plain water to rinse away any soap residue.
- Use a third, completely dry cloth to dry the surface thoroughly. Never let water sit on the wood, even for a minute.
Step 3: Tackling Tougher Grease and Stickiness
Sometimes, cooking grease or stubborn rings need a little extra cutting power. Here is where a vinegar solution comes in handy. Vinegar is a natural degreaser. Remember, we dilute it heavily!
- Create a 50/50 solution of distilled white vinegar and warm water. (For very sticky spots, you can use a stronger 75% water / 25% vinegar mix, but use sparingly.)
- Apply this solution to the sticky area using your damp, wrung-out cloth.
- Let the solution sit on the tough spot for about 30 seconds to break down the grease.
- Wipe away the grime.
- Rinse immediately with a clean, water-dampened cloth.
- Dry the area completely and quickly.
Expert Tip from Dustin: If you’re worried about using vinegar, you can substitute it with a cleaner designed specifically for wood, ensuring it’s polyurethane-safe. Always check the ingredients. According to the This Old House experts, avoiding ammonia-based cleaners is key for maintaining protective topcoats.
Step 4: Conditioning the Wood (The Final Polish)
Cleaning removes dirt, but it can sometimes leave the wood looking a little thirsty, especially if it’s older or has an oil finish. Conditioning restores luster and provides a bit of light protection.
- Wait until the table is completely dry after cleaning.
- Choose your conditioner: A small amount of good quality furniture oil (like orange oil or mineral oil) or a specialized wood polish works well. Avoid using cooking oils like canola or vegetable oil, as they can turn rancid over time.
- Apply a dime-sized amount of oil to a soft, clean cloth—not directly to the table.
- Rub the oil into the wood, moving with the grain, until the surface has a light, even sheen.
- Let it sit for about 10 minutes.
- Using a clean, dry cloth, buff away any excess oil until the surface feels smooth, not greasy.
Cleaning Challenges: Troubleshooting Common Table Problems
Every kitchen table faces unique challenges. Here’s how to handle the most common issues without causing damage.
How to Remove White Water Rings (Heat Marks)
White rings are usually caused by moisture trapped in the finish layer. This means the finish itself is slightly damaged, but often repairable without refinishing!
| Method | Best For | How To Apply |
|---|---|---|
| Hair Dryer | Fresh, shallow white marks. | Set the dryer to low heat. Hold several inches away and move it constantly over the ring until the mark disappears. Dry immediately after. |
| Mayonnaise or Petroleum Jelly | Stubborn white rings. | Dab a thick layer over the ring. Let it sit for several hours or even overnight. Wipe clean and buff. The oil helps displace the trapped moisture. |
| Iron & Cloth | Deeply set white rings (Use with caution!). | Place a clean, dry cotton cloth over the ring. Briefly press a warm (not hot!) iron onto the cloth over the mark for just a few seconds. Check frequently. |
Removing Dark Stains and Ink
Dark stains often mean the liquid has penetrated deeper than just the finish, possibly staining the raw wood below. This requires a slightly stronger approach, but proceed slowly.
- For Minor Dark Spots: Try rubbing the spot gently with a cloth dampened with a tiny bit of toothpaste (the white paste kind, not gel). Rub with the grain. Rinse well.
- For Deeper Stains: You may need very fine-grit sandpaper (400 grit or higher). Lightly sand just the stained area until the color lifts. This will dull the finish, so you must immediately follow up with a light polish or refinish that small spot afterward.
Dealing with Sticky Residue (Adhesive or Gummy Spots)
If tape or a sticker leaves behind a sticky mess, you need a solvent that breaks down the adhesive without harming the finish.
- Try rubbing a small amount of mineral spirits (paint thinner) on a soft cloth. This is generally safe on topcoats like polyurethane.
- Gently rub the sticky area until the residue rolls off.
- Clean the area again using the mild soap and water method (Step 2) to remove all traces of the solvent.
- Dry completely.
When to Avoid Certain Cleaners: What NOT to Use
Knowing what to avoid is just as important as knowing what to use. Using the wrong cleaner can cause irreversible damage to your wood table finish. These products break down the protective sealants, leading to dryness, cloudiness, and eventual cracking.
The “Never Use” List for Finished Wood Tables
- Ammonia-Based Cleaners: Windex and many general glass cleaners strip the wax and finish right off the wood.
- Abrasive Pads: Steel wool, scrub sponges, or scouring powders will leave deep, noticeable scratches.
- Silicone or Wax Polishes (Frequently): While they give a nice initial shine, frequent use builds up heavy layers that look dull over time and trap dirt. A light oil polish (Step 4) is better for maintenance.
- Excessive Water: Never leave puddles or let a wet rag sit on the surface. Wood absorbs water, leading to swelling and warping.
- Bleach or Harsh Chemicals: These will instantly discolor and damage the wood stain and finish.
Caring for Unfinished or Oiled Wood Tables
Some older or custom tables may not have a hard, plastic-like polyurethane coat. These are usually oiled or waxed. They require a totally different, more hands-on approach. If you aren’t sure if your table is finished, assume it is sealed. If you can easily scratch the surface with a fingernail and it leaves a mark, it might be unfinished or lightly waxed.
For oil or wax finishes, you clean by replenishing the oil, not by washing it away.
Cleaning Unfinished Wood
- Dust thoroughly as usual.
- For cleaning, use only the mildest possible solution—perhaps just a damp cloth with no soap. Wipe immediately dry.
- After cleaning, you must re-oil the area. Use a furniture oil specifically recommended for your wood type (e.g., tung oil or linseed oil, depending on the original treatment).
- Apply the oil according to the manufacturer’s instructions, usually wiping on a thin coat, letting it penetrate, and then buffing off the excess.
For more information on maintaining natural wood surfaces, resources like the Purdue University Extension often provide excellent guides on wood finishing and care specific to climate and material.
Preventative Maintenance: Keeping Your Table Cleaner Longer
The easiest way to clean your wood table is to keep it from getting too dirty in the first place! A little preventative care saves you a lot of elbow grease later on.
Best Practices for Daily Wood Table Protection
- Use Coasters and Trivets: This is non-negotiable. Heat and moisture are the two biggest threats. Always use cork coasters under cold drinks and trivets or silicone mats under hot serving dishes.
- Wipe Spills Immediately: Don’t let sauce or juice sit for 15 minutes. Even sealed wood can absorb spills if left sitting. A quick wipe prevents staining and stickiness.
- Use Table Linens: Placemats and tablecloths are your first line of defense against crumbs, grease, and minor scratches during mealtimes.
- Regular Light Dusting: A quick dry wipe every day or two prevents abrasive dust from building up.

Frequently Asked Questions (FAQ) About Wood Table Cleaning
Q1: Can I use baby wipes on my sealed wood kitchen table?
A: It’s best to avoid them for regular cleaning. While they might work in a pinch, many baby wipes contain mild chemicals or alcohols that can build up or dull the finish over time. Stick to warm water and mild soap for daily care.
Q2: How often should I deep clean or polish my wood table?
A: If the table is used daily, a mild soap and water clean should be done once a week. Apply a light polish or oil treatment once every 3 to 6 months, or whenever the wood starts looking dry or dull.
Q3: What should I do if my table has scratches but is otherwise fine?
A: For very minor surface scratches, try rubbing the area gently with the flesh of a walnut (the nut itself, not the shell!). The natural oils and color of the nut can temporarily camouflage light surface scratches on finished wood.
Q4: Is it safe to use lemon essential oil for cleaning?
A: Lemon oil is often marketed for wood, but pure essential oils can be too strong and strip the finish if used undiluted. If you want a pleasant smell, use commercial wood cleaners that specifically list essential oils as ingredients, or stick to the mild soap and water method.
Q5: My table looks cloudy after cleaning. What happened?
A: Cloudiness usually means you left behind soap residue or used too much polish, creating a thick film. You need to strip this residue gently. Try wiping the area with a cloth dampened with plain water, followed by a dry cloth, repeating until the residue is gone. If that doesn’t work, a small amount of mineral spirits on a cloth can help dissolve the waxy buildup.
Q6: Should I clean the underside of the table too?
A: Yes! While it doesn’t need daily attention, the underside needs occasional dusting and cleaning. Unfinished wood on the underside can warp or crack if moisture collects there unevenly, so periodically wiping it down helps balance the wood’s moisture level.
Conclusion: Keeping Your Kitchen Table Looking Its Best
Caring for your wood kitchen table doesn’t have to feel like a chore reserved only for professionals. By remembering a few key principles—always dust first, use minimal moisture, and avoid harsh chemicals—you can easily keep that centerpiece looking fantastic. We’ve covered everything from daily upkeep using simple soap and water to troubleshooting those annoying white heat rings. Remember, maintaining wood is about consistency, not aggressive scrubbing. With these proven, beginner-friendly steps, you have all the confidence you need to handle spills, grime, and dullness safely. Keep up the light, regular care, and your table will continue to be a beautiful, solid foundation for countless meals and memories for years to come.


