How to Make Red Velvet Cupcakes for Valentine’s Day
Bake red velvet cupcakes for Valentine’s Day with a small amount of cocoa, red food coloring, and buttermilk for a soft, moist crumb. Bake at 350°F until the tops spring back and a toothpick comes out with a few moist crumbs. Too little color leaves them brown, and too much mixing makes them dense. This guide covers a small-batch recipe, frosting fixes, color troubleshooting, and gift-ready finishing.
Why red velvet fits Valentine’s Day


Red velvet fits Valentine’s Day because it gives you a clear red cue, a gentle cocoa note, and a tender crumb that feels more special than a plain chocolate cupcake. Color matters here. So does texture.
For the strongest Valentine’s look, use a measured amount of red coloring, not an open-ended pour. The same batch can read brown-red, bright red, or pink-red depending on the type and amount of coloring, the cocoa level, and whether you use cake flour or all-purpose flour.
What you’ll need
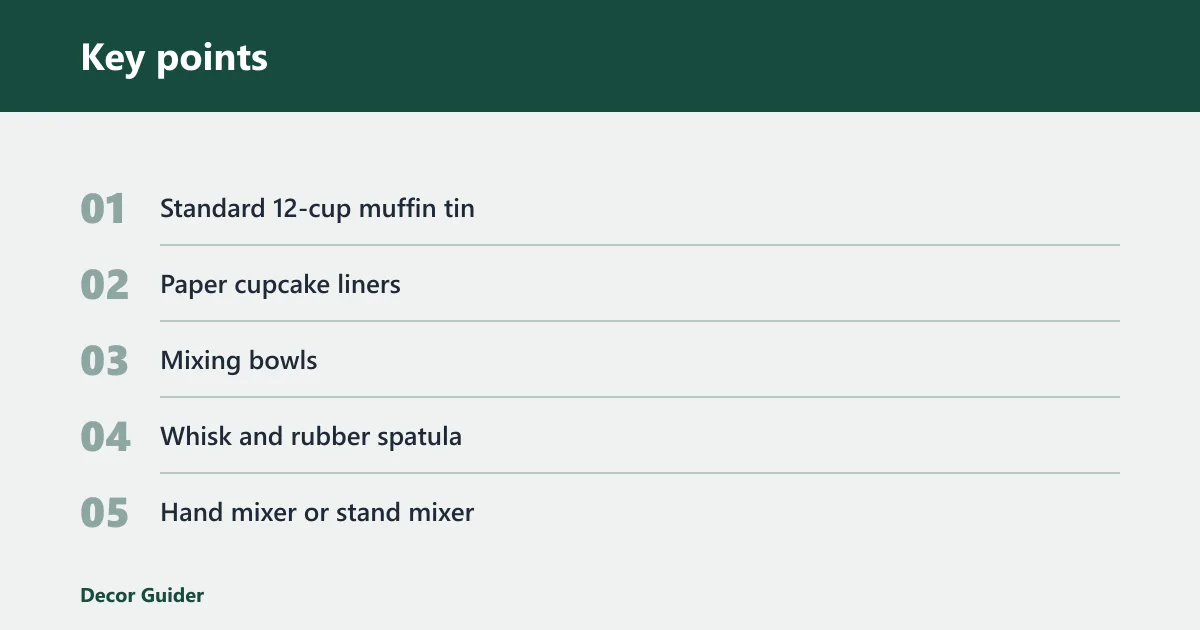
- Standard 12-cup muffin tin
- Paper cupcake liners
- Mixing bowls
- Whisk and rubber spatula
- Hand mixer or stand mixer
- Measuring cups and spoons
- Wire rack
- Toothpick or cake tester
- Piping bag or offset spatula
Ingredients for 12 cupcakes
- 1 1/4 cups cake flour, or 1 cup all-purpose flour plus 2 tablespoons cornstarch if substituting
- 1 1/2 tablespoons unsweetened cocoa powder
- 3/4 teaspoon baking soda
- 1/2 teaspoon baking powder
- 1/2 teaspoon fine salt
- 1/2 cup unsalted butter, room temperature
- 1/2 cup neutral oil
- 3/4 cup granulated sugar
- 2 large eggs, room temperature
- 1 teaspoon vanilla extract
- 1 tablespoon red liquid food coloring or 1 teaspoon red gel or paste coloring
- 1 cup buttermilk
- 1 teaspoon white vinegar or cider vinegar
- 8 ounces brick-style cream cheese, room temperature
- 1/2 cup unsalted butter, room temperature
- 3 to 3 1/2 cups powdered sugar, sifted if lumpy
- 1 teaspoon vanilla extract
- Pinch of salt
This is the canonical 12-cupcake batch. Cake flour gives a lighter, softer crumb because it has lower protein, while the all-purpose flour substitution makes a slightly firmer cake. Use one flour path or the other; do not combine both. If you want a homemade cake-flour substitute, measure 1 cup all-purpose flour, remove 2 tablespoons, and replace them with 2 tablespoons cornstarch.
Red velvet also depends on a small amount of cocoa. Live Well Bake Often uses 2 tablespoons of unsweetened natural cocoa powder, while other recipes use less. Cocoa should support the flavor, not turn the cupcakes into full chocolate cake. For a classic red velvet profile, keep the cocoa modest and let the vanilla, buttermilk, and vinegar do the balancing work. For a stronger color guide, gel coloring usually gives deeper red with less added liquid, while liquid coloring is easier to measure but can dilute the batter if overused. For more on food coloring performance, see Serious Eats on food coloring.
How do you make the batter?
Mix the batter in this order: whisk the dry ingredients, mix the wet ingredients, then combine them just until no dry streaks remain. That order keeps the crumb soft and helps the color spread evenly. Overmixing builds too much structure and makes the cupcakes dense.
Mixing steps
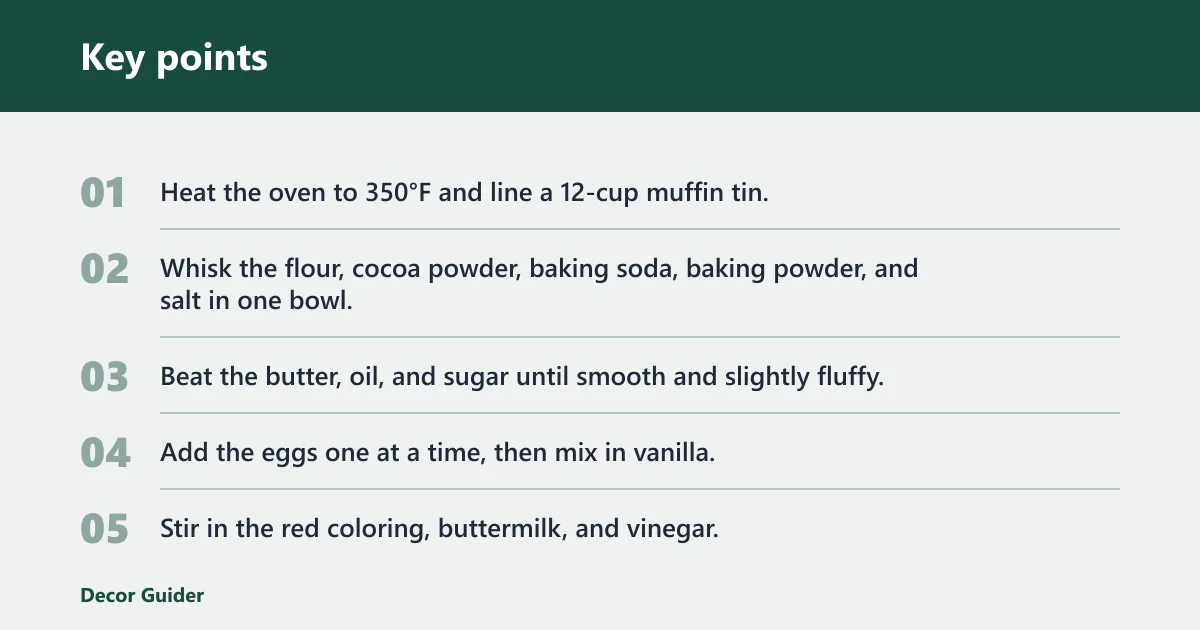
- Heat the oven to 350°F and line a 12-cup muffin tin.
- Whisk the flour, cocoa powder, baking soda, baking powder, and salt in one bowl.
- Beat the butter, oil, and sugar until smooth and slightly fluffy.
- Add the eggs one at a time, then mix in vanilla.
- Stir in the red coloring, buttermilk, and vinegar.
- Add the dry mixture in two additions and stop as soon as the batter looks combined.
- Divide the batter evenly among the liners.
Fill each liner about two-thirds full, or about 2 to 2 1/2 tablespoons of batter per cup. If you use a scale, aim for roughly 45 to 50 grams per liner. That leaves room for rise without overflow. If the batter looks thin, that is normal for red velvet; the liners should still hold the portion cleanly if you measure instead of guessing.
If the batter looks pale after the first mix, add 1/4 teaspoon gel coloring at a time, then stir once and check again. The color deepens fast, and extra mixing at this stage can make the cupcakes tougher.
Liquid, gel, or paste coloring?
Liquid, gel, and paste all work, but they do different jobs. Liquid coloring is easy to measure and spreads quickly, yet it can dilute the batter if you use too much. Gel or paste gives a stronger red hue with less added liquid, which helps if you want a deeper Valentine’s red.
Nigella recommends paste rather than the liquid coloring. The Noshery uses 1/2 tsp red gel-paste food color, while Live Well Bake Often uses 1 tablespoon of red liquid food coloring. That spread shows why you should adjust by color strength, not by one universal number.
How do you bake and cool them?
Bake red velvet cupcakes at 350°F until the tops spring back and a toothpick comes out with a few moist crumbs. Most standard cupcakes need about 18 to 22 minutes, depending on pan size, batter depth, and how dark your pan is. Pull them before the centers dry out. For a general baking reference on cupcake bake times and oven temperature, see King Arthur Baking’s cupcake guide.
Bake and cool
- Place the tin on the center rack.
- Bake until the centers set and the tops no longer look wet.
- Check the middle cupcake first, since it bakes slowest.
- Cool in the pan for 5 minutes.
- Move cupcakes to a wire rack and cool completely before frosting.
Do not frost warm cupcakes. Even a slightly warm center can soften cream cheese frosting and make it slide. If the tops feel warm to the touch, give them more time on the rack.
Picture a small Valentine’s box with six cupcakes on a warm kitchen counter. If the frosting looks loose after piping, the cupcakes are still releasing heat. Chill the frosted box for about 10 to 15 minutes, then add any final decoration.
Red velvet troubleshooting table
This table covers the failures that show up most often: pale color, dense crumb, greasy bottoms, overflow, and frosting that turns soft in a warm room. Use the likely cause to find the quickest fix, then apply the prevention step on the next batch.
| Problem | Likely cause | Exact fix | Prevention |
|---|---|---|---|
| Pale or brown-red cupcakes | Too little coloring or too much cocoa | Add 1/4 teaspoon gel coloring to the batter and mix once, or reduce cocoa to 1 tablespoon next time | Measure the coloring before mixing and choose one type, not a mix of several |
| Dense crumb | Overmixing after adding flour | Stop mixing as soon as the dry streaks disappear; do not beat the batter smooth | Fold by hand for the final additions |
| Greasy bottoms | Too much oil or underbaked centers | Bake 2 to 3 minutes longer, then cool on a rack, not in the pan | Measure oil carefully and check doneness with a tester |
| Overflowed liners | Filled past two-thirds full | Before baking, scoop the extra batter into a spare liner or make one mini cupcake; do not trim the crown after baking | Use a scoop and portion evenly |
| Runny frosting | Cream cheese too soft or frosting too warm | Chill the bowl for 15 minutes, then beat in 1/4 cup powdered sugar | Use brick cream cheese at room temperature, not tub cream cheese; Live Well Bake Often notes that cream cheese that’s in a tub usually makes runny frosting. For storage guidance, see FoodSafety.gov’s cold storage chart and Bon Appétit’s cream cheese frosting storage guide. |
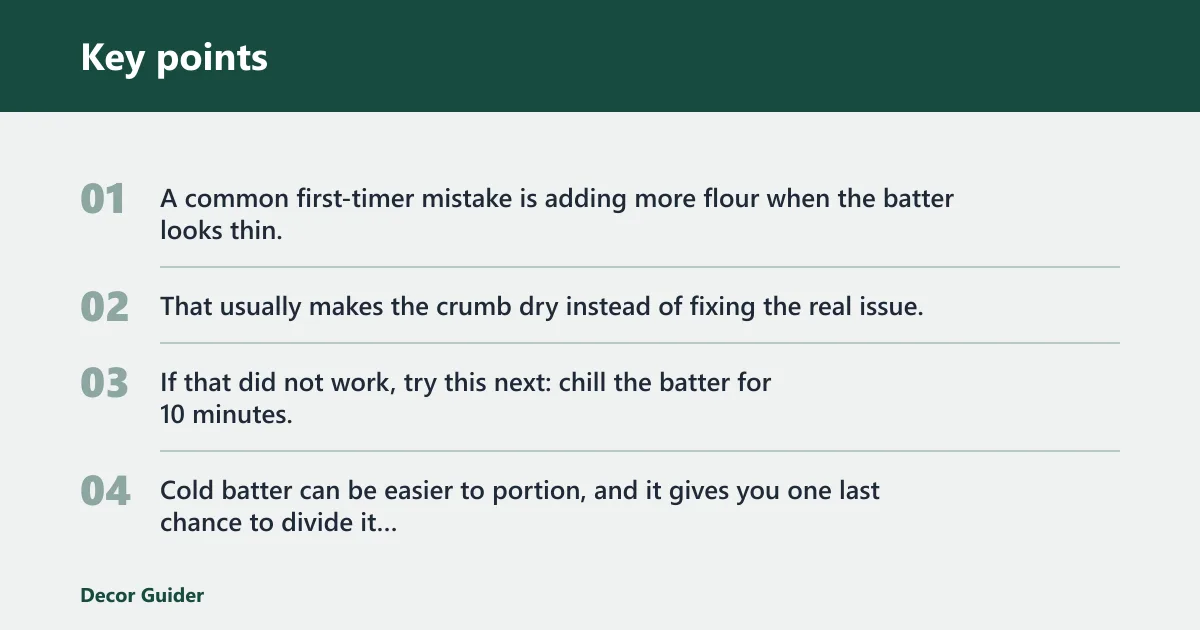
A common first-timer mistake is adding more flour when the batter looks thin. That usually makes the crumb dry instead of fixing the real issue, which is often under-mixing of the wet ingredients or a need for a little more coloring, not more flour.
If that did not work, try this next: chill the batter for 10 minutes, then recheck the color and texture before baking. Cold batter can be easier to portion, and it gives you one last chance to divide it evenly.
How do you frost and decorate them?
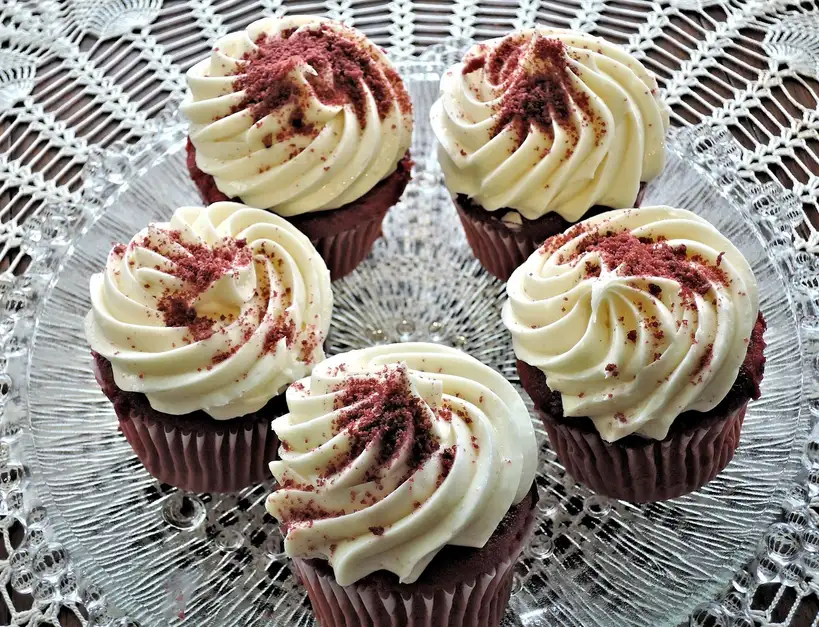
Cream cheese frosting is the default topping for red velvet because its tang matches the cocoa and buttermilk. It also gives you a clean white finish that looks sharp against the red crumb. Use brick cream cheese at room temperature so the frosting whips smooth and holds shape. For party presentation ideas, pair the frosting with a simple red accent and a box that travels well, especially if you are using the red velvet cupcake ideas link as your styling reference.
Make the frosting
- Beat the cream cheese and butter until smooth.
- Add vanilla and salt.
- Mix in powdered sugar a little at a time.
- Beat just until fluffy and pipeable.
- Chill 10 to 15 minutes if the frosting feels soft.
Veronika’s Kitchen uses 8 ounces cream cheese in the frosting, and Nigella’s recipe notes chocolate sprinkles for decoration. Use either a piping bag with a star tip or a small offset spatula. A smooth swirl, a few sprinkles, or one red sugar heart looks cleaner than a heavy pile of candy.
Simple finishing ideas
- Pipe one centered swirl and stop there.
- Dust the top edge with red sanding sugar.
- Finish each cupcake with one candy heart.
- Use a narrow ribbon around the cupcake box for gifting.
If the kitchen is warm and the frosting starts to slump after piping, chill the frosted cupcakes for 10 minutes, then pipe a second small rosette on top if needed. That gives the surface more structure without adding a thick, heavy layer.
What mistakes should you avoid?
The fastest way to protect texture and appearance is to avoid the four failures that matter most: overmixing, overfilling, frosting warm cakes, and ignoring ingredient temperature. Each one changes the final result in a visible way.
Common mistakes
- Do not overmix after the flour goes in.
- Do not fill the liners above two-thirds full.
- Do not frost until the cupcakes are fully cool.
- Do not use cold cream cheese if you want smooth frosting.
- Do not skip vinegar, since it supports the classic tang and color response.
White vinegar or cider vinegar appears in many red velvet formulas because it works with the leavening and supports the color balance. Hey Mom! What’s Cooking? uses 1 tablespoon white vinegar, and Nigella includes 1 teaspoon cider vinegar in the cupcakes. The amount is small, but it matters.
How do you scale them for a small Valentine’s batch?
You can scale red velvet cupcakes cleanly for 6, 12, or 24 servings if you keep the same ratio and measure carefully. For a small date night, six cupcakes is enough. For a standard gift box, 12 works well. For a larger gathering, 24 gives you two dozen with room for one or two extras.
| Ingredient | 6 cupcakes | 12 cupcakes | 24 cupcakes |
|---|---|---|---|
| Cake flour | 5/8 cup | 1 1/4 cups | 2 1/2 cups |
| Unsweetened cocoa powder | 2 1/4 teaspoons | 1 1/2 tablespoons | 3 tablespoons |
| Baking soda | 3/8 teaspoon | 3/4 teaspoon | 1 1/2 teaspoons |
| Baking powder | 1/4 teaspoon | 1/2 teaspoon | 1 teaspoon |
| Fine salt | 1/4 teaspoon | 1/2 teaspoon | 1 teaspoon |
| Unsalted butter | 1/4 cup | 1/2 cup | 1 cup |
| Neutral oil | 1/4 cup | 1/2 cup | 1 cup |
| Granulated sugar | 6 tablespoons | 3/4 cup | 1 1/2 cups |
| Eggs | 1 large egg | 2 large eggs | 4 large eggs |
| Vanilla extract | 1/2 teaspoon | 1 teaspoon | 2 teaspoons |
| Red liquid food coloring | 1 1/2 teaspoons | 1 tablespoon | 2 tablespoons |
| Buttermilk | 1/2 cup | 1 cup | 2 cups |
| Vinegar | 1/2 teaspoon | 1 teaspoon | 2 teaspoons |
| Brick cream cheese | 4 ounces | 8 ounces | 16 ounces |
| Unsalted butter for frosting | 1/4 cup | 1/2 cup | 1 cup |
| Powdered sugar | 1 1/2 to 1 3/4 cups | 3 to 3 1/2 cups | 6 to 7 cups |
Use the 6-cup batch for a small Valentine’s dinner, the 12-cup batch for gifting, and the 24-cup batch for a party tray. Keep the oven temperature the same and rotate the pans halfway through if both tins sit on the same rack. For gifting and storage planning, the Valentine’s Day link also helps you plan how many boxes you need.
Frequently asked questions
How do I make red velvet cupcakes for Valentine’s Day?
Use a small amount of cocoa, a reliable red coloring, and buttermilk for tenderness, then finish with cream cheese frosting and a simple red accent. Bake at 350°F until the centers are set and cool completely before decorating. That gives you the classic Valentine’s look without a dry crumb.
What makes red velvet cupcakes moist and not dry?
Oil, buttermilk, and careful mixing do most of the work. Oil keeps the crumb tender, while buttermilk adds acidity and softness. Use only enough flour to bring the batter together, and stop mixing as soon as the dry streaks disappear.
Can I use gel food coloring instead of liquid in red velvet cupcakes?
Yes. Gel or paste usually gives stronger color with less added liquid, so it often helps when you want a deeper red. Start with a small amount, mix once, and add more only if the batter still looks brown-red rather than Valentine’s red.
Do red velvet cupcakes need cream cheese frosting?
No, but cream cheese frosting is the classic match because its tang pairs well with cocoa and buttermilk. If you choose another frosting, keep it stable enough to hold a swirl and balance the slight tang in the cake.
How long do red velvet cupcakes bake?
Most bake in about 18 to 22 minutes at 350°F. Start checking near the 18-minute mark. The tops should spring back lightly, and a tester should come out with a few moist crumbs, not wet batter.
Can I make red velvet cupcakes ahead of Valentine’s Day?
Yes. Bake the cupcakes a day ahead, cool them completely, and store them covered. Frost the day you plan to serve them for the cleanest look. If you need to frost early, chill them and keep them refrigerated until 30 minutes before serving.
How do I keep red velvet cupcakes from overflowing?
Fill each liner about two-thirds full and use a standard 12-cup muffin tin with paper liners. If your batter seems generous, bake a small test cupcake first. That gives you a read on the rise before you commit the whole batch.
Can I turn red velvet cupcake batter into a cake?
Yes. Use the same batter in one or two round cake pans, but check the bake time earlier because thicker pans need a different schedule than cupcakes. Start testing at 25 minutes for thinner layers and continue until the center springs back.
Do red velvet cupcakes need to be refrigerated?
Yes, if they are frosted with cream cheese frosting. Refrigerate them in a covered container, then let them sit at room temperature for 20 to 30 minutes before serving. Unfrosted cupcakes can stay covered at room temperature for a short time, but frosting changes the storage rule.
Products related to this article
Sponsored / affiliate links. As an Amazon Associate I earn from qualifying purchases. I may earn additional commission from eligible campaigns.