

Canning pickles is a simple process of using a hot water bath to seal jars of fresh cucumbers and brine. This proven method ensures your homemade pickles stay crisp, safe, and delicious on the shelf for up to a year, giving you pantry security with great flavor.
Do you love the satisfying crunch of a good pickle? Store-bought jars can be expensive and often lack that perfect homemade zing. Maybe you have a huge harvest of cucumbers and want to save them for later. Learning how to can pickles might seem complicated, like something only grandmas do perfectly. Don’t worry! It is actually a straightforward, repeatable process that anyone can master with the right steps. We are going to break down everything you need, from preparing your jars to sealing them tight. Get ready to fill your shelves with crisp, tangy goodness you made yourself!
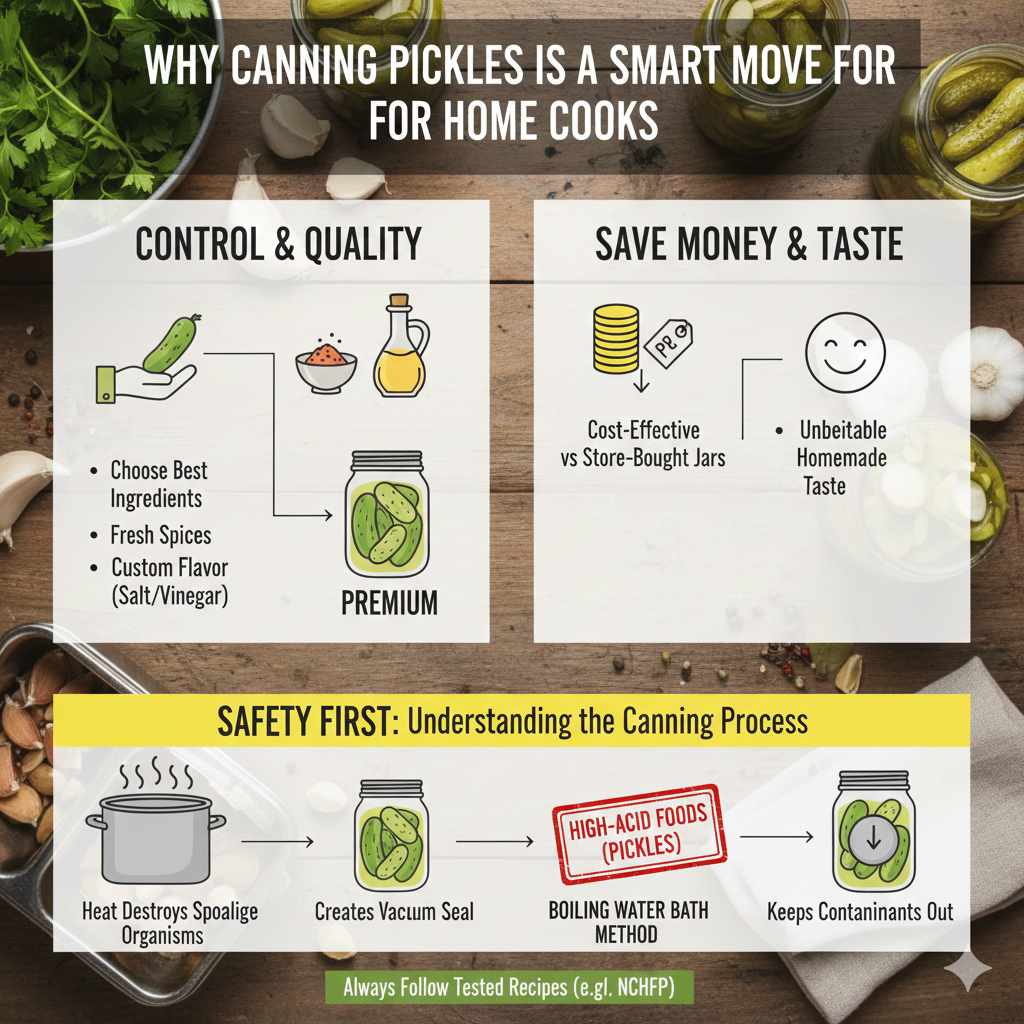
Why Canning Pickles is a Smart Move for Home Cooks
Canning is more than just a way to preserve food; it’s about control and quality. When you can your own pickles, you choose the best cucumbers, the freshest spices, and the exact amount of salt and vinegar you like. It saves money over buying premium jars, and nothing beats the taste of a pickle made exactly how you want it.
Safety First: Understanding the Canning Process
When we talk about canning, we are using heat to destroy spoilage organisms (like yeasts and molds) and create a vacuum seal. This vacuum seal pulls the lid down tight, keeping air—and potential contaminants—out. For high-acid foods like pickles (because of the vinegar), the standard method is the boiling water bath canning. This method is reliable, especially when following tested recipes, such as those provided by the National Center for Home Food Preservation (NCHFP).
Gathering Your Essential Canning Tools
Before you even slice your first cucumber, make sure your kitchen station is ready. Having the right tools makes the process smooth and enjoyable. Think of this like prepping your toolkit before working on an engine—you need the right wrench for the job!
Must-Have Equipment for Canning Pickles
- Canning Jars and Lids: Use only jars specifically designed for canning (like Mason or Ball jars). Check for chips or cracks.
- Water Bath Canner: This is a large, deep pot with a rack inside. The rack keeps the jars off the bottom of the pot and allows water to circulate underneath them.
- Jar Lifter: This specialized tool securely grips hot jars without you having to touch them. This is a major safety tool!
- Canning Funnel: A wide-mouth funnel helps pour the hot brine into the jars without spilling onto the rims (which ruins the seal).
- Bubble Remover/Headspace Tool: This plastic tool helps you slide down the side of the jar to release trapped air bubbles.
- Lid Wand or Tongs: To safely lift hot lids out of simmering water.
- Large Saucepan: For heating the pickling brine.
Step 1: Selecting and Preparing Your Cucumbers
The secret to a crisp pickle starts with the cucumber. You cannot use soft, old cucumbers and expect a great result. We are looking for firm, fresh produce.
Choosing the Right Cucumbers
For the best canning results, look for pickling cucumbers, often labeled as Kirby cucumbers. They are shorter, stubbier, and have thinner skins than slicing cucumbers.
- Freshness is Key: Use cucumbers harvested within 24 hours if possible. The longer they sit, the softer they become.
- Size Matters: Smaller cucumbers (4–6 inches) tend to pickle better and fit nicely in the jars.
- Do Not Refrigerate: Storing them in the fridge can sometimes soften the texture before you even start. Keep them cool but dry.
The Crucial Pre-Soak (The Crispness Trick)
Many experienced canners swear by a crisping soak. This helps draw out excess water and firm up the cucumber structure before it hits the brine.
- Trim off the blossom end of the cucumber. The blossom end contains enzymes that can soften the pickle later.
- Place cucumbers in a large bowl filled with ice water.
- Add 1/2 cup of pickling salt (or 1 tablespoon of pickling lime, if using).
- Soak for 2 to 4 hours, or even overnight in the refrigerator.
- Rinse thoroughly before proceeding to the next step.
Step 2: Preparing the Jars and Lids (Sanitation)
Clean jars are non-negotiable for safe canning. While modern canning guidelines often state that processing time above 10 minutes naturally sterilizes jars, it’s best practice, especially for beginners, to sanitize them first.
Cleaning and Heating Jars
You need everything hot when you fill the jars—hot jars, hot lids, and hot brine—to prevent thermal shock (jar breakage).
- Wash jars, bands, and lids in hot, soapy water. Rinse well.
- Place the clean jars upright on the rack inside your water bath canner.
- Fill the canner about two-thirds full with water, ensuring the jars are covered by at least an inch of water.
- Bring the water to a simmer (180°F / 82°C) and keep it hot until you are ready to fill them.
- Place the flat lids in a small saucepan of simmering (not boiling) water nearby. Keeping them warm softens the sealing compound. Do not boil the lids, as this can damage the seal.
Step 3: Making the Perfect Pickling Brine
The brine is what flavors and preserves the cucumbers. For safety, we must use a tested ratio of vinegar to water. Vinegar must have at least 5% acidity (50 grain strength) for safe canning.
Essential Brine Ingredients
While recipes vary widely, the base formula remains the same. Here is a reliable starter ratio for a basic dill pickle brine (adjust spice amounts to your taste):
| Ingredient | Quantity (for approximately 4 Pints) | Purpose |
|---|---|---|
| White Vinegar (5% acidity) | 3 cups | Preservation (acid content) |
| Water | 3 cups | Dilution |
| Canning Salt (Pickling Salt) | 1/4 cup | Flavor and texture |
| Dill Seed/Fresh Dill Heads | To taste | Flavor |
| Garlic Cloves | 4-8 cloves (peeled) | Flavor |
Crucial Note on Salt: Never use iodized table salt. The iodine and anti-caking agents can cause the brine to become cloudy and may affect the preservation process. Always use canning or pickling salt.
Brine Preparation Steps
- In your large saucepan, combine the vinegar, water, and canning salt.
- Bring the mixture to a full, rolling boil, stirring until the salt is completely dissolved.
- Reduce the heat to keep it hot (but not boiling rapidly) while you pack the jars.
Step 4: Packing the Jars
This is where the cucumber, spices, and brine come together. Remember, pack tightly, but leave room at the top for the seal!
Packing Sequence
- Remove one hot jar from the canner using the jar lifter and empty the water back into the pot. Place the jar on a towel or cutting board (never a cold counter surface).
- Add your desired flavoring agents to the bottom of the jar. A good start is 1-2 cloves of garlic and 1 teaspoon of dill seed (or a sprig of fresh dill) per pint jar.
- Pack the cucumbers into the jar tightly, standing them upright or layering them sideways, depending on your preference. Pack them firmly so they don’t float during processing.
- Using the canning funnel, carefully pour the hot brine over the cucumbers, ensuring they are completely submerged.
- Check the Headspace: This is critical. Headspace is the empty space between the top of the liquid and the rim of the jar. For pickles, you need exactly 1/2 inch of headspace. Use your bubble remover tool to gently run around the inside of the jar to release any trapped air pockets. If needed, add a bit more hot brine to reach the 1/2 inch mark.
- Wipe the rim of the jar thoroughly with a clean, damp cloth. Any residue (salt, oil, or food) will prevent a proper seal.
- Place a warm, clean lid onto the jar and screw the band on until it is “fingertip tight.” This means tight enough to hold the lid in place, but not overly cranked down, which can prevent air from escaping during processing.
Step 5: The Water Bath Processing Time
This step applies the necessary heat treatment to ensure safety and a long shelf life. You must use a tested processing time for your specific recipe and jar size.
Setting Up the Canner
- Using the jar lifter, carefully place the filled jars onto the rack inside the canner. Ensure the jars are not touching each other.
- Make sure the water level covers the tops of the jars by at least 1 to 2 inches. Add boiling water if necessary.
- Place the lid on the canner.
- Turn the heat to high and bring the water to a full, rolling boil.
- Start the Timer ONLY when the water reaches a full, rolling boil. If you start too soon, your pickles won’t be processed long enough.
Processing Times for Pickles (Pints and Quarts)
Processing times vary based on altitude. Always add extra time if you live above sea level to compensate for lower boiling temperatures. For reliable guidelines, consult resources like the USDA guidelines. The times below are standard sea-level recommendations for bread-and-butter or dill pickles.
| Jar Size | Processing Time (Sea Level) | Processing Time (1,001–3,000 ft Altitude) |
|---|---|---|
| Pints (16 oz) | 10 minutes | 12 minutes |
| Quarts (32 oz) | 15 minutes | 17 minutes |
Altitude Adjustment Note: For every 1,000 feet increase in altitude above sea level, you need to add 5 minutes for boiling water bath canning processes over 20 minutes, and often 1-2 minutes for shorter times, as noted above. Always check official tables if you live in high elevations.
Step 6: Cooling, Checking Seals, and Storing
Patience is the final ingredient! Once the processing time is up, you need to let the jars cool down undisturbed.
Cooling Down Safely
- Once the time is up, turn off the heat. Carefully remove the canner lid (tilt it away from you to avoid steam burns).
- Let the jars sit in the hot water for 5 minutes before removing them. This helps prevent “siphoning” (loss of liquid).
- Using the jar lifter, remove the jars one by one. Lift them straight up, keeping them level. Place them on a folded towel or a wooden cutting board, leaving at least an inch of space between jars.
- Do not tilt, tap, or tighten the bands. Let them cool undisturbed for 12 to 24 hours. You should hear the satisfying “pop” as the vacuum seals form.
Checking the Seal
After 24 hours, check every jar. A proper seal is essential for safety.
- Press the center of the lid. If it is concave (curved downward) and does not move or pop when pressed, it is sealed.
- If a jar did not seal, place it in the refrigerator immediately and eat those pickles within a few weeks, or re-process them within 24 hours using a new, clean lid.
Storage
Once sealed, remove the screw bands (rings). Storing jars without the bands prevents false seals from forming and allows you to easily spot a failed seal later. Store your canned pickles in a cool, dark, dry place. Properly canned pickles are best used within one year for peak quality, though they remain safe longer if the seal holds.
Troubleshooting Common Pickling Problems
Even when following instructions precisely, sometimes issues arise. Here are quick fixes for beginner snags, similar to diagnosing why a car might idle rough.
Cloudy Brine
This is usually caused by using non-canning salt (iodized salt), using soft cucumbers, insufficient sterilization, or cooking the jars too long. If the seal is firm, the pickles are safe to eat, though they look less appealing.
Shriveled or Soft Pickles
This is the biggest disappointment! Causes include:
- Using old or wrong varieties of cucumbers.
- Not trimming the blossom end off the cucumber.
- Not using the ice bath soak.
- Using iodized salt instead of pickling salt.
- Processing for too long (overcooking them).
Lids Not Sealing
If a lid fails to seal after 24 hours, the easiest fix is to try reprocessing it. Remove the lid, wipe the rim, replace the lid with a brand new, hot lid, adjust the band to fingertip tight, and run it through the water bath again using the full processing time.
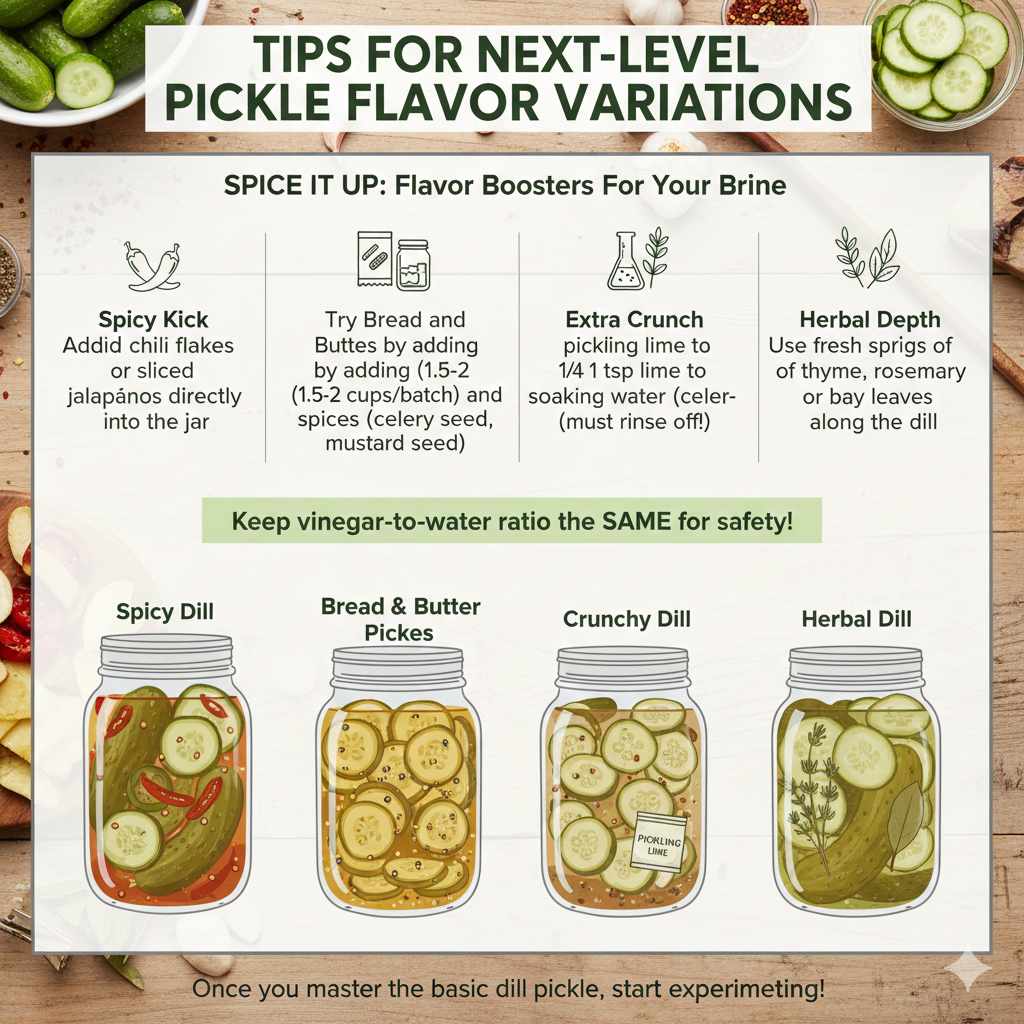
Tips for Next-Level Flavor Variations
Once you master the basic dill pickle, you can start experimenting. Remember, flavor additions are safe as long as you keep the vinegar-to-water ratio the same for safety.
Spice It Up: Flavor Boosters for Your Brine
- Spicy Kick: Add dried chili flakes or sliced jalapeños directly into the jar.
- Sweetness: Try Bread and Butter Pickles by adding sugar (usually 1.5 to 2 cups per batch of brine) and spices like celery seed and mustard seed.
- Extra Crunch: Add 1/4 teaspoon of pickling lime (calcium hydroxide) to your soaking water (must be rinsed off completely before brining!).
- Herbal Depth: Use fresh sprigs of thyme, rosemary, or bay leaves along with the dill.
Frequently Asked Questions (FAQ) About Canning Pickles
Q1: Can I use regular table salt instead of pickling salt?
No. It is strongly recommended that you only use canning or pickling salt. Table salt contains anti-caking agents and iodine, which can make your pickle brine cloudy and potentially interfere with safe long-term preservation.
Q2: How long do homemade canned pickles last on the shelf?
If sealed correctly using the water bath method, properly canned pickles are safe to consume for up to one year when stored in a cool, dark place. They will maintain their best flavor and texture within the first 6–9 months.
Q3: Do I really need to trim the blossom end of the cucumber?
Yes, trimming the blossom end (the end opposite the stem) is highly recommended. This end contains enzymes that can cause your pickles to soften over time, defeating your goal of a crisp result.
Q4: What is “headspace” and why is 1/2 inch important?
Headspace is the empty space between the top of the food/liquid and the jar rim. For pickles, 1/2 inch is required so that as the jar cools, the vacuum pulls the liquid up slightly, creating a strong seal without sucking food residue onto the rim.
Q5: My jars sealed, but I want to store them in the fridge right away. Can I?
Yes, you can store them in the fridge right away. However, they will not achieve the long shelf stability that the canning process provides. If you skip the processing step entirely and just pack them in brine and refrigerate, they are “refrigerator pickles” and must be eaten within 2–3 weeks.
Conclusion: Your Path to Perfect Homemade Pickles
Canning pickles isn’t just a kitchen skill—it’s a satisfying way to turn fresh cucumbers into crunchy, flavorful jars you can enjoy all year long. By following a tested water bath method, using quality ingredients, and paying attention to small but important details like headspace, acidity, and proper sealing, you’re setting yourself up for safe, delicious success. What may feel intimidating at first quickly becomes a repeatable, confidence-building process that rewards you every time you hear that telltale pop of a sealed lid.
Whether you’re preserving a backyard harvest, saving money, or simply chasing that ideal balance of tang and crunch, homemade canned pickles give you full control over flavor and quality. Start with the basics, trust the process, and then have fun experimenting once you’ve mastered the fundamentals. Before long, your pantry shelves will be lined with jars that tell a story of care, patience, and seriously good pickles—made exactly the way you like them.


