Quick Summary (Top of Article)
The effortless way to clean a skillet involves immediately rinsing it while warm, using hot water and a soft sponge/nylon brush, drying it completely on the stove, and applying a thin layer of oil (for cast iron). Avoid harsh soaps and letting stuck food sit.
We’ve all been there. You just cooked a fantastic meal, but looking at the greasy, stuck-on mess in your favorite frying pan steals the joy away. Cleaning skillets can feel like a chore, especially if you own cast iron or delicate non-stick cookware. Don’t worry! Knowing the right tricks makes the job fast and easy. As someone who loves keeping my tools in top shape, I’m here to show you the simple, proven steps. Forget scrubbing for ages; we are making cleanup effortless. Ready to get your pan shining without breaking a sweat? Let’s dive into the simple secrets.
Why Skillet Cleaning Seems Hard (And Why It Doesn’t Have To Be)
Many people run into trouble cleaning skillets because they use the wrong tools or wait too long. Different materials—like cast iron, stainless steel, or non-stick—need slightly different care. Using steel wool on Teflon is a recipe for disaster, just like soaking cast iron overnight is a big no-no.
The biggest mistake beginners make is letting cooked-on bits harden into cement. Once that happens, scrubbing becomes a battle. We are going to skip that battle entirely. Our goal is simple: clean the surface quickly so your skillet is ready and waiting for the next great meal.

Your Essential Skillet Cleaning Toolkit
Before we start the process, gather your gear. You don’t need complicated chemicals or heavy-duty power tools. Simple, common items work best. Having the right defense makes the clean-up quick.
Make sure you have these on hand:
- Hot Water (The hotter, the better)
- Soft Sponge or Non-Abrasive Scrubber (For most pans)
- Nylon Bristle Brush (Excellent for safely scrubbing)
- Dish Soap (Use sparingly, especially on seasoned pans)
- Paper Towels or Clean Dish Towel (For drying)
- Coarse Salt and Oil (ONLY needed for stubborn cast iron messes)
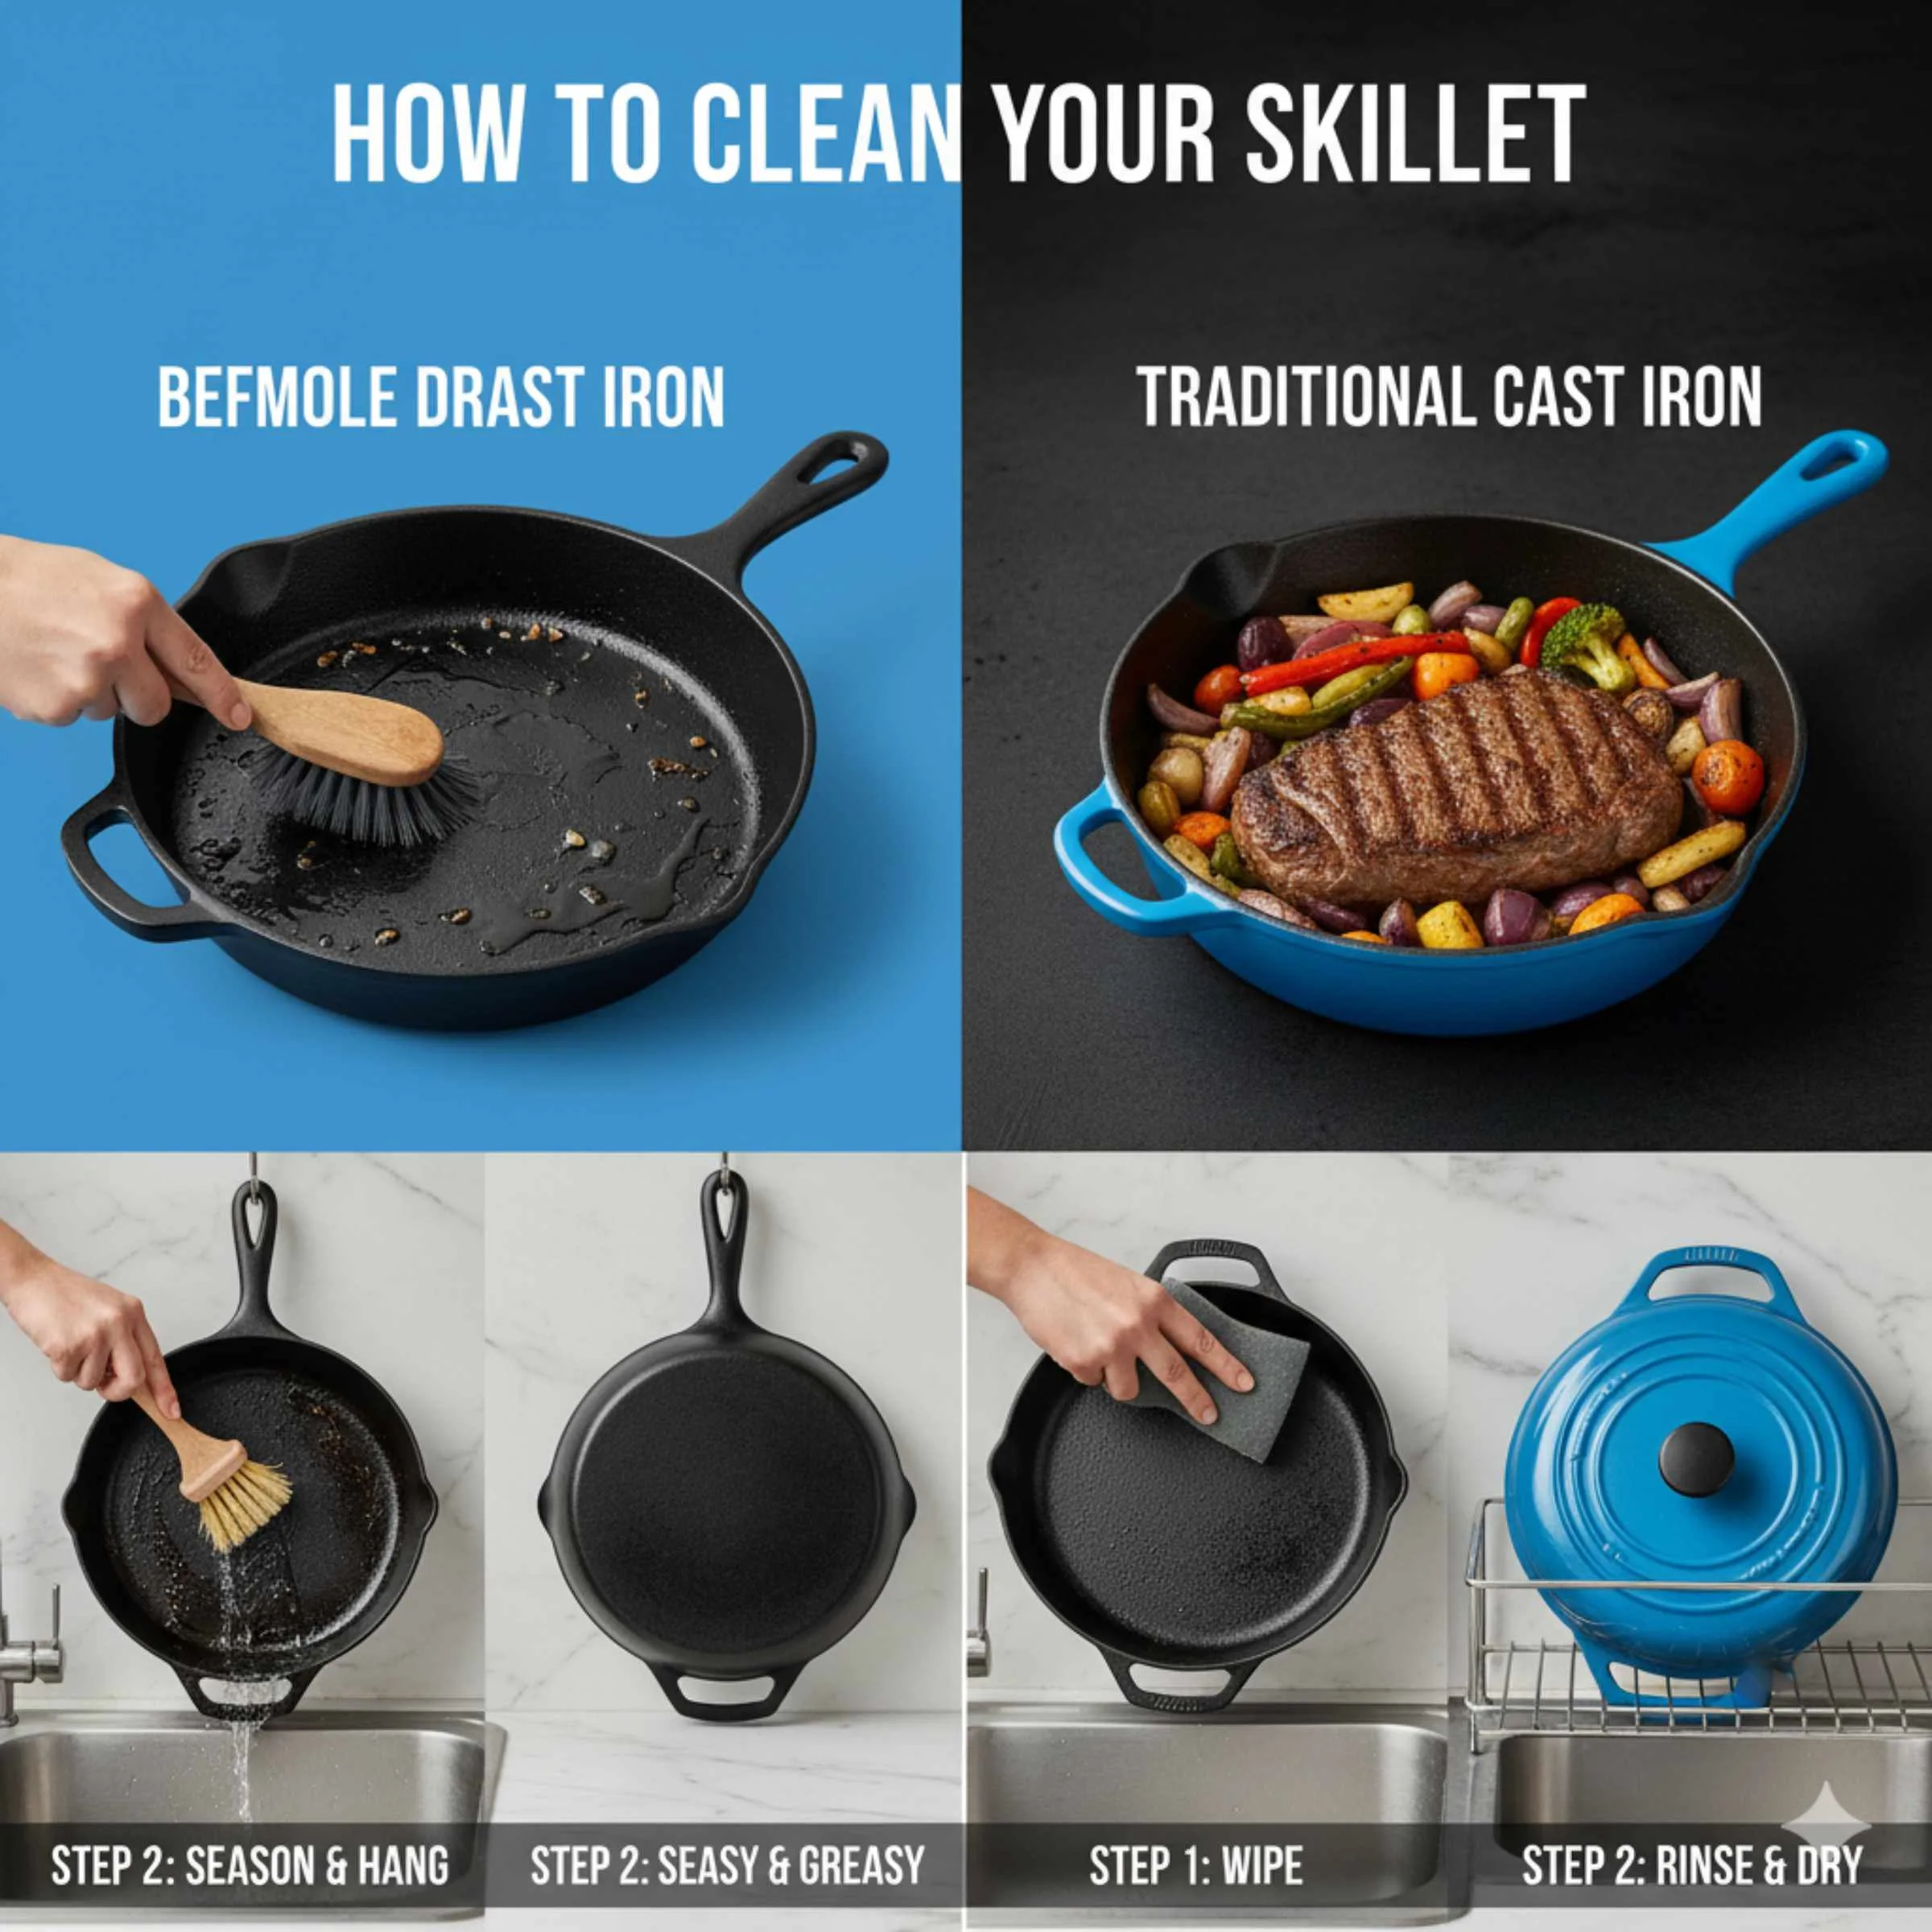
The Proven Effortless Cleaning Method: Step-by-Step Guide
This method prioritizes speed and material safety. We tailor the steps slightly depending on when you clean the pan (right after cooking or later), but the principle remains the same: tackle the mess gently but immediately.
Step 1: Timing is Everything (Clean It Warm!)
The absolute best time to clean your skillet is shortly after you finish cooking, while it still retains some heat. Food debris hasn’t had a chance to bond tightly with the metal surface yet.
- Remove any large food scraps from the pan and discard them in the trash (not down the drain!).
- Let the pan cool slightly so you can handle it safely, but it should still be warm to the touch—think hot tea vs. boiling water.
Pro Tip: If you let the pan cool completely before cleaning, the stuck food hardens. If you clean it while it’s scorching hot, you risk warping stainless steel or damaging some non-stick coatings.
Step 2: The Hot Water Flush
This step does most of the heavy lifting. Hot water helps dissolve grease and loosens any lightly stuck particles.
- Hold the warm skillet under a stream of very hot running tap water.
- Use the water pressure to start dislodging any loose bits.
Step 3: Gentle Scrubbing for General Cleaning
For daily cleaning where food hasn’t fused to the metal, you rarely need more than warm water and a gentle scrubber.
- Apply a drop or two of mild dish soap to your soft sponge or nylon brush.
- Gently scrub the inside and outside of the pan. For most stainless steel or ceramic pans, this is enough to make it sparkle.
- Rinse thoroughly under hot water to ensure all soap residue is gone.
Step 4: Dealing with Stuck-On Messes (The Simmer Trick)
Sometimes, even a warm rinse isn’t enough. If you have sticky residue, use the gentle simmer method. This works great for stainless steel and standard aluminum pans, but be careful with delicate non-stick—keep the heat low.
- Fill the bottom of the skillet with about half an inch of water.
- Place the pan back on the stove over medium-low heat.
- Allow the water to come to a gentle simmer. Watch it closely!
- As it simmers (usually 3–5 minutes), use a wooden spoon or plastic spatula to gently nudge the stuck food. It should start lifting right off.
- Turn off the heat, let the water cool slightly, and pour it out. Then proceed to Step 5.
This technique is related to deglazing, a classic cooking method often used to build flavor in sauces. According to cooking experts, applying gentle heat helps break down food polymers preventing hard scrubbing (Source: Serious Eats methodology).
Step 5: Drying Immediately and Completely (Crucial Step!)
This is perhaps the most important step to prevent future problems, especially rust on cast iron or water spots on stainless steel.
- Right after rinsing, dry the skillet thoroughly with a clean dish towel or paper towels. Get into the corners.
- The Final Dry: Place the wiped-down skillet back on the stove burner over low heat for 2–3 minutes. You are ensuring every speck of moisture has evaporated. If you see steam rising, wait a moment longer.
Material-Specific Care: Cast Iron vs. Non-Stick
While the general steps above get you 90% of the way there, different surfaces demand specific protective measures. Ignoring these differences is what leads to ruined pans.
Caring for Cast Iron Skillets (The Rust Fighters)
Cast iron is incredibly durable but sensitive to soap and prolonged soaking. The goal here is to protect the “seasoning”—a layer of baked-on oil that prevents rust and creates a natural non-stick surface.
The Cast Iron Deep Clean (For The Truly Stuck Jobs)
If you have majorly scorched food on your cast iron that the simmer trick didn’t fix, use this non-soap method:
- Heat the pan slightly.
- Pour in about a half cup of coarse kosher salt.
- Use a folded paper towel to scrub the salt around the pan. The salt acts as a gentle abrasive that removes stuck bits without stripping the seasoning underneath.
- Dump out the salt, wipe clean.
Post-Cleaning Oiling (Essential Maintenance)
After drying your cast iron completely (Step 5), you must re-oil it:
- Pour a pea-sized amount of cooking oil (like vegetable or flaxseed oil) into the warm pan.
- Use a paper towel to wipe that oil all over the interior surface until the pan looks dry again—you want a microscopic layer, not a puddle.
- Store the pan uncovered.
Caring for Non-Stick Skillets (The Gentle Approach)
Non-stick coatings (like Teflon or ceramic) are easily scratched. Never use metal utensils, steel wool, or abrasive scouring pads. They also hate harsh dishwasher cycles.
- Use only soft sponges or microfiber cloths.
- If you must use soap, choose a very mild one.
- Avoid the simmer trick (Step 4) unless the stuck food is minimal, as prolonged high heat exposure can degrade the coating over time. Consult manufacturer guidelines, like those provided by the EPA on cookware safety (EPA official site), when considering chemical exposure or material safety for your home).
Caring for Stainless Steel Skillets (The Shiny Finish)
Stainless steel is tough but can develop a rainbow tint or stuck-on rings from high-heat searing. The simmer trick (Step 4) is your best friend here.
- If stubborn polymerized grease remains, a paste made of baking soda and a tiny bit of water can gently lift stains without scratching the metal. Rub gently, rinse well, and dry immediately.
Skillet Cleaning Material Comparison Table
To keep things clear, here is a quick reference guide on what cleaning tools are safe for your pan type:
| Skillet Material | Best Scrubber | Dish Soap Use | Drying Requirement |
|---|---|---|---|
| Cast Iron | Nylon brush, Coarse Salt | Rarely (If absolutely necessary) | Immediate heat-drying + Oiling |
| Non-Stick (Teflon/Ceramic) | Soft Sponge, Microfiber Cloth | Mildly is okay | Towel dry completely |
| Stainless Steel | Scrub Pad (non-metal), Baking Soda | Regularly safe | Immediate heat-drying to prevent spotting |
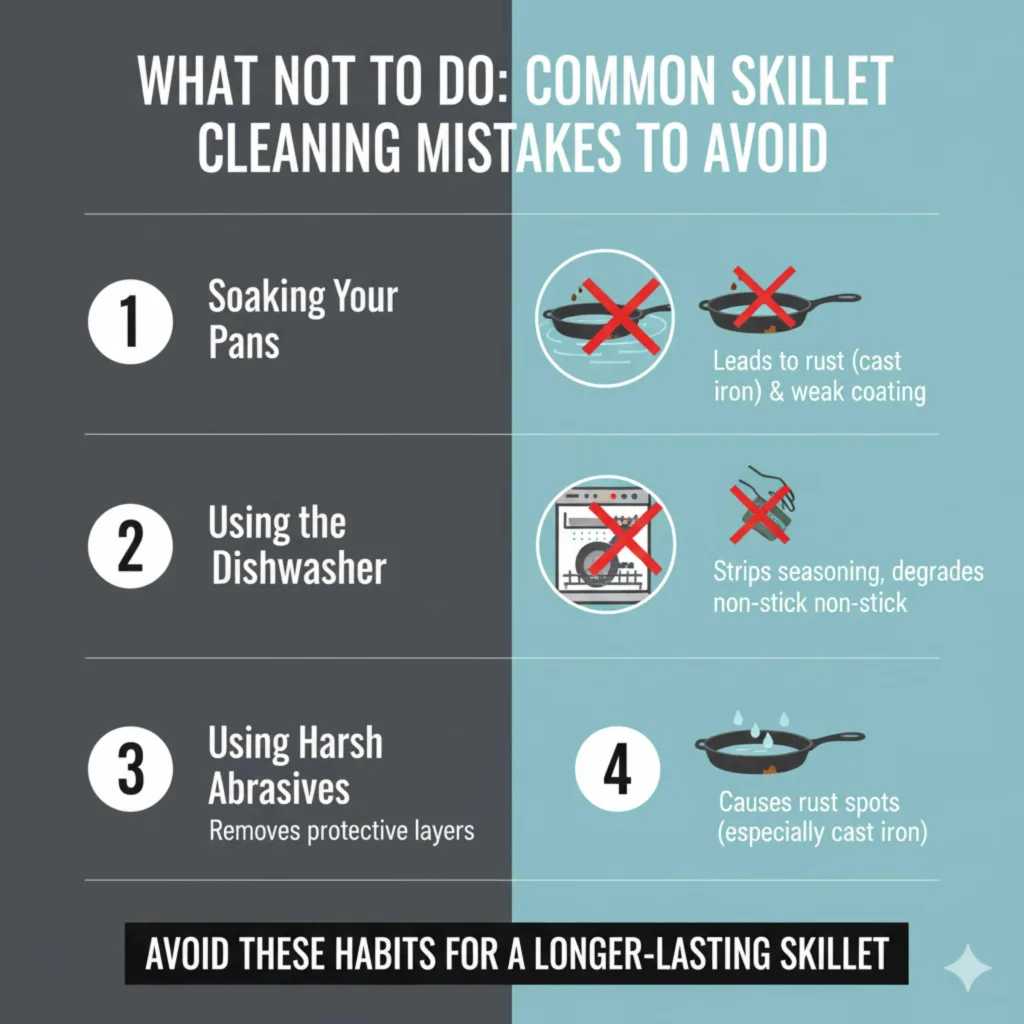
What NOT To Do: Common Skillet Cleaning Mistakes To Avoid
Knowing what to avoid is just as important as knowing what to do. These habits will shorten your skillet’s life span and make cleaning harder in the long run.
Mistake 1: Soaking Your Pans
Unless you have a modern, well-seasoned stainless steel pan, soaking is dangerous. For cast iron, soaking introduces moisture that leads to flash rust. For non-stick, soaking can weaken the coating’s adhesion.
Mistake 2: Using the Dishwasher
Dishwashers are harsh environments. The intense heat, prolonged exposure to water, and strong detergents strip seasoning from cast iron instantly and degrade non-stick coatings quickly. It’s an easy route to a ruined pan.
Mistake 3: Using Harsh Abrasives
Steel wool, metal scrapers, and certain industrial cleaners aggressively remove protective layers. If you need heavy scrubbing power, use physics (heat/water) or natural abrasives (salt) first.
Mistake 4: Air Drying
Never let your skillet air dry, especially cast iron. Even if you think it looks dry, residual moisture will cause rust spots within hours. Always use heat to finish the job.
Frequently Asked Questions (FAQ) About Skillet Cleaning
Q1: Can I use regular dish soap on my cast iron skillet?
A: Historically, soap damaged the seasoning. Modern, well-cured seasoning is much more robust; a tiny drop of mild soap used with a quick scrub is usually fine, but it’s best to rely on hot water and salt first.
Q2: How do I remove tough burnt residue from stainless steel quickly?
A: Use the “Simmer Trick.” Add an inch of water, heat until simmering, and gently scrape the burnt bits with a wooden spoon or plastic spatula. This loosens the hardened food safely.
Q3: Is it safe to put my non-stick pan in the dishwasher?
A: While some manufacturers claim certain non-stick pans are dishwasher safe, experts universally recommend handwashing. Dishwasher detergents are caustic and the cycle wears down the non-stick coating far faster.
Q4: My cast iron skillet has a slightly rusty spot now. How do I fix that?
A: Don’t panic! Scrub the rusty spot vigorously with steel wool or the salt scrub method until the bare metal shows. Wash it, dry it completely on the stove, and then immediately re-season that area (or the whole pan) with a light coat of oil.
Q5: What is the best oil to use for post-cleaning seasoning on cast iron?
A: Vegetable oil, canola oil, or flaxseed oil are popular choices. The key is using an oil with a high smoke point and applying it very thinly so it cures into a protective barrier rather than staying greasy.
Q6: If I forget to clean it and the food dries solid, what is my best bet?
A: Soak it—but gently, and only if it’s stainless steel or regular aluminum. For cast iron, use the simmer trick immediately when you get to it, even if it’s hours later. Soaking an already seasoned cast iron pan is better than forcefully scraping it off.
Maintaining Confidence with Your Cookware
Cleaning any piece of cooking equipment doesn’t have to be a source of kitchen dread. By adopting the habit of a quick, warm rinse immediately after use, you prevent 90% of potential cleaning headaches. Remember that your cookware is a tool meant to serve you, and a little proactive care goes a long way in keeping it functional and reliable for years.
For our cast iron friends, the routine simplifies to: Clean, Heat-Dry, Oil lightly. For your hard-working stainless steel and non-stick pans, the routine is: Warm Water Rinse or Gentle Simmer, Soft Scrub, and Towel-Dry Immediately. Consistent, gentle maintenance ensures your skillets perform perfectly every time you reach for them. You’ve got this!