Build your own side table with this easy guide! You’ll learn about tools, materials, and simple steps to create a functional and stylish piece of furniture for your home, even if you’re a complete beginner.
Ever feel like your living room or bedroom is missing that perfect little spot for your lamp, book, or coffee mug? A side table is the answer! But sometimes, finding the right one in stores can be tricky, or maybe you’re just looking for a project to get your hands on. Don’t worry! Building your own side table is totally doable, even if you’ve never picked up a tool before. We’ll walk through everything you need, step-by-step, so you can build a sturdy and good-looking side table that fits your space and style. Let’s get started on creating something great!
Getting Started: Essential Tools and Materials
Before we dive into building, let’s make sure you have everything you need. Think of this like checking your oil and tire pressure before a road trip – it keeps things running smoothly. Having the right tools and materials ready makes the whole process much easier and more enjoyable.
Must-Have Tools for Your Project
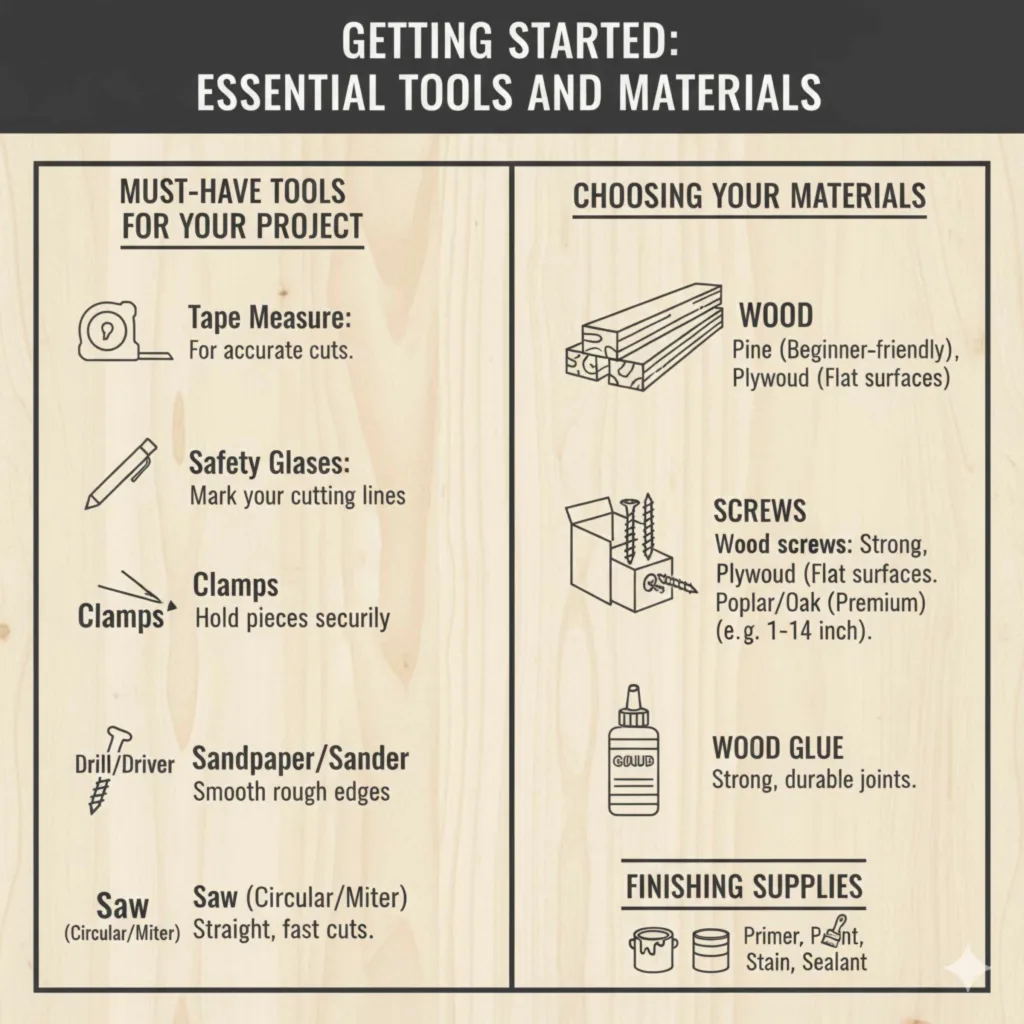
You don’t need a professional workshop to build a side table. A few basic tools will get the job done. Here’s a list of what you’ll likely need. If you don’t have them, many can be borrowed or are relatively inexpensive to pick up for a single project.
- Tape Measure: For accuracy in all your cuts and measurements.
- Pencil: To mark your cutting lines and assembly points.
- Safety Glasses: Always protect your eyes when working with tools, especially saws.
- Clamps: To hold pieces together securely while glue dries or while you’re screwing them together. Bar clamps or C-clamps work well.
- Screwdriver or Drill/Driver: A power drill makes driving screws much faster and easier. Make sure you have the right drill bits.
- Sandpaper or Orbital Sander: For smoothing out rough edges and preparing the surface for finishing. Start with a coarser grit (like 80 or 120) and finish with a finer grit (like 220).
- Saw: A handsaw is possible, but a circular saw or a miter saw will make straighter cuts and speed up the process. If using a circular saw, consider a guide for extra straightness. We found some great tips on using basic saws safely over at Family Handyman.
- Optional: A square (like a speed square or combination square) to ensure your cuts and assemblies are at a perfect 90-degree angle.
Choosing Your Materials
The type of wood you choose will affect the look, durability, and cost of your side table. For beginners, common and easy-to-work-with woods are ideal.
- Wood: Pine is a great choice for beginners. It’s inexpensive, lightweight, and easy to cut and sand. Plywood can also be an option for tabletops or shelves if you want a very stable, flat surface. You can usually buy pre-cut lumber at your local hardware store, which saves you some cutting time. For a more premium look, you could consider poplar or oak, but they are harder to work with and more expensive.
- Screws: Wood screws are best. Choose a length that will go through one piece of wood and securely into the other, without poking out the other side. For example, if you’re joining two 3/4-inch boards, a 1 1/4-inch screw is usually a good choice.
- Wood Glue: A strong wood glue is essential for creating durable joints.
- Finishing Supplies: This includes primer, paint, stain, or a clear sealant like polyurethane. You’ll also need brushes or rags for application.
Planning Your Side Table Design
Before cutting any wood, it’s super important to have a plan. This is like mapping out your route before you start driving. A simple side table design is perfect for a first project. We’ll aim for a common size and structure, but you can adjust these dimensions to fit your needs.
Simple Side Table Structure
A basic side table usually consists of:
- A Tabletop: The main surface.
- Four Legs: To support the tabletop.
- Apron (Optional but Recommended): These are boards that run between the legs, directly under the tabletop. They add a lot of stability and give you a place to attach the legs firmly.
- A Shelf (Optional): For extra storage.
Sketching and Measuring
Grab that pencil and paper! Draw out your table. Decide on the height (standard side tables are often between 20-24 inches high), the width of the tabletop, and how deep you want it. Think about whether you want a shelf and how high it should be. This sketch is your blueprint!
Example Dimensions for a Beginner Side Table:
| Component | Typical Dimensions | Notes |
|---|---|---|
| Tabletop | 18″ x 18″ (or 18″ x 24″) | Can be made from one larger piece or several smaller boards joined together. |
| Legs | 4 legs, each 20″ long | Standard lumber like 2x2s or 4x4s can be used. Adjust length for desired table height. |
| Apron Pieces | 4 pieces, each 3″ wide. Two will be approx. 15″ long (for width of top minus leg thickness x 2), two will be approx. 21″ long (for length of top minus leg thickness x 2). | Usually made from 1×4 lumber (which is actually 3/4″ x 3 1/2″). |
| Shelf (Optional) | 14″ x 18″ (or smaller than tabletop) | Cut to fit between the legs, leaving space for the apron and to avoid hitting the legs when attaching. |
Remember, these are just examples. Feel free to adjust them based on your needs and the materials you have. It’s always best to measure twice and cut once!
Step-by-Step Guide to Building Your Side Table
Alright, we’ve got our tools, our materials, and our plan. Now it’s time to get building! Follow these steps carefully. Don’t rush, and don’t be afraid to re-measure or adjust as you go. This is where the magic happens.
Step 1: Cut Your Wood Pieces
This is where your saw comes in. Measure and mark your lumber carefully according to your plan. Use a square to ensure your lines are perfectly straight. Safety first: wear your safety glasses!
- Cut your tabletop piece(s). If using multiple boards for the top, make sure the edges that join are straight and smooth.
- Cut your four legs to the desired length. Make sure they are all exactly the same length for a stable table.
- Cut your four apron pieces. These will connect the legs.
- If you’re adding a shelf, cut that piece now.
Tip: If you’re not comfortable cutting the wood yourself, many hardware stores will cut lumber for you for a small fee. Just bring them your measurements!
Step 2: Prepare the Tabletop (If needed)
If your tabletop is made of multiple boards, you’ll need to join them. Apply a generous amount of wood glue to the edges of the boards that will be joined. Clamp them tightly together. You can also reinforce the joint by driving a few screws through the underside of the tabletop, but make sure they don’t go all the way through. Let the glue dry completely according to the manufacturer’s instructions.
Once the glue is dry (or if you’re using one solid piece for the top), it’s time to start sanding. Sand all edges and surfaces until smooth. Start with a coarser grit sandpaper, and then move to a finer grit for a silky-smooth finish. A good resource for understanding wood sanding best practices is the Popular Mechanics guide on sanding.
Step 3: Assemble the Apron and Legs
This is where we start forming the base of the table. You’re essentially building a sturdy box that will attach to the tabletop.
- Take two legs and one of the shorter apron pieces. Apply wood glue to the ends of the apron where it will meet the legs.
- Position the apron piece between the two legs, flush with the top edge of the legs. Use clamps to hold them in place.
- Drill pilot holes through the legs into the ends of the apron piece. Pilot holes are smaller than your screws and prevent the wood from splitting.
- Drive screws through the pilot holes to secure the apron to the legs.
- Repeat this process with the other two legs and the other short apron piece.
- Now, take one of the longer apron pieces. Apply glue to its ends and position it between the two leg assemblies you just created, flush with the top.
- Clamp, drill pilot holes, and screw these pieces together.
- Repeat with the final long apron piece.
You should now have a sturdy rectangle or square frame made of legs and apron pieces, ready to receive the tabletop.
Step 4: Attach the Tabletop
Place your prepared tabletop upside down on a clean, flat surface. Center the leg and apron assembly you just built on top of it. Make sure the edges of the apron are perfectly aligned with the edges of the tabletop, or set in slightly if that’s your design.
- Apply wood glue to the top edges of the apron pieces.
- Carefully place the leg and apron assembly onto the upside-down tabletop, ensuring it’s centered.
- From the underside of the apron pieces, drill pilot holes up into the tabletop (be careful not to drill through the top surface!).
- Drive screws through the apron into the tabletop to secure it. Again, use clamps to hold it steady while you work if needed.
Step 5: Add the Shelf (Optional)
If you decided to add a shelf, now is the time.
- Measure the distance from the floor up to where you want your shelf. Mark this height on the inside of each leg.
- Apply wood glue to the edges of the shelf piece that will rest on the legs. Alternatively, you can attach small wooden blocks or cleats to the inside of the legs at your marked height, and then rest the shelf on these.
- Position the shelf. If attaching directly to the legs, drill pilot holes through the legs into the shelf edge, or through the shelf into the legs (this is easier if you attach cleats first).
- Secure the shelf with screws.
Step 6: Final Sanding and Finishing
You’ve built the table, great job! Now it’s time to make it look polished and protected.
- Give the entire table one last light sanding with fine-grit sandpaper (220 grit is good). This smooths out any rough spots and prepares the wood for finishing. Wipe away all the dust with a tack cloth or a slightly damp rag.
- Now for the fun part: finishing! Decide if you want to paint, stain, or use a clear coat.
- For Staining: Apply the stain with a brush or rag, following the grain of the wood. Wipe off the excess stain after a few minutes, depending on the desired color intensity. Let it dry completely.
- For Painting: Apply a coat of primer first. Let it dry, then sand lightly. Apply your paint color in thin, even coats, allowing each coat to dry before applying the next. You might need 2-3 coats for full coverage.
- For Clear Coats (Polyurethane, Varnish): These protect the wood and can give it a nice sheen. Apply in thin coats with a brush, moving with the grain. Lightly sand with very fine grit sandpaper (320 grit or higher) between coats for a super smooth finish.
Allow your side table to cure completely according to the finish manufacturer’s instructions before placing items on it or using it regularly. This can take several days for some finishes.
Troubleshooting Common Side Table Build Issues
Even with the best plans, sometimes things don’t go exactly as expected. That’s perfectly normal! Here are a few common hiccups and how to fix them.
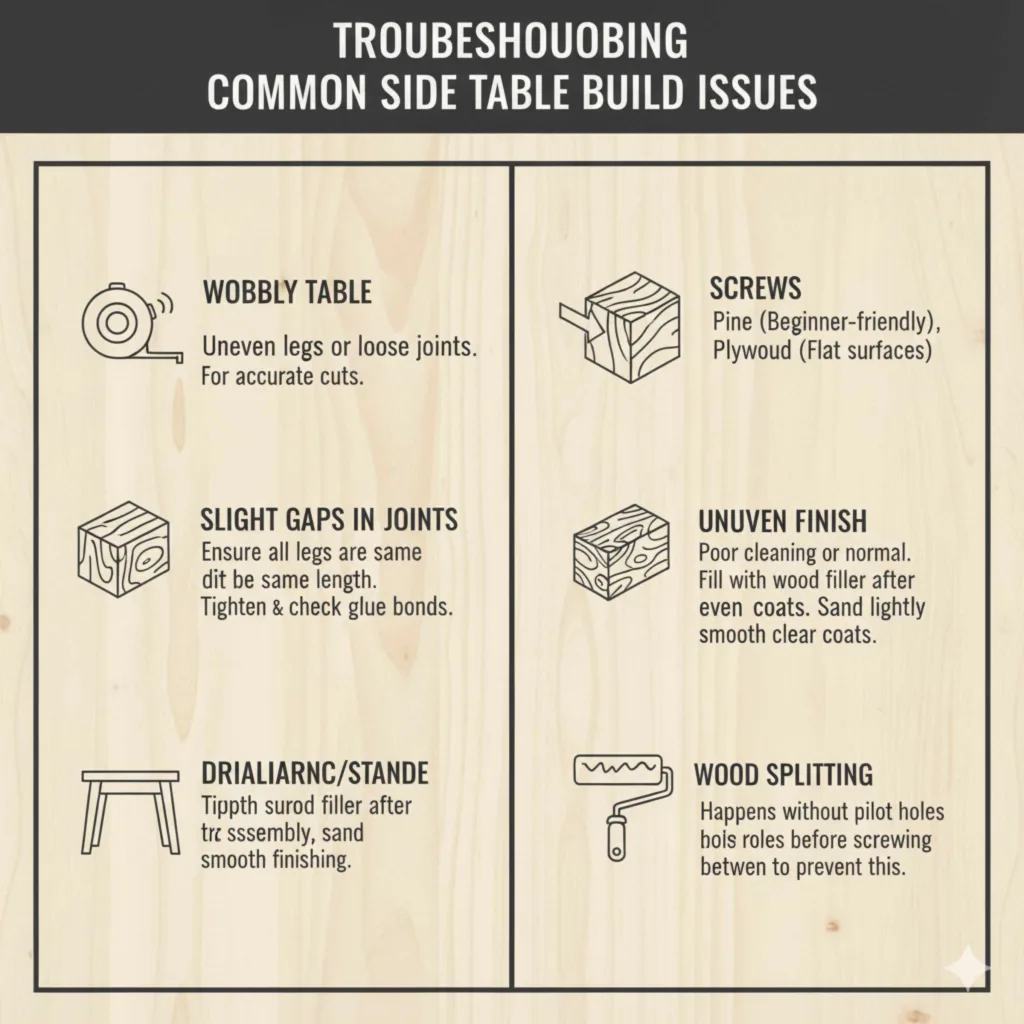
- Wobbly Table: This is usually due to uneven leg lengths or a loose joint. Double-check that all legs are the same length. If it’s still wobbly, you might be able to shave a tiny bit off the bottom of the longest legs. Ensure all screws are tight and glue joints are well-bonded.
- Slight Gaps in Joints: Small gaps can happen. For minor gaps, wood filler is your friend! Apply it after assembly but before finishing, let it dry, then sand smooth.
- Uneven Finish: This often happens if the surface wasn’t cleaned properly before finishing or if coats were applied too thick. Ensure you wipe away all dust before you start. Apply finishes in thin, even coats, and always sand lightly between coats of clear finish.
- Wood Splitting: This usually happens when screws are driven into wood without pilot holes. If you can, try to strategically place new screws or use wood filler to cover the split. Always drill pilot holes for future projects!
Frequently Asked Questions About Building a Side Table
Q1: How long does it take to build a simple side table?
A: For a beginner, a simple side table can take anywhere from a weekend (4-6 hours of actual work time) to a full weekend, depending on your speed, experience, and how long you let glue and finishes dry.
Q2: Is it cheaper to build a side table than to buy one?
A: Often, yes! Especially if you already own some basic tools. The cost of lumber and finishing supplies is usually less than a comparable pre-made table, particularly for solid wood pieces. Plus, you get the satisfaction of building it yourself!
Q3: What kind of wood is best for a first-time builder?
A: Pine is highly recommended. It’s affordable, soft, easy to cut, sand, and finish. Plywood can also be a good option for tabletops as it’s very stable.
Q4: Do I really need to use wood glue AND screws?
A: Yes! Glue creates a strong bond between wood fibers, making the joint much stronger than screws alone. Screws add mechanical strength and hold the pieces together while the glue dries. Using both is the best way to ensure a durable piece of furniture.
Q5: How can I ensure my table is level and doesn’t wobble?
A: Accuracy in cutting your legs to the same length is crucial. After assembly, place the table on a flat surface. If it wobbles, try to identify which leg is off and slightly trim it. Using a level on the tabletop during assembly can also help.
Q6: What’s the difference between stain and paint for a side table?
A: Stain soaks into the wood to enhance its natural grain and color, giving a more natural wood look. Paint covers the wood entirely, offering a solid color finish. Both require a primer for best results and a protective topcoat for durability.
Conclusion
See? Building your own side table is absolutely within your reach. You’ve learned about the essential tools and materials, how to plan your dimensions, and you’ve followed a step-by-step process to bring your vision to life. From cutting the wood to applying the final coat of finish, each step builds upon the last, resulting in a functional piece of furniture that’s uniquely yours. This project isn’t just about creating a table; it’s about building confidence in your DIY abilities. Don’t be discouraged if your first attempt isn’t perfect. Every project is a learning experience. With each table you build, your skills will grow, and you’ll find yourself tackling even more ambitious projects around your home. So, gather your supplies, follow these guidelines, and enjoy the rewarding process of building something with your own two hands!