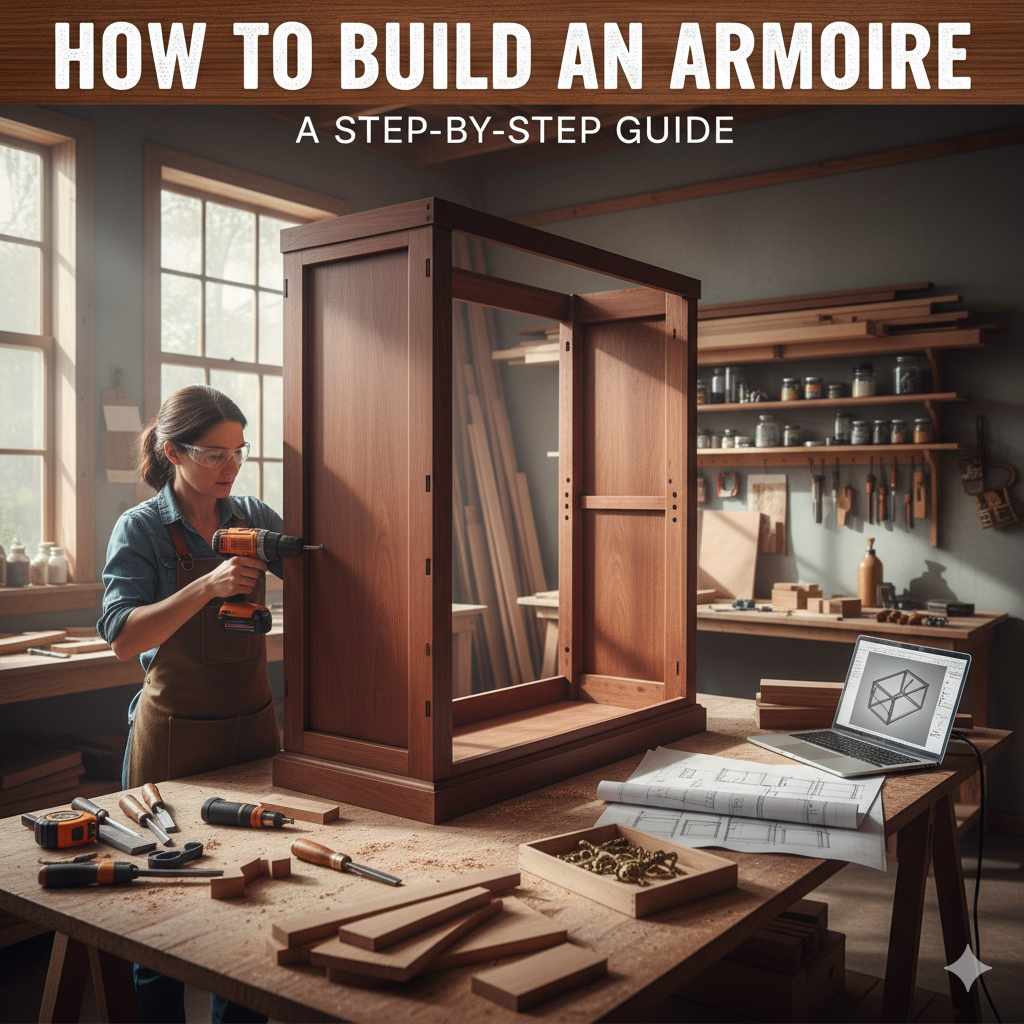
Learn how to build an armoire with this simple, step-by-step guide. We break down planning, cutting, assembling, and finishing your custom wardrobe, making this woodworking project achievable even for beginners looking to add practical storage.**
Building your own furniture might sound tricky, like fixing a complex engine. Many people want custom storage but feel intimidated by detailed plans. Storing clothes, linens, or tools efficiently often means having an armoire that fits perfectly where you need it. Don’t worry! If you can follow simple directions, you can totally tackle this project. We will walk you through the entire process, from picking the right wood to hanging the final doors. Get ready to build something sturdy and useful that you can be proud of.
Table of Contents
- Why Build Your Own Armoire?
- Phase 1: Planning and Design – Getting Your Blueprint Right
- Step 1: Sketching and Measuring
- Step 2: Choosing Materials and Tools
- Essential Tools Checklist
- Phase 2: Cutting and Preparation
- Step 3: Breaking Down the Lumber
- Step 4: Preparing Shelves and Back Panels
- Phase 3: Assembly – Making It Stand Up
- Step 5: Building the Main Box Frame
- Step 6: Attaching the Bottom and Top
- Step 7: Installing the Back Panel for Squareness
- Phase 4: Doors and Finishing Touches
- Step 8: Building and Hanging the Doors
- Step 9: Installing Hardware (Hinges and Knobs)
- Step 10: Sanding, Staining, or Painting
- Final Inspection and Securing Your Armoire
Why Build Your Own Armoire?
You might ask, “Why not just buy one from the store?” That is a fair question. Off-the-shelf furniture is easy, but it rarely hits the sweet spot for size or style. When you build an armoire, you are customizing it specifically for your space and needs. Think of it like tuning an engine—you get exactly what you want.
- Perfect Fit: Measure that awkward corner or tight bedroom space? You build it to fit exactly, maximizing every inch of real estate.
- Quality Control: You choose the wood. No wobbly particleboard here! You ensure every joint is strong and reliable, just like checking coolant levels yourself.
- Saves Money (Sometimes): Depending on the wood you select, building a high-quality piece can often be cheaper than buying a comparable solid wood unit.
- Pride of Ownership: There’s a huge satisfaction in looking at a piece of furniture you made with your own two hands.

Phase 1: Planning and Design – Getting Your Blueprint Right
Every great build starts long before you touch a saw. In our world, this is like researching parts and checking manuals before attempting a repair. Proper planning prevents headaches later. We need clear dimensions and a solid plan.
Step 1: Sketching and Measuring
Grab a notepad, some graph paper, or even an online design tool. Keep it simple at first—think of a basic box shape. This armoire will generally have five main components: a bottom panel, a top panel, two side panels, internal shelving/drawers (optional), and doors.
- Measure Your Space: Measure the height, width, and depth where the armoire will live. Remember to account for baseboards or trim. It is always better to build it slightly smaller than you think you need.
- Determine Internal Needs: How many hanging clothes? Do you need deep shelves for sweaters or shallow shelves for shirts? Decide on the ratio of hanging space to shelf space.
- Draw a Simple Elevation: Sketch the front view. Mark where your door seams will be and how high the bottom shelf or drawer section will sit off the floor. Mark the planned thickness of your wood (e.g., 3/4 inch plywood or solid wood boards) in your measurements.
- Create a Cut List: Based on your sketch and wood thickness, list every single piece you need to cut. This is your shopping list for lumber later.
Step 2: Choosing Materials and Tools
Choosing the right materials is like selecting the right oil viscosity for your climate—it affects longevity and performance. For an armoire, we need stability and strength.
Wood Choices for Your Armoire
For beginners, using high-quality plywood for the main carcass (the box) is often the easiest path to a strong, stable build. Solid wood is beautiful but can warp more easily if not balanced correctly across the build.
| Material Option | Pros (Why It’s Good) | Cons (Things to Watch Out For) |
|---|---|---|
| Cabinet Grade Plywood (3/4 inch) | Very stable, strong joints, easy to paint or veneer. Excellent for large panels. | Edges must be covered (edge banding or face framing). |
| Solid Pine/Poplar | Affordable, classic look, easy to work with hand tools. | Can be soft, dents easily, may warp if humidity changes a lot. |
| Maple or Birch Hardwood | Extremely durable, looks beautiful when stained. | More expensive, noticeably harder to cut and drill, requires sharp blades. |
Essential Tools Checklist
You don’t need the entire professional workshop, but a few key power tools will make this process much safer and faster. Remember, safety gear comes first—always wear eye and ear protection when running power tools!
If you are using pre-milled dimensional lumber (ready-to-use boards):
- Tape Measure and Pencil
- Combination Square (essential for marking 90-degree angles)
- Circular Saw or Table Saw (for accurate, straight cuts)
- Drill/Driver (with bits for pilot holes)
- Clamps (lots of clamps—you can never have too many!)
- Wood Glue (Titebond II or III recommended)
If you are cutting large sheets of plywood, a table saw is highly recommended for the best accuracy, but a skilled user can manage with a circular saw and a straight edge guide clamped securely to the sheet. For more information on setting up safe cutting practices, check the guidelines from woodworking safety organizations, such as those recommended by the Occupational Safety and Health Administration (OSHA) regarding stationary tools, even if you are using portable saws.
Phase 2: Cutting and Preparation
This is where we transform raw material into precisely sized components. Accuracy matters here; even a tiny variation in the sides will make the doors crooked later.
Step 3: Breaking Down the Lumber
Refer back to your cut list. Measure twice, cut once! This old saying is the golden rule of woodworking.
- Cut the Major Panels: Cut the sides, top, and bottom pieces. If you are using plywood, ensure the smooth, outer face is pointing up/out while cutting to minimize tear-out.
- Use a Guide: When using a circular saw to cut long panels, always clamp a perfectly straight edge (like a factory-made laminate edge or a dedicated guide rail) to the plywood to guide your saw base. This ensures your sides are perfectly straight and parallel.
- Mark Clearly: Mark the inside faces of the pieces. This helps you remember which side should face inward, especially for the sides where shelf pin holes or fixed partitions will go.
Step 4: Preparing Shelves and Back Panels
The internal components need preparation before the main box goes together. If your design includes fixed center shelves, these often act as crucial structural supports, bracing the side panels against bowing.
- Fixed Shelves: If you are using fixed shelves, cut them precisely. These should fit snugly between the two side panels once the side panels are assembled.
- Adjustable Shelves: If you want adjustable shelves, you must drill the shelf pin holes now, while the shelves are flat and easy to access. Use a shelf pin jig if you have one—it makes getting those tiny holes perfectly aligned much easier than measuring each one individually.
- Back Panel Consideration: Back panels are critical for stability; they keep the armoire square (preventing it from leaning like a parallelogram). Usually, the back panel is made of thinner material (like 1/4 inch plywood or hardboard). Cut this panel to the final exterior dimensions of your box after you have assembled the sides, top, and bottom. This ensures it fits perfectly flush.
Phase 3: Assembly – Making It Stand Up
This is similar to bolting the main chassis components together on a vehicle. Precision in how you join the major panels determines the final strength and straightness of the armoire.
Step 5: Building the Main Box Frame
We need to join the two sides to the top and bottom pieces. The method you use depends on your desired look and strength.
Joinery Methods for the Carcass
For beginners, using biscuits, pocket holes, or simple butt joints reinforced with screws and glue are the most reliable starting points.
- Butt Joints with Glue and Screws: This is the simplest. Apply wood glue liberally to the joining surfaces. Clamp the pieces together tightly. Pre-drill pilot holes slightly smaller than your screws to prevent the wood from splitting. Drive screws through the exterior surface if hidden later (like the bottom), or through the faces of the top/bottom into the sides.
- Pocket Holes: If you use pocket hole joinery (drilling angled holes on the inside face of the top/bottom pieces), the screws become invisible when assembled. Ensure your jigs are set correctly for the right material thickness.
Pro Tip: When assembling the first corner (side to top or bottom), use your square to ensure the joint is exactly 90 degrees before driving the first screw. Once glued and screwed, check that corner again. Glue sets fast, so work deliberately.
Step 6: Attaching the Bottom and Top
If you have decided on a base or feet, attach those to what will become the bottom piece before you attach it to the sides. This is much easier than trying to lift and attach them once the tall box is built.
Assemble the main shell. The goal is a rigid, square box structure consisting of the two sides, the top, and the bottom panel.
Step 7: Installing the Back Panel for Squareness
This step is non-negotiable for a quality build. The entire structure relies on the back panel to prevent racking (leaning side-to-side).
- Check for Square: Measure diagonally from the top-left inside corner to the bottom-right inside corner. Then, measure the opposite diagonal (top-right to bottom-left). If the measurements are identical, your box is perfectly square. If they differ, nudge the frame until the diagonals match.
- Attach the Back: Place the thin back panel material over the rear of the frame. Use small brad nails or short wood screws set every 4–6 inches around the entire perimeter where the back panel meets the top, bottom, and sides. This locks the squareness in place forever.
For cabinet construction, some professionals prefer to dado (cut a groove) the back panel 1/4 inch deep into the side pieces rather than nailing it onto the surface. While stronger, dado cuts require a router or table saw setup, so nailing a high-quality 1/4″ plywood back onto the surface remains the best beginner-friendly route for stability.
Phase 4: Doors and Finishing Touches
The main structure is up! Now we focus on the moving parts and making it look professional. Much like adding custom wheels and paint to a car, the doors define the finished look.
Step 8: Building and Hanging the Doors
Armoire doors are large, heavy, and need to hang perfectly straight. Two common styles are an overlay door (the door covers the face frame or the box edges) or a flush door (the door sits exactly inside the opening).
Door Construction Tip: Face Frame vs. Panel Door
If you are using plywood for the cabinet box, adding a face frame made of solid wood strips (1.5 to 2 inches wide) glued and pinned to the front edges of the box vastly increases the strength and makes door mounting easier and more forgiving. If you skip the face frame, your door mounting must be extremely precise.
Measure the opening where the doors will sit. If you added a face frame, measure the opening of the frame. Subtract about 1/8 inch from the total width and height to allow for clearance (gaps) around the doors (usually 1/16 inch gap on all sides).
Step 9: Installing Hardware (Hinges and Knobs)
This is often the most frustrating step for new builders, but modern concealed hinges make it manageable.
Choosing Hinges
For armoires, you will almost certainly want European (Concealed) Hinges. These hinges mount entirely into a circular cutout (a “cup”) in the back of the door and attach to the inside of the cabinet frame. They offer incredible adjustability.
- Mark Hinge Locations: Standard placement is usually 2–3 inches from the top and bottom edges of the door, and one in the middle if the door is tall.
- Drill the Cups: Use a Forstner bit matching the size specified by your hinge manufacturer (usually 35mm) to drill the recess into the door. Go deep enough for the cup to sit flush, but do not drill all the way through the door!
- Mounting the Plates: Attach the mounting plates to the inside of the cabinet using screws.
- Hanging the Door: Attach the hinge arm to the door cup, then clip or screw the arm onto the mounting plate.
Adjustment is Key: Concealed hinges have adjustment screws. These allow you to move the door left/right, up/down, and in/out, which is crucial for getting those even gaps when the doors are closed. Take your time here; perfect alignment takes patience!
Step 10: Sanding, Staining, or Painting
The finish protects your work and gives it that professional shine. Preparation here is just like detailing a car before a show—it makes all the difference.
Sanding Progression
Every piece of wood and plywood edge needs sanding. Start rough and finish smooth.
- Sand all surfaces starting with 100 or 120 grit sandpaper to level any rough spots or glue squeeze-out.
- Move to 150 grit, ensuring all scratches from the previous paper are gone.
- Finish with 180 or 220 grit. This is usually the final grit for a good piece of furniture that will be painted or stained.
If you are staining, always wipe the wood down with a tack cloth or mineral spirits to remove all dust before applying the stain. Follow the product directions exactly for drying times.
If you are painting, apply a good quality primer first. Primer helps the paint stick evenly, especially on plywood edges. Apply thin coats of topcoat paint, sanding lightly with 320 grit between coats for the smoothest possible finish.

Final Inspection and Securing Your Armoire
Building your own armoire may seem like a big project at first, but when you break it down into simple steps—planning, cutting, assembling, and finishing—it becomes much more manageable. By carefully measuring your space, selecting the right materials, and assembling the frame with patience, you can create a strong and functional storage piece tailored exactly to your needs.
One of the biggest advantages of building an armoire yourself is the customization. You decide the size, shelf layout, door style, and finish, ensuring the furniture fits perfectly in your room while matching your personal style. With proper sanding, staining, or painting, your finished piece can look just as professional as store-bought furniture—sometimes even better.
Safety and stability should always be the final priority. Because armoires are tall and heavy, securing them to a wall with anti-tip straps or brackets is a smart step that prevents accidents and keeps the furniture firmly in place.
In the end, building an armoire is more than just a woodworking task—it is a rewarding DIY project that gives you practical storage and the pride of creating something useful with your own hands. Take your time, follow the steps carefully, and soon you will have a sturdy, custom armoire that can serve your home for many years.