The proven best way to cook chicken for casserole is to pre-cook it until it reaches 165°F using methods like poaching, baking, or sautéing, ensuring it is fully cooked, safe, and moist before mixing it into the other ingredients. This prevents undercooked spots and dry results later.
We all love a hearty casserole. It’s the perfect comfort food—creamy, cheesy, and satisfying. But there’s one common roadblock that stops even the best casserole recipes from turning out right: the chicken. Should you add it raw? Should you cook it all the way? It can feel confusing, especially when the recipe just says, “Add cooked chicken.” If the chicken isn’t cooked right before it goes into the oven, you end up with rubbery, dry, or worse, slightly undercooked pieces hiding under that bubbly topping. Don’t worry! Getting perfectly tender, ready-to-go chicken for any casserole is simpler than you think. We’ll walk through the safest and tastiest methods, step-by-step, so your next bake is a guaranteed success. Let’s build that perfect foundation for your casserole!
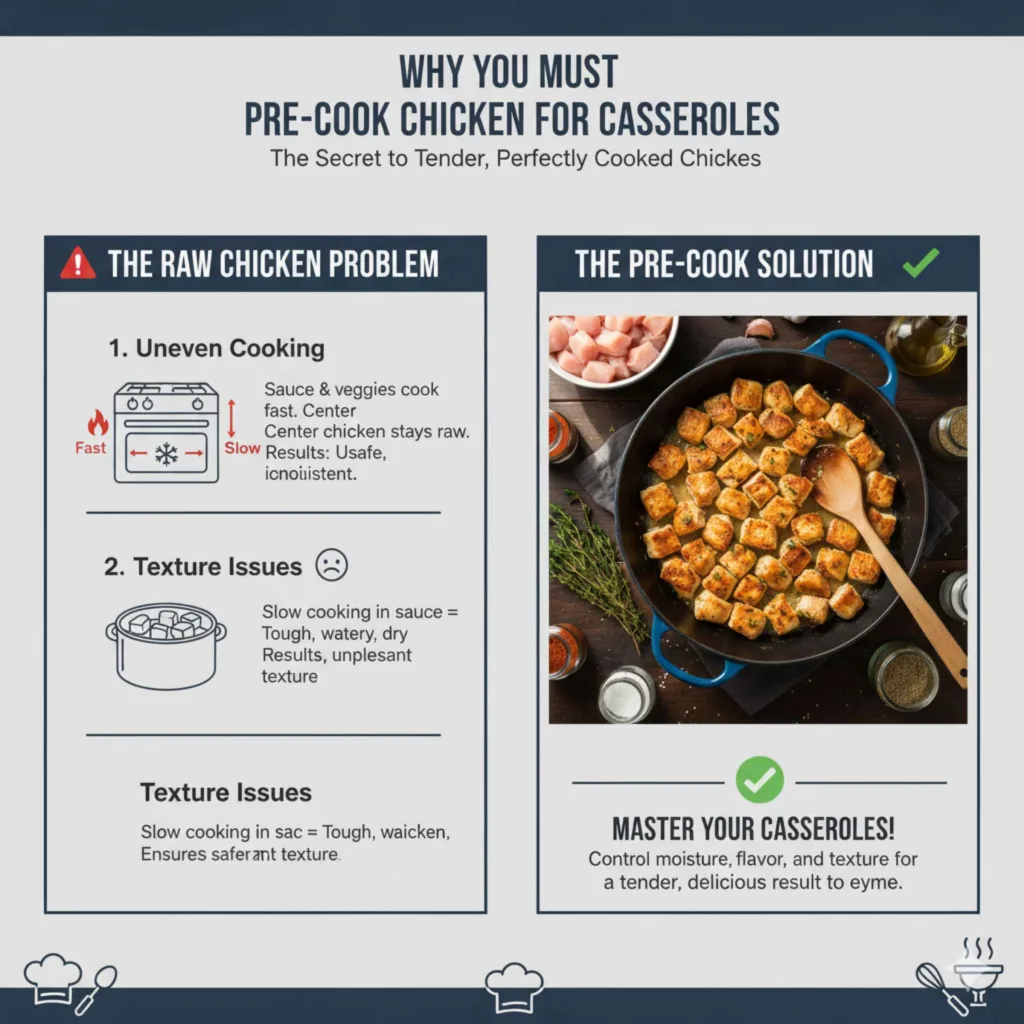
Why You Must Pre-Cook Chicken for Casseroles
When you are assembling a casserole, you are essentially baking everything together. If you add raw chicken, you run into two main problems:
1.Uneven Cooking Time: Sauces, vegetables, and noodles often cook much faster than raw chicken breast needs to reach a safe internal temperature of 165°F (74°C). The edges of your casserole might be bubbling hot and browned, while the center pieces of chicken are still undercooked.
2.Texture Issues: Chicken that cooks slowly inside a wet environment (like a creamy sauce) soaks up liquid but often turns tough or watery as it dries out while waiting for the surrounding ingredients to finish baking.
By cooking the chicken first, you control the moisture content and ensure safety before the long bake, resulting in tender, perfectly textured pieces throughout the finished dish.
Safety First: Understanding Safe Internal Temperatures
Before we dive into cooking methods, let’s talk safety. Food safety is not optional; it is the most important step. Whether you use breasts, thighs, or even rotisserie chicken, it must reach the correct temperature.
According to the U.S. Department of Agriculture (USDA), all poultry, including chicken, must reach a minimum internal temperature of 165°F (74°C) to eliminate harmful bacteria.
You should always use a reliable instant-read meat thermometer. This tool is your best friend for confident cooking, just like checking your tire pressure ensures a safe drive!
| Chicken Part | Safe Minimum Internal Temperature | Best for Casseroles? |
|---|---|---|
| Breasts (Leanest) | 165°F (74°C) | Yes, but easy to dry out. |
| Thighs/Legs (Dark Meat) | 165°F (74°C) (Can go higher) | Excellent—stay moist during baking. |
| Pre-Cooked/Rotisserie | Reheat to 165°F (74°C) | Fastest option. |
The Three Proven Best Methods for Pre-Cooking Chicken
There are three fantastic ways to get your chicken ready. The “best” method often depends on how much time you have and what texture you prefer.
Method 1: Poaching (The Moisture Lock-In Secret)
Poaching means gently simmering the chicken in water or broth just below boiling point. This is arguably the best method for delicate casseroles because the chicken retains maximum moisture.
Tools You Will Need
- Saucepan with a lid
- Tongs or slotted spoon
- Instant-read thermometer
Step-by-Step Poaching Guide
- Prepare the Liquid: Fill a saucepan with enough low-sodium chicken broth or water to completely cover the chicken breasts or thighs. For extra flavor, toss in a few aromatics like a quartered onion, a stalk of celery, or a teaspoon of dried herbs (like thyme or bay leaf).
- Heat Gently: Place the chicken in the cool liquid. Turn the heat to medium-high. Your goal is to bring the liquid to a very gentle simmer—not a rolling boil. You should see tiny bubbles forming around the edges, but only occasional larger bubbles breaking the surface.
- Simmer and Monitor: Once simmering, immediately reduce the heat to low. Cover the pot and let it poach for about 10 to 15 minutes, depending on the thickness of the chicken.
- Check the Temperature: Remove the thickest piece of chicken and insert your thermometer into the center. If it reads 165°F (74°C), it’s done! If it’s lower, return it to the liquid for a few more minutes.
- Cool and Shred/Dice: Remove the chicken from the liquid immediately. Let it rest on a cutting board for about 5 minutes. Then, use two forks to shred it, or dice it into cubes suitable for your casserole dish.
Pro Tip: Save that poaching liquid! It is now flavorful chicken stock. Use it instead of plain water when mixing your casserole base (like a cream soup base) for a huge flavor boost.
Method 2: Baking/Roasting (The Hands-Off Approach)
Baking is perfect when you are busy with other tasks. It requires virtually no hands-on time once it’s in the oven. This method works well for almost any casserole, particularly those with chunkier vegetables or drier mixes.
Tools You Will Need
- Baking sheet
- Aluminum foil (optional, for easier cleanup)
- Wire rack (optional, aids even cooking)
Step-by-Step Baking Guide
- Preheat and Prep: Preheat your oven to a moderate 375°F (190°C). Line a baking sheet with foil or parchment paper for easy cleanup.
- Season Lightly: Place the raw chicken breasts or thighs on the prepared sheet. Since this chicken will be mixed with sauce later, you only need a light sprinkle of salt and pepper now.
- Bake Until Done: Bake for 20 to 30 minutes. Thinner pieces cook faster; thicker pieces take longer. Do not overcook it here, as it will bake slightly more in the casserole later.
- Verify Temperature: Check the thickest part of the chicken. Remove from the oven immediately at 165°F (74°C).
- Shred or Dice: Let the chicken cool enough to handle, then proceed with shredding or cutting.
Note on Dark Meat: Chicken thighs are extremely forgiving when baked. They can safely cook past 165°F and remain juicy, making them an excellent choice for busy home chefs.
Method 3: Sautéing or Pan-Frying (The Quickest Option)
If you realize you need cooked chicken five minutes before starting your casserole assembly, sautéing is your go-to. This works best with thinly sliced or cubed chicken pieces.
Tools You Will Need
- Large skillet
- A small amount of neutral oil (like vegetable or canola)
- Spatula
Step-by-Step Sautéing Guide
- Cut the Chicken: For fast cooking, slice the chicken breasts horizontally into thinner cutlets or dice them into uniform 1-inch cubes. Uniform size is key here for even cooking.
- Heat the Pan: Heat 1 tablespoon of oil in the skillet over medium-high heat until it shimmers slightly.
- Cook in Batches: Add the chicken pieces to the hot pan, ensuring you don’t overcrowd the skillet. Overcrowding lowers the pan temperature and causes the chicken to steam instead of brown. Cook in batches if necessary.
- Sear and Flip: Cook for about 3–4 minutes per side until golden brown on the outside and cooked through.
- Check Safety: Use your thermometer. If 165°F (74°C) is reached, remove it from the heat right away.
- Dice and Assemble: Remove the chicken cubes and quickly chop any remaining larger pieces before mixing them into your casserole filling.
When to Use Store-Bought Rotisserie Chicken
Let’s be honest—sometimes you need speed. Store-bought rotisserie chicken is a fantastic shortcut for almost any chicken casserole. It’s already cooked perfectly and seasoned well.
Rotisserie Chicken Tips
- Check the Temperature: Even though it looks done, always check the thickest part of the breast or thigh with a thermometer before using it. If it’s been sitting out, it might have dropped below 140°F (60°C), which means you need to gently reheat it slightly until it hits 165°F.
- Shredding: Pull off the meat and shred it. Dark meat often stays moister than white breast meat in commercial rotisserie chickens, making thighs a great choice here.
- Flavor Balance: Since rotisserie chicken is already seasoned (sometimes heavily salted), reduce the amount of extra salt you add to your casserole recipe.
Preparing Chicken for Specific Casserole Types
The best preparation method can change slightly depending on the final texture you want your casserole to have.
1. Creamy Casseroles (e.g., Chicken Noodle, Chicken Pot Pie Filling)
For casseroles featuring a thick, creamy sauce, you want chicken that is tender and easy to mix in without breaking apart too much.
Recommended Method: Poaching. The gentle simmering keeps the meat supple and moist, which pairs beautifully with rich cream bases.
How to Cut: Shredded or small 1/2 inch cubes.
2. Baked Pasta Casseroles (e.g., Baked Ziti with Chicken, King Ranch Chicken)
These require chicken that can stand up to mixing with sauces, cheese, and pasta without turning mushy during the final bake.
Recommended Method: Baking/Roasting. This method cooks the chicken slightly firmer, which prevents it from dissolving into the sauce during the second bake in the oven.
How to Cut: 3/4 inch cubes.
3. Casseroles with Crunchy Toppings (e.g., Chicken and Rice Casserole)
When the top layer is meant to be crisp or crunchy, the chicken mixture needs to be fully seasoned and pre-cooked for safety.
Recommended Method: Sautéing (for flavor infusion) or Rotisserie usage. Sautéing lets you build flavor directly into the protein before adding it.
How to Cut: Medium-sized chunks (about 1 inch).
The Crucial Step: Seasoning Your Pre-Cooked Chicken
This is where many beginners miss the mark! If you cook the chicken blandly (like plain water poaching), the entire casserole might taste dull. When you pre-cook, you have a prime opportunity to season.
Seasoning Ideas for Perfect Casserole Chicken
- For Poaching: Add beef or vegetable bouillon, a few sprigs of fresh rosemary or thyme, and whole peppercorns to the poaching liquid.
- For Baking: Brush the chicken lightly with olive oil and sprinkle with garlic powder, onion powder, paprika, salt, and pepper before putting it in the oven.
- For Sautéing: Cook the chicken in butter instead of oil, and add a pinch of dried sage or Italian seasoning to the pan while it cooks.
Remember this general rule: Because the chicken will be mixed with many other ingredients, season it slightly more intensely than you would if you were eating it plain off the pan.
A Note on Thighs vs. Breasts: Chicken thighs have more fat marbling than breasts. This fat keeps them incredibly moist, even if you slightly overcook them or reheat them aggressively in the final casserole bake. For beginner cooks, using boneless, skinless chicken thighs is the most reliable path to worry-free, juicy results.
The Ultimate Flavor Boost: Using the Leftover Cooking Liquid
Whether you poach or bake, you are left with delicious drippings or stock. Never throw this away! This liquid contains savory compounds that amplify the flavor profile of your entire casserole.
If you poached your chicken, the liquid is ready-made broth. If you baked it, the drippings in the bottom of the pan are concentrated flavor.
How to Incorporate Cooking Liquid
- Strain: Pour the liquid through a fine-mesh sieve to remove any stray herbs or burnt bits.
- Measure: Measure out the amount of liquid specified in your casserole recipe, often using it to thin out condensed soup cans or create homemade white sauce (roux).
- Season Adjustments: Taste the liquid. If it seems salty, reduce the amount of added salt in the final casserole mixture.
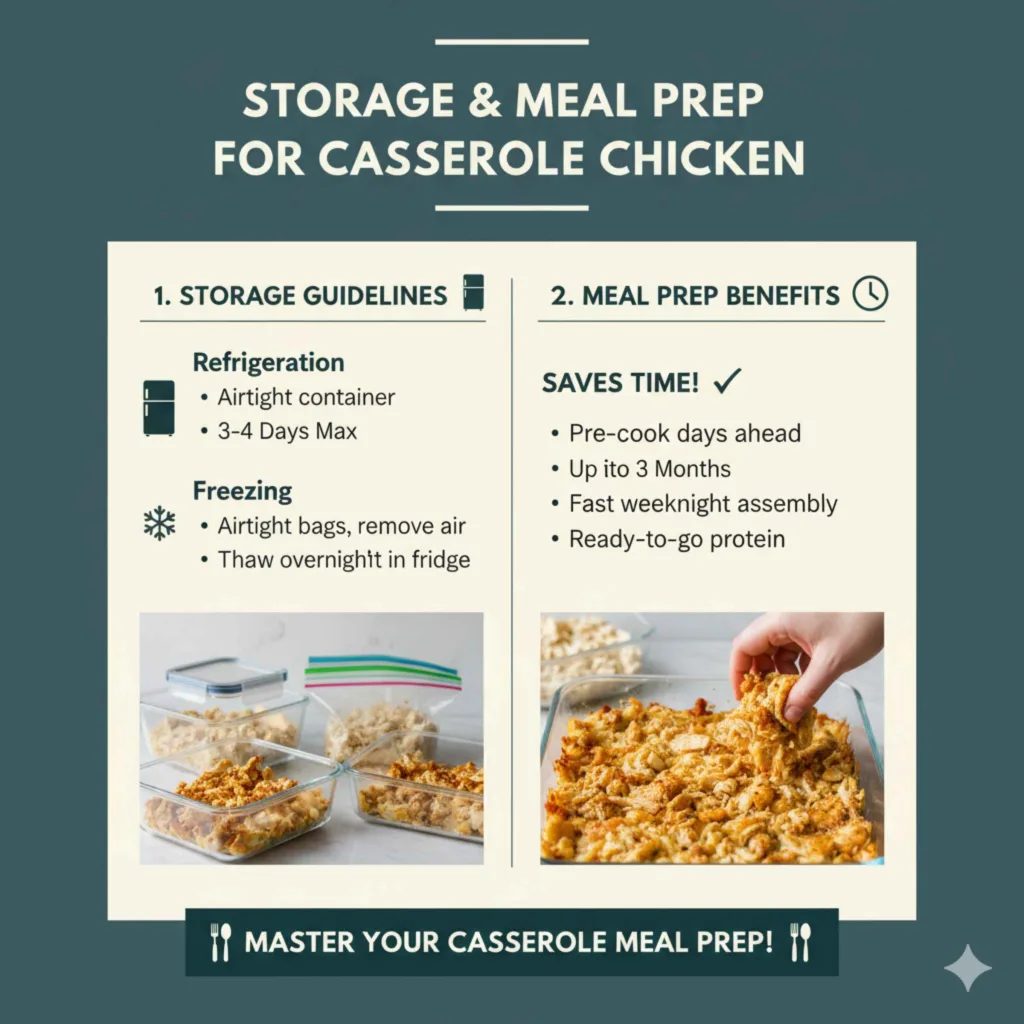
Storage and Meal Prep for Casserole Chicken
One of the best parts of pre-cooking chicken is that you can do it days ahead of time, setting yourself up for ultra-fast weeknight assembly.
Storage Guidelines
- Refrigeration: Cooked, shredded, or cubed chicken should be stored in an airtight container in the refrigerator for no more than 3 to 4 days.
- Freezing: For longer storage, freeze the cooled chicken in zip-top bags, pressing out as much air as possible. It lasts well for up to 3 months. When ready to use, thaw overnight in the fridge and use it as directed, ensuring it is piping hot when added to the final casserole.
Frequently Asked Questions (FAQ) for Casserole Chicken Prep
Q1: Can I use raw chicken directly in a slow cooker casserole?
A: Yes, you often can in a slow cooker because the cooking time is very long and slow (usually 6-8 hours on low). However, for best results and safer temperature management, cooking the chicken for the first hour or two separately before adding other ingredients is still recommended.
Q2: Should I use canned chicken instead of cooking fresh?
A: Canned chicken is fully cooked and extremely convenient. However, it often has a very soft, sometimes mushy texture and can taste quite salty or sterile. If you use it, rinse it briefly under cold water to remove excess brine, then add it during the last 15 minutes of baking to heat it through.
Q3: How do I keep poached chicken from getting stringy?
A: The key is temperature control. If the poaching water boils vigorously, the muscle fibers seize up, making the meat tough and stringy. Keep the heat very low—just below a simmer—to allow the protein to cook slowly and retain moisture.
Q4: Does the type of chicken (breast vs. thigh) matter for casseroles?
A: It matters for moisture! Thighs (dark meat) are far more forgiving and stay juicy. Breasts (white meat) dry out easily. If you use breasts, be extra careful to pull them out right at 165°F when pre-cooking.
Q5: Should I add the cooked chicken hot or cold to the casserole mixture?
A: It should be warm or completely cooled down, but never piping hot directly from the stove or oven. Adding very hot chicken forces the already cold ingredients (like refrigerated cream soup or raw vegetables) to cook unevenly during assembly.
Q6: If my recipe calls for raw chicken, what should I do?
A: If the recipe explicitly calls for raw chicken, cook it partially—aim for about 80% done (around 150°F) using poaching or sautéing—before adding it to the dish. This significantly cuts down on the time risk during the final bake. Always ensure the final internal temperature hits 165°F after the casserole comes out of the oven.
Conclusion: Confidence in Your Casserole Base
Mastering how to cook chicken for a casserole might seem like a small detail, but it’s the difference between a mediocre dish and a restaurant-quality comfort classic. By consistently pre-cooking your poultry to the safe temperature of 165°F using gentle methods like poaching or precise baking, you guarantee tenderness and eliminate the risk of undercooked meat. Remember the power of using that flavorful cooking liquid—that’s where home cooks truly elevate their dishes. Now you have the knowledge to choose the best method based on your schedule and ingredient needs. Go ahead and build that casserole with confidence; you’ve already nailed the most important step!