Build a bookcase yourself! This guide breaks down the process into simple steps, showing you how to create a sturdy, custom bookshelf with basic tools. It’s easier than you think to add practical and stylish storage to your home.
Ever felt like your books are staging a hostile takeover of your living space? You’re not alone! Bookshelves can get pricey, and assembling flat-pack furniture can sometimes feel like solving a puzzle with missing pieces. But what if you could build a bookcase that perfectly fits your needs and your budget, all by yourself? It sounds intimidating, but with the right guidance, it’s totally achievable. We’re going to walk through building a simple, sturdy bookcase step-by-step. You’ll be organizing your favorite reads in no time, feeling proud of your new handmade addition!
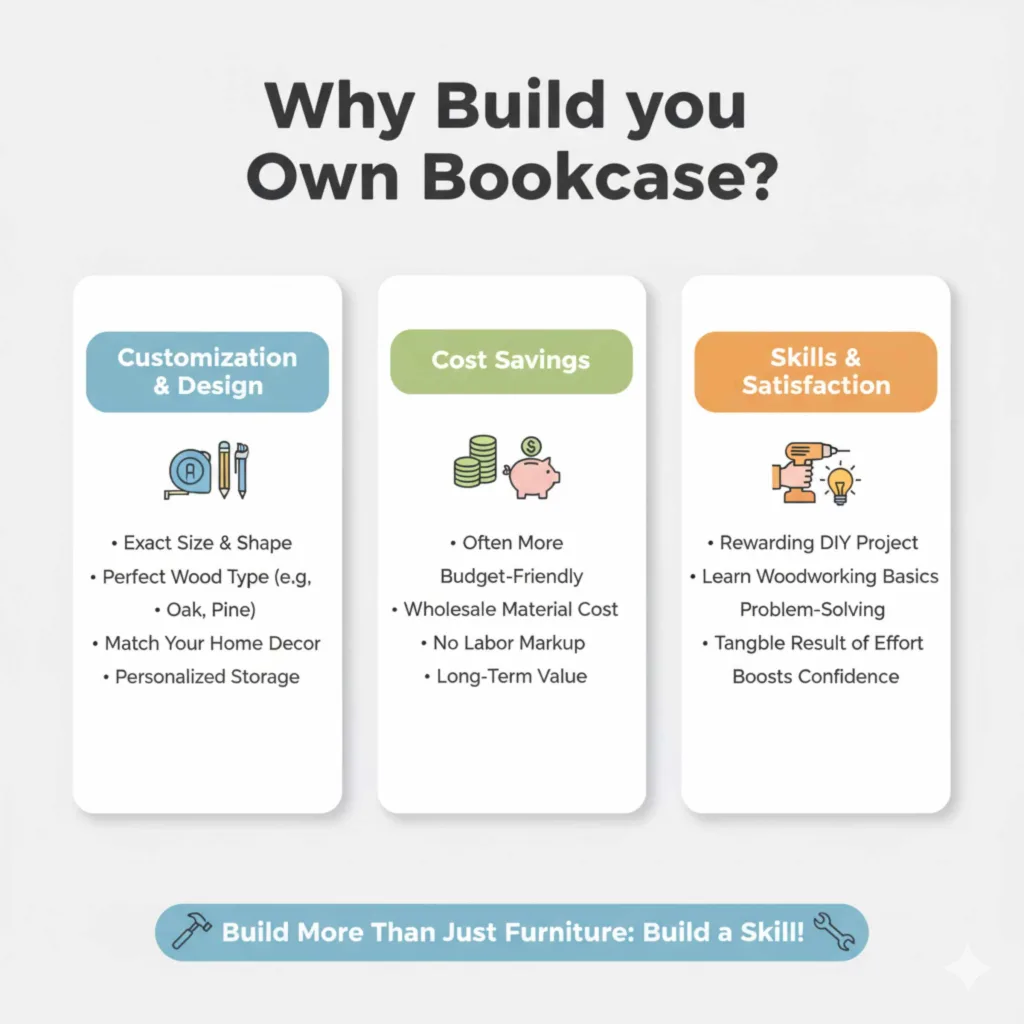
Why Build Your Own Bookcase?
Taking on a DIY bookcase project offers a ton of benefits that you just can’t get from buying one off the shelf. Think about it: you get to choose the exact size, the perfect wood type, and the exact finish to match your home’s decor. Plus, the sense of accomplishment is huge! Not to mention, building it yourself can often be more budget-friendly than purchasing a comparable piece. It’s a fantastic way to add custom storage that feels personal.
Beyond customization and cost savings, building your own furniture is a rewarding skill to develop. It’s a chance to learn a bit about woodworking, problem-solving, and gain confidence in your practical abilities. You’re not just getting a bookcase; you’re gaining a new skill and a tangible result of your effort.
Essential Tools and Materials
Don’t worry if you’re new to this! We’ll stick to the basics. Most of these tools are pretty standard for any DIYer or can be borrowed from a friend. Remember to always prioritize safety – wear safety glasses and gloves when needed.
Tools You’ll Need:
- Measuring Tape: For getting precise measurements.
- Pencil: To mark your cuts and assembly points.
- Circular Saw or Hand Saw: To cut your wood panels. A circular saw makes straighter cuts with less effort. (If using a hand saw, a miter box can help you get accurate angles).
- Drill and Drill Bits: For pre-drilling holes and driving screws. This prevents wood from splitting.
- Screwdriver Bits: To match your screws.
- Clamps: To hold pieces together while you’re working. Essential for accurate assembly!
- Level: To ensure your shelves are straight.
- Safety Glasses: Absolutely non-negotiable for eye protection.
- Sandpaper (various grits) or Electric Sander: To smooth the wood.
- Wood Glue: For extra strong joints.
Materials You’ll Need:
- Wood Panels: Plywood (3/4 inch is common and sturdy) or lumber like pine or poplar are great choices. The quantity and size depend on your bookcase design. A good starting point for a medium-sized bookcase might be:
- Two side panels (e.g., 72 inches tall x 12 inches wide)
- One top panel (e.g., 36 inches wide x 12 inches deep)
- One bottom panel (e.g., 36 inches wide x 12 inches deep)
- Adjustable shelves (e.g., 34.5 inches wide x 11.5 inches deep)
- A back panel (thin plywood or hardboard)
- Screws: Wood screws, typically 1 1/4 inch or 1 1/2 inch, depending on wood thickness.
- Shelf Pins (for adjustable shelves): If you want to have adjustable shelf heights.
- Wood Finish: Stain, paint, or polyurethane, plus brushes or rags.
- Optional: Trim or decorative molding for a more finished look.
When buying wood, consider visiting a local lumberyard or a home improvement store’s lumber section. They can often make cuts for you, which is a huge help if buying large panels. Just provide them with your exact measurements!
Planning Your Bookcase Design
Before you even pick up a tool, let’s make a plan. A simple, rectangular bookcase is a great starting point for beginners. Decide on the:
- Height: How tall do you want it? Think about ceiling height and accessibility.
- Width: How much space do you have, and how many books do you need to store?
- Depth: Most standard books fit well on a 10-12 inch deep shelf.
- Number of Shelves: How many shelves do you need, and how far apart should they be?
Sketching out your idea is super helpful. You don’t need to be an artist! Just draw a simple box and mark down your measurements. This sketch will be your best friend when cutting wood and assembling.
Standard Bookcase Dimensions (Example)
Here’s a common setup that works well for many living rooms and offices:
| Component | Typical Dimensions (Height x Width x Depth) | Notes |
|---|---|---|
| Side Panels | 72 inches x 12 inches x 3/4 inch | These form the vertical sides. |
| Top & Bottom Panels | 12 inches x 34.5 inches x 3/4 inch | These span between the side panels. 34.5 inches allows them to fit inside the 36-inch outer width created by the sides. |
| Fixed Middle Shelf (Optional) | 12 inches x 34.5 inches x 3/4 inch | Adds structural support. Can be placed at the halfway point. |
| Adjustable Shelves | 11.5 inches x 34.5 inches x 3/4 inch | Slightly less deep than the main structure to allow for clearance. |
| Back Panel | 72 inches x 36 inches x 1/4 inch (or thinner hardboard) | This thin panel greatly increases stability. |
Remember, these are just examples. Adjust them to your space and needs!
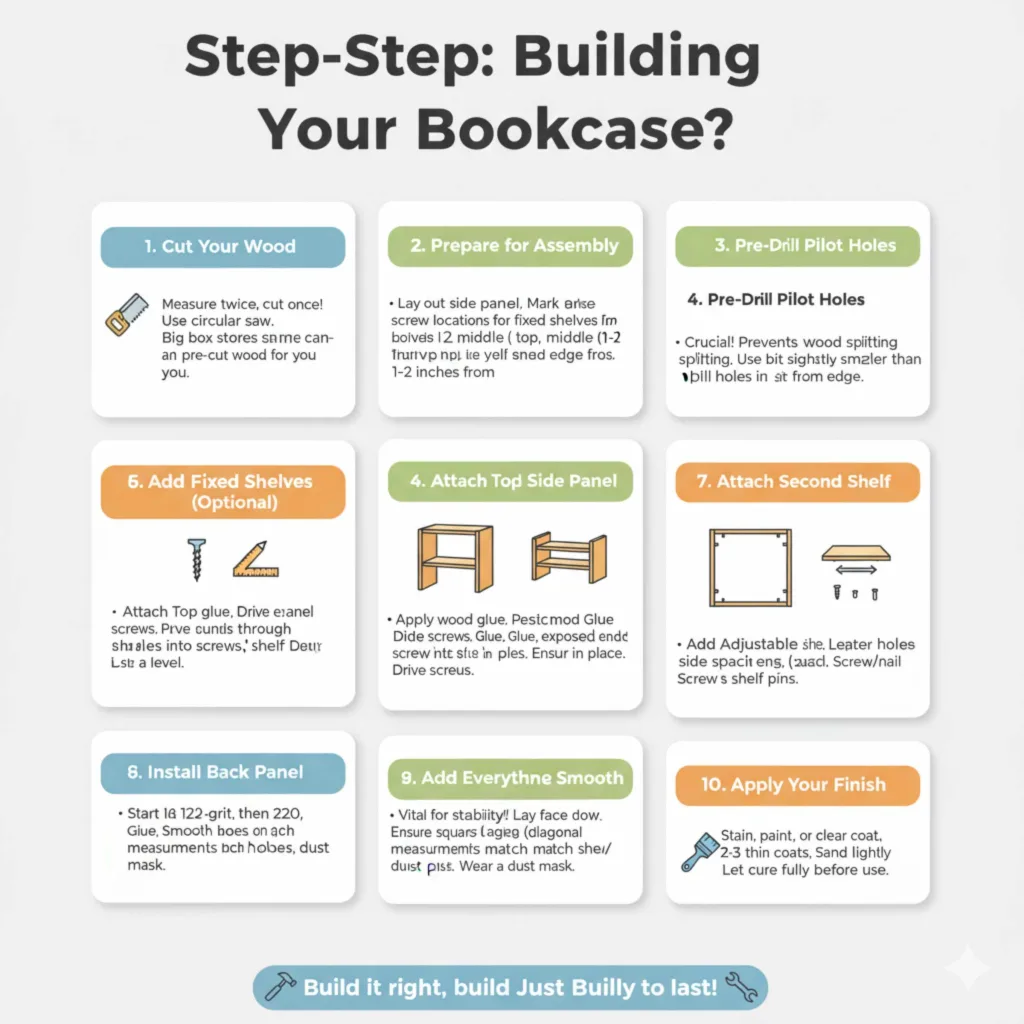
Step-by-Step: Building Your Bookcase
Alright, let’s get building! We’ll focus on a simple, sturdy design. If your wood isn’t pre-cut, this is where you’ll do that first. Measure twice, cut once!
Step 1: Cut Your Wood
Using your measurements and a straight edge (like a speed square or a clamped-on straight board), carefully mark your wood. If you have a circular saw, this is the time to use it. Always cut on the line you marked.
Pro Tip: If you’re unsure about using a saw, most big box stores like Home Depot or Lowe’s offer cuts for a small fee. You can buy your wood to the exact dimensions you need!
Step 2: Prepare for Assembly
Lay out your two side panels. These will be the longest pieces. Decide where your fixed shelves (like the top, bottom, and maybe a middle one for stability) will go. For adjustable shelves, you’ll drill holes later.
Using your pencil and measuring tape, mark where your screws will go to attach the top, bottom, and any fixed shelves to the side panels. It’s common to place screws about 1-2 inches from the edge.
Step 3: Pre-Drill Pilot Holes
This is a crucial step! Before driving any screws, pre-drill pilot holes through the side panels where you marked them. Use a drill bit that is slightly smaller than the diameter of your screws. This prevents the wood from splitting, especially near the edges, and makes driving screws much easier.
You’ll also pre-drill pilot holes into the ends of your top, bottom, and fixed shelves to attach them to the side panels.
Step 4: Attach Top and Bottom Panels
Stand one side panel upright (you might need a helper or clamps to hold it steady). Apply a line of wood glue along the edge of the top panel where it will meet the side panel. Position the top panel, align your pilot holes, and drive screws through the side panel into the top panel.
Repeat this process for the bottom panel. Use your level to make sure everything is plumb and square as you go.
Step 5: Add Fixed Shelves (If Any)
If you’re adding a fixed middle shelf for extra support (highly recommended for larger bookcases!), repeat the process from Step 4. Apply glue to the edges, position the shelf, align pilot holes, and screw it in. Ensure it’s level.
Importance of a Fixed Shelf: A fixed shelf, especially a middle one, greatly increases the rigidity and stability of your bookcase. It prevents racking (wobbling side-to-side) and distributes weight better. For more information on structural integrity in furniture, resources like Woodworking Network offer valuable insights.
Step 6: Attach the Second Side Panel
Now, carefully lay your assembled structure down on the sides you’ve already attached to. Apply wood glue to the exposed ends of the top, bottom, and fixed shelves. Position the second side panel, aligning all the pilot holes. Drive screws to secure it firmly.
At this point, you should have a solid, three-sided box structure.
Step 7: Install the Back Panel
This step is vital for stability! Lay your bookcase structure face down on a flat surface. Position your thin plywood or hardboard back panel, making sure it covers the entire back and that the bookcase frame is perfectly square. Measure diagonally from corner to corner; the measurements should be identical if it’s square. Use your level again to confirm.
Secure the back panel using small screws or nails, spacing them every 6-8 inches around the perimeter and into any fixed shelves. This panel is what prevents your bookcase from twisting and becoming wobbly.
Step 8: Add Adjustable Shelf Supports
If you want adjustable shelves, use a jig or a measuring tape and pencil to mark evenly spaced lines on the inside of your side panels for the shelf pin holes. Many people place holes every inch or two.
Use your drill with a bit the same diameter as your shelf pins to drill the holes. Make sure they are straight and go all the way through the side panel. You’ll insert the shelf pins into these holes to support your adjustable shelves.
Step 9: Sand Everything Smooth
Now is the time to make your bookcase look and feel finished. Start with a coarser grit sandpaper (like 120-grit) to smooth out any rough edges or imperfections. Then, move to a finer grit (like 220-grit) for a silky-smooth finish. Pay attention to edges and corners.
If you’re using an electric sander, it will speed this process up significantly. Either way, wear a dust mask to avoid inhaling sawdust.
Step 10: Apply Your Finish
This is where your bookcase really comes to life!
- Staining: Apply wood stain evenly with a brush or rag, following the wood grain. Wipe off excess stain after a few minutes, based on the product’s instructions, to achieve your desired color depth.
- Painting: Apply a primer first, then one or two coats of your chosen paint. Lightly sand between coats for a smoother finish.
- Clear Coat (Polyurethane, Varnish): This protects the wood and gives a durable finish. Apply 2-3 thin coats, allowing them to dry thoroughly between applications. Light sanding with very fine grit sandpaper (320+) between coats can lead to a more professional look.
Allow your finish to cure completely according to the product directions before placing books on the shelves. This can take anywhere from 24 hours to a week.
FAQ: Your Bookcase Building Questions Answered
Q1: How do I make sure my bookcase is stable?
A1: Stability comes from several factors: using sturdy¾-inch thick material for the main structure, ensuring all joints are glued and screwed securely, and, most importantly, attaching a solid back panel. The back panel is crucial for preventing racking (wobbling). If you plan to place heavy books or have children, consider anchoring the bookcase to the wall using furniture anti-tip kits (CPSC advises furniture anchoring).
Q2: What’s the easiest way to cut wood for beginners?
A2: The easiest way is to have the wood store cut it for you! If you need to cut it yourself, a circular saw with a guide is generally easier for long, straight cuts than a hand saw. For precise angles, a miter box and hand saw can be helpful, or a power miter saw if you have access to one.
Q3: Can I make a bookcase without a drill?
A3: It’s very difficult to build a sturdy bookcase without a drill. Pre-drilling pilot holes is essential to prevent wood splitting, and driving screws requires a drill or a powered screwdriver. While technically possible with manual screwing and careful pre-drilling with an awl or nail, it’s highly impractical and the joints won’t be as strong.
Q4: How thick should my shelves be?
A4: For typical bookcases, 3/4-inch thick material (like plywood or solid wood) is standard and strong enough for most books. If you plan to put very heavy items or want very long unsupported spans (over 3 feet), you might consider thicker material or adding support.
Q5: How do I space my shelves evenly?
A5: First, decide on the total space available for shelves. Then, decide how many shelves you want. Divide the total space by the number of shelves (plus one for the space between them) to get your desired spacing. Use a measuring tape and pencil to mark the desired height for the top of each shelf on both side panels. For adjustable shelves, mark lines for the pin holes at your preferred intervals.
Q6: My bookcase wobbles. What did I do wrong?
A6: Wobbling usually points to one or more of these issues: the back panel wasn’t attached or wasn’t square, the joints weren’t glued or screwed securely, or the unit isn’t sitting on a perfectly level floor. Double-check that the back panel is firmly attached and that all your screws are tight. If the floor is uneven, you can use shims under the bookcase to level it.
Conclusion
See? Building your own bookcase isn’t some mystical craft reserved for seasoned professionals. By breaking it down into manageable steps – from planning and gathering tools to cutting, assembling, and finishing – you’ve successfully created a functional and attractive piece of furniture. You’ve tackled measurements, saw blades, and screws, and emerged victorious with a custom bookcase ready to house your literary treasures.
This project is just the beginning. With the confidence you’ve gained, you can tackle more complex designs, experiment with different wood types, or even build other furniture pieces. Enjoy the satisfaction of knowing you built it yourself, and feel free to show it off – you’ve earned it!