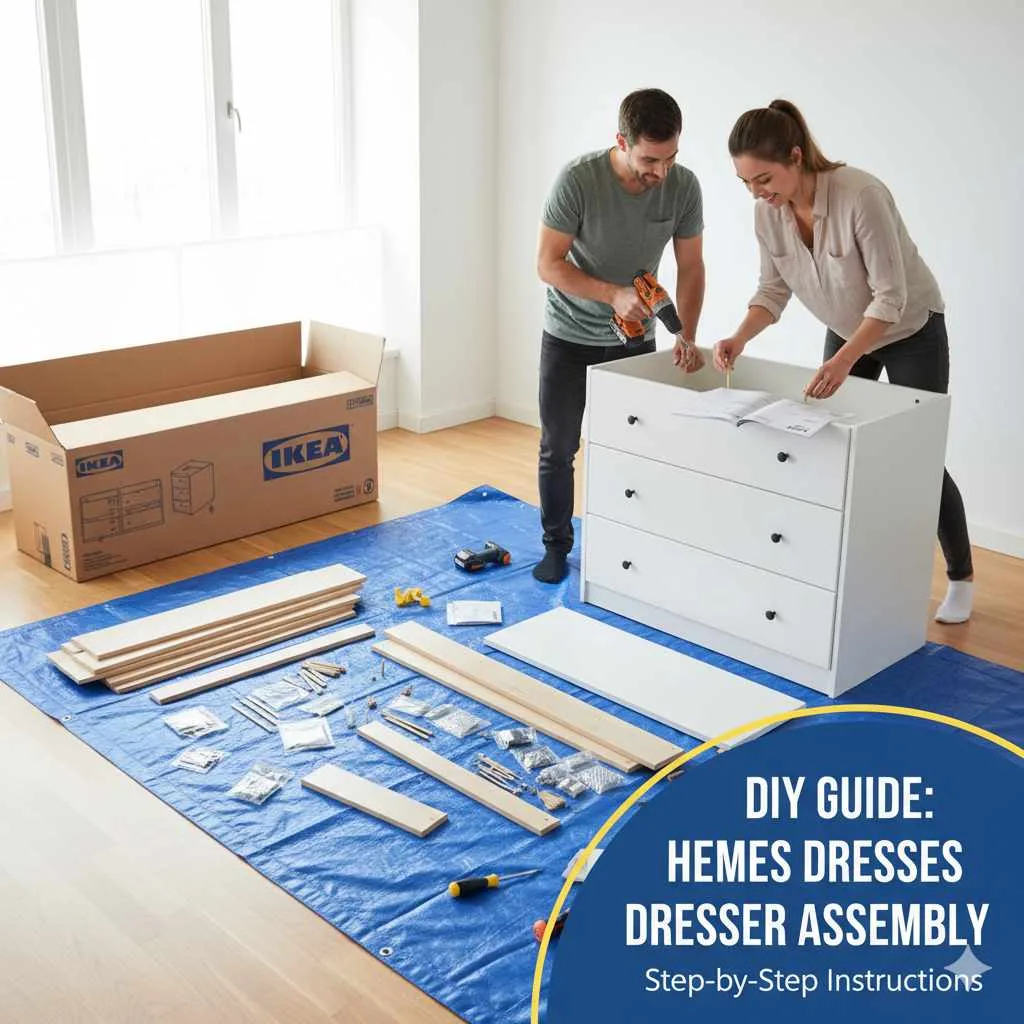
Putting together your IKEA HEMNES dresser is straightforward! This guide breaks down each step, providing clear instructions and helpful tips to ensure a smooth assembly process, so you can enjoy your stylish new furniture without the stress.
So, you’ve just brought home that beautiful IKEA HEMNES dresser, ready to add a touch of Scandinavian charm to your bedroom. But as you open the box and see all those pieces and a hefty instruction manual, a little voice of doubt might whisper, “Can I really do this?” Don’t worry, you absolutely can! As your trusted home decor advisor, I’m here to tell you that assembling furniture, especially a beloved piece like the HEMNES, is totally within reach. This guide is designed to make the process feel less like a chore and more like a rewarding DIY project. We’ll walk through each step together, demystifying the instructions and offering practical advice. Get ready to build something wonderful!
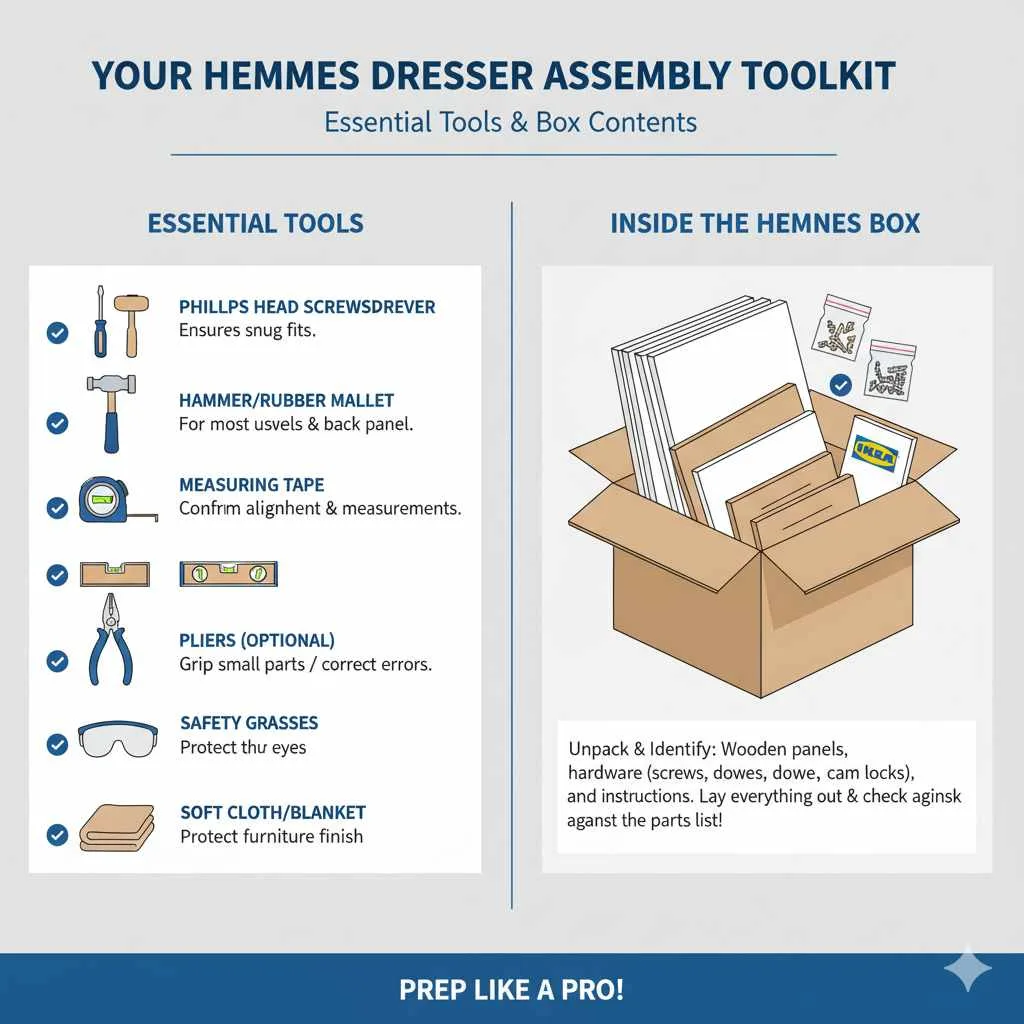
Your HEMNES Dresser Assembly Toolkit: What You’ll Need
Before we dive into the assembly, let’s gather our supplies. Having everything ready will make the process much smoother and prevent frustrating interruptions. Think of it like prepping your ingredients before cooking a delicious meal!
Essential Tools for HEMNES Assembly:
- Phillips head screwdriver: This is your most frequently used tool. Make sure it’s a good quality one that fits the screw heads snugly to avoid stripping them.
- Hammer: You’ll need this for gently tapping in dowels and the back panel nails. A rubber mallet is also a great option to protect the furniture surfaces from dents.
- Measuring tape: Handy for confirming measurements and ensuring pieces are aligned correctly.
- Level: Crucial for ensuring your dresser sits perfectly straight on the floor, which is important for drawer function and overall stability.
- Pliers (optional but helpful): Can be useful for gripping small parts or removing any pieces you might have accidentally placed incorrectly.
- Safety glasses: Always a good idea when working with tools, especially hammers.
- A soft cloth or blanket: Lay this down on your workspace to protect the dresser’s finish from scratches.
What’s Inside the HEMNES Box?
When you unpack your HEMNES dresser, you’ll find a collection of wooden panels, drawers, hardware (screws, dowels, cam locks, etc.), and the assembly instructions. Take a moment to lay everything out and check it against the parts list in the manual. This is a great opportunity to identify each piece and familiarize yourself with the hardware.
Step-by-Step Guide to Assembling Your HEMNES Dresser
Let’s get building! Follow these steps carefully, and you’ll have your HEMNES dresser ready in no time. Remember, take your time, double-check your work, and don’t be afraid to refer back to its official IKEA manual for visual guidance.
Step 1: Prepare Your Workspace and Parts
Find a spacious, well-lit area to work. Clear enough room to spread out the pieces and move around comfortably. Lay down your protective cloth or blanket on the floor. Now, carefully unpack all the components from the box. Group similar parts together – all the large side panels, the drawer fronts, the drawer sides, etc. Also, organize your hardware by type and size. This makes finding what you need at each step much easier.
Step 2: Building the Frame
This is where your dresser starts to take shape. You’ll typically begin by assembling the main carcass of the dresser. This usually involves attaching the side panels to the bottom and top panels using a combination of wooden dowels and metal cam lock screws/nuts.
- Insert Dowels: Gently tap the wooden dowels into the pre-drilled holes on the edges of the panels.
- Attach Panels: Align the panels so the dowels fit into their corresponding holes.
- Secure with Cam Locks: Screw the cam lock screws into their designated holes, then insert the cam lock nuts into the larger holes on the connecting panel. Use your screwdriver to turn the cam lock nuts clockwise about half a turn until they feel snug. This locks the two pieces together securely.
Make sure all connections are firm but avoid overtightening, which can damage the wood composite.
Step 3: Attaching the Back Panel
The back panel is crucial for the dresser’s stability and squareness. It’s often a thin piece of hardboard that slides into grooves or is nailed into place.
- Slide into Grooves: If your model has grooves, carefully slide the back panel into place. You might need to slightly flex the frame to get it in.
- Nailing it Down: If you need to nail, align the back panel so it’s flush with the edges of the frame. Using the provided small nails and your hammer, gently tap them into place around the perimeter. Start with the corners, ensuring the frame stays square. Spacing the nails about every 4-6 inches is usually sufficient. A carpenter’s square can be helpful here to ensure the corners are 90 degrees before nailing.
Step 4: Assembling the Drawers
The HEMNES dresser typically comes with multiple drawers that are assembled similarly. Don’t let assembling several drawers deter you; it becomes faster with each one.
- Sides and Bottom: Connect the drawer sides to the front and back panels using dowels and cam locks, just like you did for the main frame.
- Slide in Drawer Bottom: The thin drawer bottom panel usually slides into pre-cut grooves on the sides and front/back. Ensure it’s fully seated.
- Attach Drawer Front: The drawer front is often attached last, sometimes with screws from the inside of the drawer box. Some HEMNES models have decorative handles that are also attached at this stage.
Check that the drawers are square and that the bottom panel is secure before proceeding.
Step 5: Installing Drawer Runners and Drawer Slides
This step ensures your drawers glide smoothly. There are usually two types of runners involved: those attached to the dresser frame and those attached to the sides of the drawers themselves.
- Frame Runners: Screw the corresponding runners onto the inside walls of the dresser frame, following the pre-drilled holes precisely. IKEA often uses metal drawer slides. Pay close attention to the orientation (left vs. right) and front/back placement as shown in the manual.
- Drawer Slides: Attach the matching parts of the drawer slides to the sides of each assembled drawer. Again, ensure correct orientation and placement.
Smooth operation is key here, so take your time to ensure they are installed straight and level. You can find excellent resources from IKEA on proper runner installation on their assembly instructions page.
Step 6: Attaching the Top and Finishing Touches
Many IKEA dressers, including the HEMNES line, have a separate top panel that is attached to the main frame. This is usually secured from underneath or with specific brackets.
- Position the Top: Carefully place the top panel onto the assembled frame, ensuring it’s aligned perfectly with the edges.
- Secure it: Follow the instructions to secure the top, often by screwing through pre-drilled holes from the inside of the frame.
- Attach Handles/Knobs: If you haven’t already, attach any drawer pulls or knobs.
Step 7: Inserting Drawers and Testing
With the frame complete and drawers assembled, it’s time for the satisfying part: inserting the drawers!
- Alignment: Gently align the drawer slides on the drawer with the runners in the frame.
- Slide In: Push the drawer in carefully. It should slide smoothly. If it sticks or feels rough, you may need to adjust the runner placement slightly.
- Test: Open and close each drawer several times to ensure they function properly. Check that they sit flush when closed.
Step 8: Anchoring to the Wall (Crucial Safety Step!)
This is a non-negotiable step for safety, especially if you have children or pets. Dressers can tip over if not properly secured.
- Locate Studs: Use a stud finder to locate wall studs behind where your dresser will be placed. For stability, it’s best to anchor into a stud.
- Attach Bracket: The HEMNES dresser comes with an anti-tip kit. Attach one part of the bracket to the back of the dresser as instructed.
- Mark and Drill: Position the dresser against the wall. Mark the wall through the other part of the bracket (or its cord) for drilling. If you can, aim for a stud. Drill an appropriate pilot hole.
- Secure: Use the provided screws (or appropriate wall anchors if a stud isn’t available, though stud anchoring is preferred) to secure the bracket firmly to the wall.
According to the Consumer Product Safety Commission (CPSC), furniture tip-overs are a serious hazard, and using these restraints is paramount.
HEMNES Dresser: A Look at the Different Sizes
The HEMNES collection is known for its versatility, offering dressers in various sizes to suit different needs and spaces. Understanding these differences can help you choose the right one or assemble the one you have with confidence.
The HEMNES line typically includes:
- 3-drawer dressers: Ideal for smaller spaces like entryways, closets, or children’s rooms.
- 5-drawer dressers: A popular choice for bedrooms, offering a good balance of storage and footprint.
- 6-drawer dressers: These are generally wider, providing substantial storage for larger wardrobes.
- 8-drawer dressers: The widest option, offering maximum storage capacity, often designed with a split configuration for a striking visual.
While the assembly process is fundamentally the same for all HEMNES dressers, the larger models will naturally have more steps and more pieces of wood, hardware, and drawers to assemble. The core principles of using dowels, cam locks, and ensuring squareness remain consistent across the range.
Troubleshooting Common HEMNES Assembly Issues
Even with the best guides, sometimes a little hiccup occurs. Here’s how to tackle the most common issues:
| Problem | Possible Cause | Solution |
|---|---|---|
| Drawers don’t slide smoothly | Drawer runners or slides are misaligned, installed backward, or the dresser frame isn’t square. | Double-check runner installation for straightness. Ensure the frame is square (use a carpenter’s square). Loosen screws slightly on runners, adjust, and retighten. Ensure the back panel is fitted correctly. |
| Cam locks won’t tighten | The cam lock screw isn’t fully seated, or the cam lock nut is oriented incorrectly. | Ensure the cam lock screw is screwed in all the way. Make sure the arrow or opening on the cam lock nut points towards the screw head before tightening. |
| Pieces don’t align perfectly | Parts might be upside down, backward, or not fully seated into dowels/grooves. | Carefully review the IKEA manual to confirm the orientation of each piece. Ensure all dowels are fully inserted and panels are pressed together firmly before securing. |
| The dresser wobbles | The floor is uneven, or the back panel is not securely attached, or securing screws are loose. | Use a level to check the dresser’s orientation. Adjust by placing shims under the legs on uneven floors. Ensure the back panel is nailed securely on all sides and that all frame screws are tightened. Always anchor to the wall. |
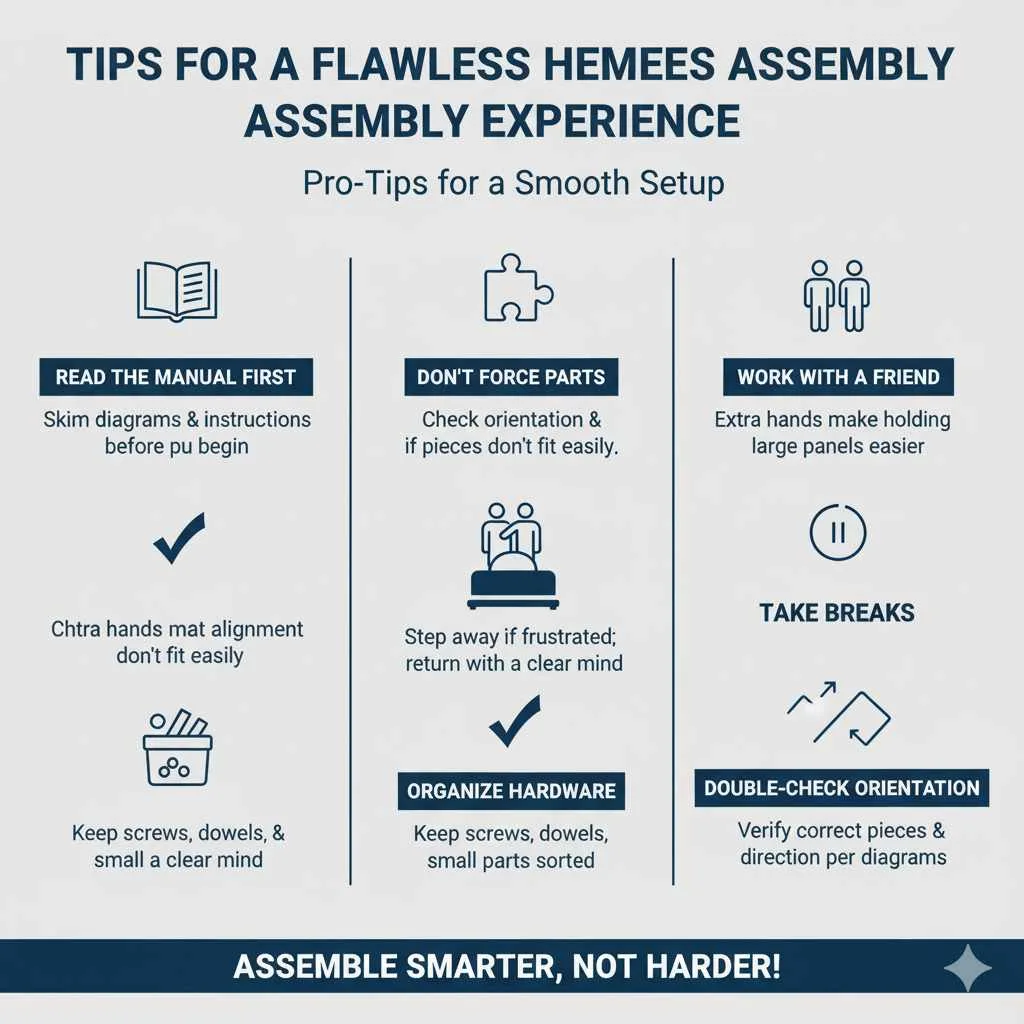
Tips for a Flawless HEMNES Assembly Experience
Beyond the step-by-step instructions, a few pro tips can elevate your assembly experience from “okay” to “amazing!”
- Read the manual before starting: Even though this guide is comprehensive, IKEA’s manual has diagrams that are invaluable for ensuring you have pieces oriented correctly. Give it a quick skim first.
- Don’t force parts: If something isn’t fitting easily, don’t force it. Stop and check the instructions. You likely have a piece in the wrong orientation or haven’t fully inserted a dowel.
- Work with a friend: While many IKEA pieces can be assembled solo, having a second pair of hands can make holding larger panels and ensuring alignment significantly easier, especially for heavier items like dressers.
- Take breaks: If you start to feel frustrated, step away for a few minutes. A short break can help you return with fresh eyes and a clearer mind.
- Keep hardware organized: Use small containers or the bags they came in to keep screws, dowels, and other small parts sorted. This saves immense time searching later.
- Double-check orientation: Many parts look similar but have subtle differences (e.g., holes for drawer slides). Always verify you’re using the correct piece and orienting it as shown in the diagram.
Frequently Asked Questions About Assembling the HEMNES Dresser
Q1: How long does it typically take to assemble a HEMNES dresser?
A1: For a beginner, assembling a typical 5 or 6-drawer HEMNES dresser usually takes about 2-4 hours. This can vary depending on your experience, the specific model, and whether you have an extra pair of hands to help.
Q2: What if I lose a screw or a small part?
A2: IKEA is generally good about providing a few extra common hardware pieces. If you’re missing something critical, you can often order replacement parts directly from IKEA’s customer service or look for generic hardware at a local hardware store. Take a photo of the missing part and its assembly step number to help them assist you.
Q3: Can I assemble the HEMNES dresser on my own?
A3: Yes, absolutely! While an extra person can make it easier, especially for lifting and holding larger panels, most HEMNES dressers can be successfully assembled by one person. Just be patient with yourself and use the tips provided.
Q4: How do I know if my dresser is square?
A4: A dresser that isn’t square won’t function optimally, and drawers might stick. Use a carpenter’s square to check that the corners of the frame are 90-degree angles, especially before attaching the back panel. Measuring the diagonals of the frame—they should be equal—is another way to check for squareness.
Q5: What is the best way to clean and care for my HEMNES dresser?
A5: For the solid pine or painted finishes of HEMNES, a damp cloth with a mild detergent is usually sufficient for cleaning. Wipe dry immediately. Avoid abrasive cleaners or excessive moisture. For painted surfaces in particular, check the official IKEA care instructions for your specific finish.
Q6: Do I really need to anchor it to the wall?
A6: Yes, 100%! This is for your safety and the safety of anyone in your home. Dressers are top-heavy, and furniture tip-overs can cause serious injury or death, especially to children. Always use the provided anti-tip hardware and secure it to the wall, ideally into a stud.
Conclusion: Enjoy Your Beautifully Assembled HEMNES Dresser!
Congratulations! You’ve navigated the assembly process and built a beautiful, functional piece of furniture. It’s incredibly rewarding to look at something you’ve put together yourself, knowing you’ve created a stylish and practical addition to your home. The HEMNES dresser, with its classic design and sturdy construction, is built to last and serve you well for years to come. Remember the tips you learned, and don’t hesitate to tackle your next DIY project with the same confidence. Happy decorating!