Effective cleaning for pots and pans involves understanding the material—stainless steel, non-stick, cast iron, or aluminum—and using the right gentle abrasion or chemical reaction (like baking soda paste or vinegar soak) to lift burnt food or stuck grime without damaging the surface finish. Consistency is key to long-lasting cookware.
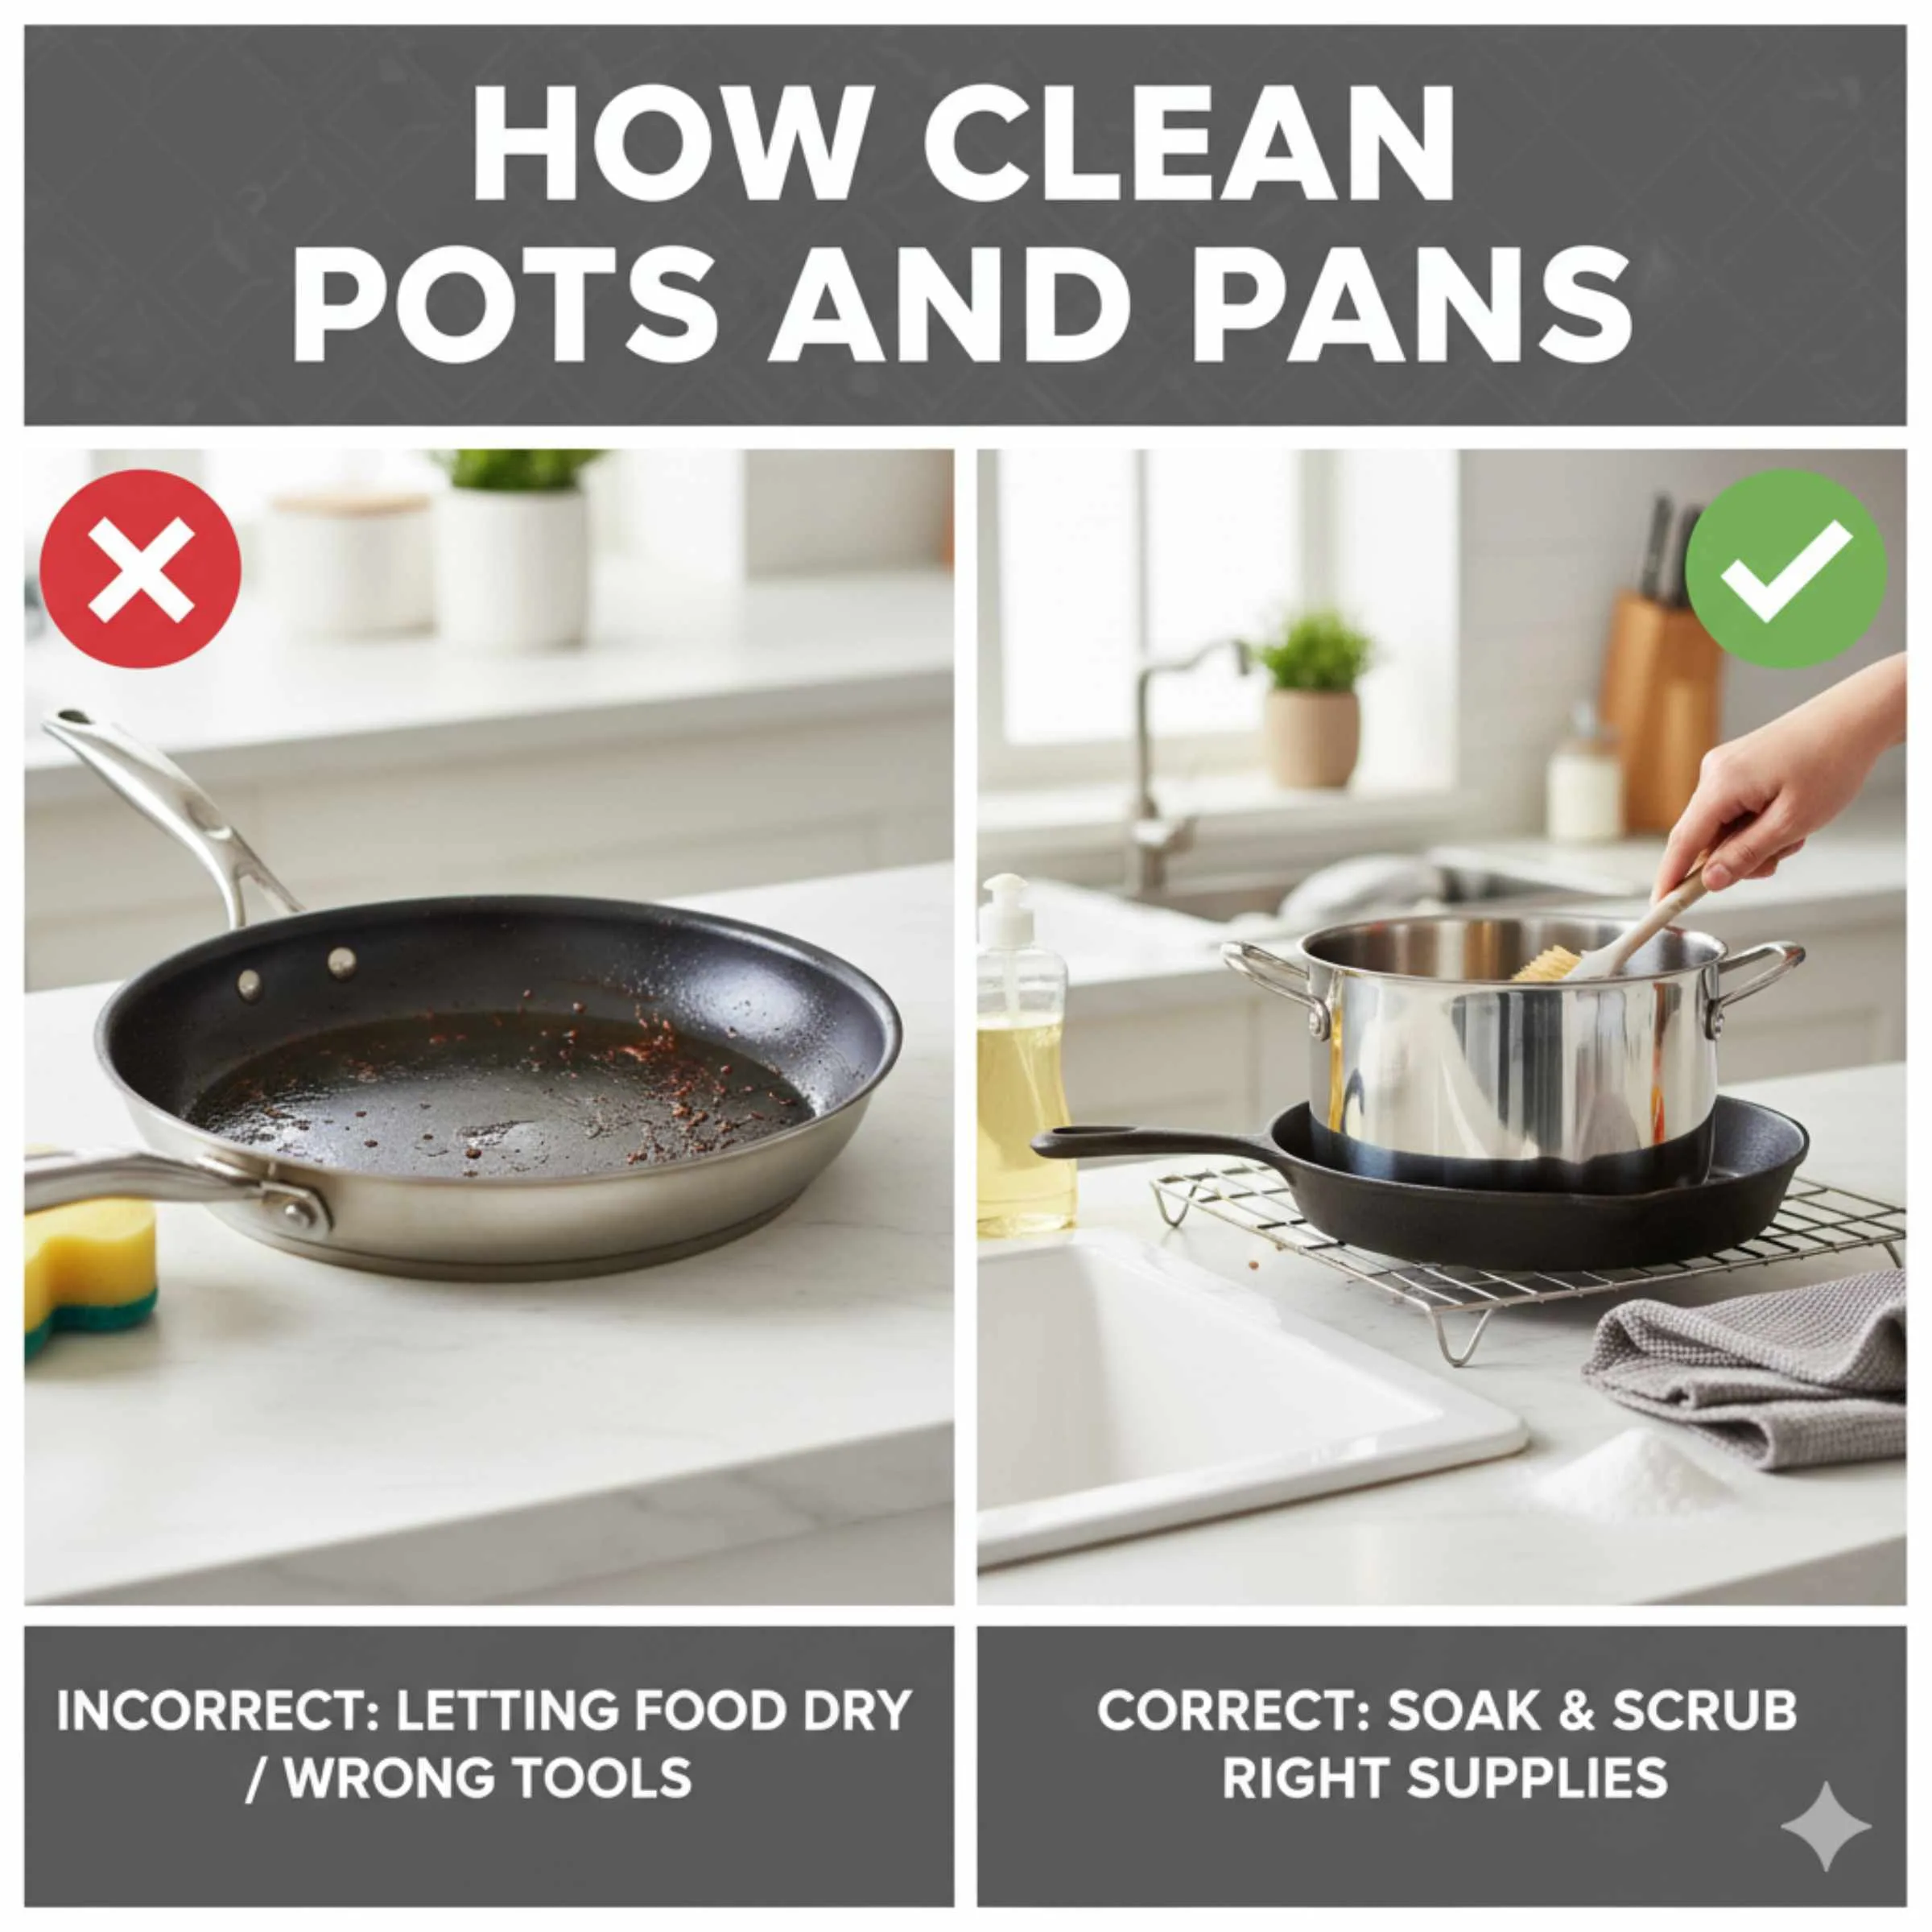
We’ve all been there. You made a fantastic meal, but the cleanup looks less than fantastic. That caked-on, burnt-on mess stuck to your favorite pot or pan can feel like a garage job that needs a serious lift. Don’t worry—this happens in every kitchen, even mine!
You don’t need harsh chemicals or hours of scrubbing to bring your cookware back to life. Think of this as basic maintenance for your tools. Just like we keep our cars tuned up, keeping our pots and pans clean extends their life and keeps your food tasting great.
We are going to break down the best methods based on what your pan is made of. Follow these easy steps, and you’ll restore that shine safely. Ready to tackle that tough cleanup? Let’s look at what you need first.
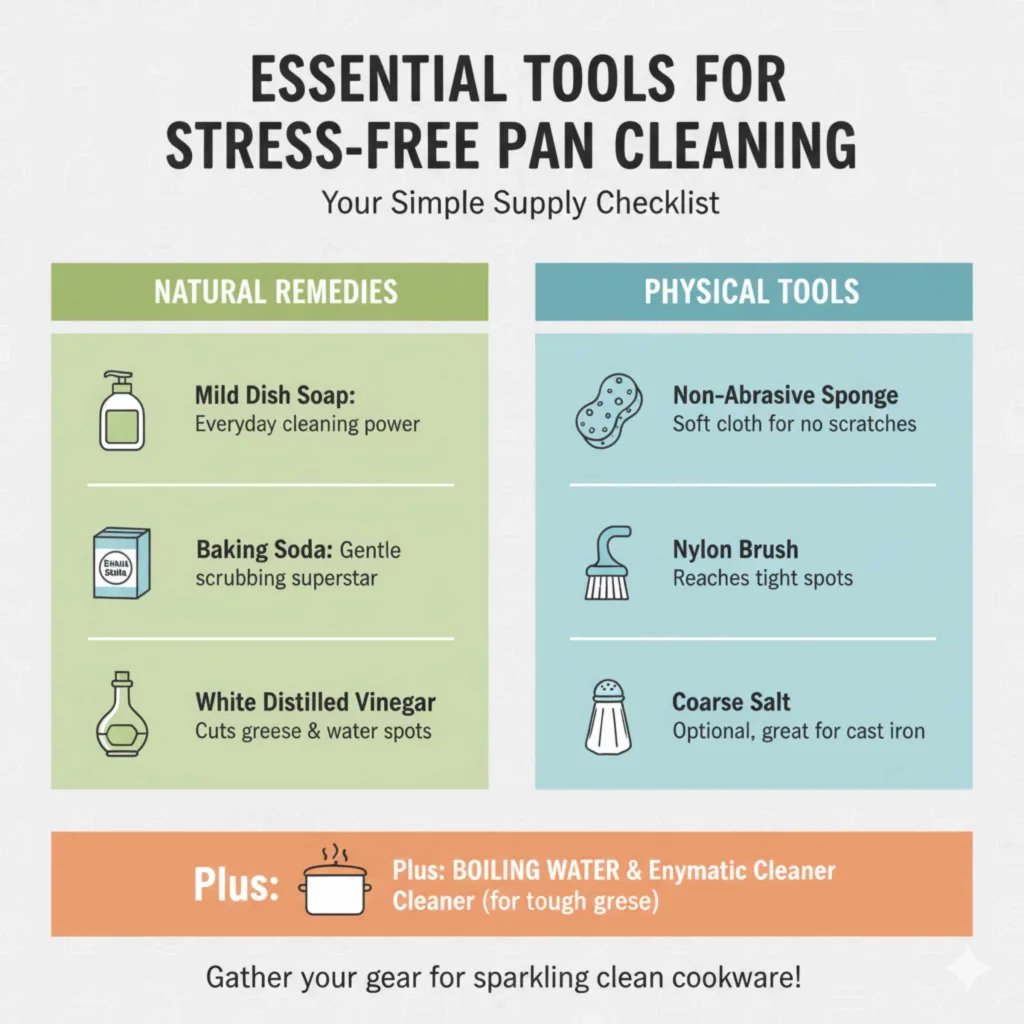
Essential Tools for Stress-Free Pan Cleaning
Before you start scrubbing, gather your simple supplies. You likely have most of these sitting right under your sink already. Having the right gear prevents scratching and makes the job much easier.
What You Need on Hand:
- Mild dish soap (the kind you use every day)
- Baking soda (the superstar of gentle scrubbing)
- White distilled vinegar (great for cutting through grease and hard water spots)
- Non-abrasive scrub sponge or soft cloth
- Nylon brush or dishwashing brush (for reaching tight spots)
- Coarse salt (optional, but great for cast iron)
- Boiling water
If you are dealing with really tough, baked-on grease that seems impossible to remove, sometimes an enzymatic cleaner—used for breaking down organic materials—can help, though we usually try the natural remedies first.
The Golden Rule: Know Your Material
The absolute most important step in knowing how to clean pots and pans is identifying what they are made of. Scrubbing delicate non-stick surfaces with steel wool is like taking a wire brush to your car’s paint job—it removes the finish. Always match your cleaning method to your pan’s surface.
Here is a quick guide to the most common types you’ll find in the kitchen:
| Cookware Type | Key Cleaning Concern | Biggest Don’t |
|---|---|---|
| Stainless Steel | Removing stuck-on food residue and discoloration. | Using chlorine bleach, which can pit the metal. |
| Non-Stick (Teflon/Ceramic) | Protecting the coating at all costs. | Using metal scrubbers or harsh scouring pads. |
| Cast Iron | Maintaining the seasoning (the natural non-stick layer). | Soaking it in water or using strong soap frequently. |
| Aluminum | Preventing discoloration and etching from acidic foods. | Putting scratched or lightweight pans in the dishwasher. |
Method 1: The Best Way to Clean Stainless Steel Pans
Stainless steel is tough, durable, and generally dishwasher safe, but that durability hides stains easily, especially when sugary sauces or burned starches weld themselves to the bottom. For these situations, we use heat and a reaction.
Step-by-Step Gentle De-Scaling for Stainless Steel:
- Assess the Damage: If there’s loose debris, wipe it out first. Don’t soak stainless steel for long periods unless necessary, as this can sometimes encourage spotting.
- The Vinegar and Water Soak: Fill the bottom of the pan with about an inch of water. Add a cup of white vinegar.
- Heat It Up: Place the pan on the stove over medium heat. Bring the water/vinegar mix just barely to a simmer (don’t let it boil vigorously). You will see the grime start to lift almost immediately.
- Scrape Gently: Turn off the heat. While the solution is still warm, use a wooden spoon or a plastic spatula to gently push at the stuck food. Most of it should release easily.
- The Baking Soda Power Scrub: Drain the pan. Sprinkle the entire bottom surface liberally with baking soda. Dampen your non-abrasive sponge and use the baking soda as a gentle, yet effective, scouring agent. The baking soda reacts subtly with the mild acid from the vinegar, giving you extra elbow grease without deep scratching.
- Rinse and Dry: Rinse thoroughly with hot water. Dry immediately to prevent water spots.
If you have stubborn rainbow-colored stains (often called “heat tint”) on stainless steel, a dab of Bar Keepers Friend—a mild acid cleaner—rubbed in with a damp cloth usually wipes them away without any heavy scrubbing.
Method 2: Saving Your Non-Stick Cookware (Handle with Care!)
Non-stick surfaces require the most gentle touch. The goal here is to clean the surface without compromising the coating that keeps your eggs sliding right out. Never use steel wool or abrasive cleaners on non-stick pots and pans.
The Simmer and Soft Scrape Technique:
- Cool Down First: Ensure the pan is completely cool to the touch. Rapid temperature changes can warp the metal underneath the coating.
- Soap and Soak: Fill the pan with warm water and a generous squirt of mild dish soap. Let it soak for about 15 to 30 minutes. This softens any residue.
- Use the Right Tool: Use only a soft sponge, dishcloth, or a dedicated non-scratch scouring pad. For residue that won’t budge, the plastic edge of a spatula or spoon often works better than abrasive action.
- The Baking Soda Paste Trick: For sticky spots, mix a paste of baking soda and water (about 2 parts baking soda to 1 part water). Apply the paste directly to the stubborn spot. Let it sit for 10 minutes, then gently rub with a damp, soft cloth.
- Rinse Completely: Rinse well. Never let soap residue dry on the surface, as it can leave a film.
A common question that comes up is whether you have to hand-wash these. While many brands claim “dishwasher safe,” the harsh detergents and high heat of a dishwasher can degrade the non-stick coating over time. If you want to maximize the life of your pan, hand-washing is always the smarter choice, similar to how we treat specialized engine components on vehicles.
Method 3: Restoring Seasoned Cast Iron Pans
Cleaning cast iron is different because you are not just cleaning the metal; you are protecting the seasoning—the layer of polymerized oil that creates the natural non-stick surface. Aggressive scrubbing removes this seasoning, which can lead to rust.
How to Clean Cast Iron (The Right Way):
- Clean While Warm: Clean the pan soon after use while it is still warm (but not scorching hot).
- Scrape and Rinse: Use a stiff nylon brush or a chainmail scrubber (this is safe for cast iron seasoning!) to knock off food particles. Rinse with hot water.
- Soap Sparingly (If Needed): If you cooked something particularly greasy or pungent, a tiny drop of mild soap is okay, but rinse immediately. Modern dish soaps are much milder than lye soaps of the past. For most messes, hot water and a stiff brush are enough.
- The Salt Scrub Method: For stuck-on, stubborn bits, pour a few tablespoons of coarse kosher salt into the warm pan. Add a little cooking oil (like canola or vegetable). Use a folded paper towel to scrub the salt mixture around the pan. The salt acts as a safe, natural abrasive that won’t strip the seasoning.
- Thorough Drying is Non-Negotiable: Place the clean pan back on the burner over medium heat for 3–5 minutes until every drop of water has evaporated. Water is the enemy of cast iron, causing rust quickly.
- Re-Season Lightly: Once dry and warm, take a paper towel, dip it in a neutral cooking oil (like grapeseed oil), and wipe a very small amount over the entire cooking surface. Wipe the excess off until the pan just looks lightly oiled. This protects it until the next use.
Method 4: Tackling Aluminum and Hard Water Stains
Aluminum pans are lightweight and conduct heat well, but they are softer and more reactive than stainless steel. Acidic foods left too long can cause dark spots or pitting. Hard water spots (white, chalky film) are also common.
The Vinegar Soak for Dullness and Stains:
- Create a Mild Acid Bath: Mix one part white vinegar with three parts water in the pan.
- Apply Heat: Bring this mixture to a gentle simmer on the stove for about 10 minutes. This mild acid helps dissolve mineral deposits and stains that the water left behind.
- Neutralize: Turn off the heat and let it cool slightly. Pour out the liquid. Immediately wash the pan with hot, soapy water. This step neutralizes the acid remaining on the surface, preventing etching.
- Buff Clean: Use a soft cloth and mild soap. If you notice any remaining dullness, a paste of cream of tartar applied gently can sometimes restore the bright finish.
It is crucial to remember that aluminum pots and pans should generally not be cleaned in the dishwasher, as the strong detergents can cause the aluminum to oxidize, turning it dark grey or black. You want to treat aluminum with a bit more care, similar to how you would use lower-grade materials when swapping out parts on a budget car build.
Advanced Relief: Solutions for Truly Burnt-On Disasters
Sometimes, you forget the rice on the stove for 10 minutes too long. The food bakes into a hard, black ceramic layer. Before you resort to scraping with a metal tool, try this intensive soak method that works for most non-reactive metals (Stainless Steel and sturdy Aluminum):
The Boiling Detergent Blast
This method uses the power of boiling water and surfactant action (the soap breaks down fats) to lift the worst grime.
- Fill High: Fill the scorched pan about three-quarters full with water.
- Add Soap: Add 1–2 tablespoons of standard dish soap.
- Boil Hard: Bring the water to a rolling boil over high heat. Let it boil steadily for 10 to 15 minutes. Watch carefully so it doesn’t boil over!
- Scrape While Boiling: Using a wooden spoon or flat wooden spatula, gently push against the black residue while the water is vigorously boiling. The thermal shock and lifting action often cause large pieces to float free.
- Cool and Finish: Pour out the water (it might look like tar—that’s a good sign!). Now, use the baking soda scrub (Method 1, Step 5) on any remaining spots.
According to university extension programs that focus on kitchen safety and cleaning techniques, leveraging heat and mild chemical action is often more effective and safer than relying on brute force scrubbing, which damages implements over time.
Pro Tips for Maintaining Your Cookware Shine
Cleaning is reactive; maintenance is proactive. A little effort after every use saves you hours of scrubbing later. Think of this as your preventative maintenance schedule.
Daily Habits for Lasting Pans:
- Rinse Immediately: As soon as you empty your pan, give it a quick rinse with hot water. It’s much easier to clean a warm, slightly soiled pan than a cold, dried-out one.
- Wipe Down Immediately: Always dry your pans right away, especially cast iron and aluminum, to prevent water spots and rust.
- Avoid Overfilling: When cooking sauces or liquids, don’t fill the pan past two-thirds full. This prevents boil-overs that burn onto the upper sides of the pan.
- Use the Right Utensils: Stick to wood, silicone, or nylon utensils while cooking to protect non-stick coatings and softer metals.
- Don’t Stack Wet Pans: Stacking wet pans traps moisture, leading to mildew or rust spots between the layers.
For those interested in deeper cleaning science, understanding pH balance in cleaning agents can be helpful. Vinegar (acetic acid) is acidic, great for mineral deposits. Baking soda (sodium bicarbonate) is mildly alkaline, excellent for cutting through baked-on grease after the initial loosening.
Troubleshooting Common Pan Cleaning Issues
Sometimes the problem isn’t just burned food—it’s discoloration or cloudiness. Here are quick fixes for issues outside the scope of simple stuck-on meals.
Cloudy Glass Lids:
If your glass lids look milky or cloudy, it’s usually hard water deposits reacting with trapped soap residue. The best fix is a long, hot soak in a solution of 1 part vinegar to 1 part water. Let them sit for an hour before rinsing.
Sticky Non-Stick Pan (Even After Washing):
Sometimes, the coating becomes sticky if too much oil was used during cooking (polymerization creating a gummy layer). Strip this layer by boiling a solution of water and a mild degreaser, like a few drops of Dawn dish soap, for 10 minutes. Rinse and dry well.
Scratches on Stainless Steel:
If your stainless steel happens to get a minor scratch, remember that stainless steel is hard. You can carefully use a highly fine-grade (600 grit or higher) sandpaper or Bar Keepers Friend to gently rub with the grain of the metal to minimize the appearance of the scratch. Always test an inconspicuous area first! For significant damage, consult a professional refinisher, though usually, minor scratches are cosmetic only.
For authoritative guidance on metal maintenance, resources from organizations like the National Institute of Standards and Technology (NIST) show how material composition dictates care, reinforcing the need to be gentle with softer metals.

Frequently Asked Questions (FAQ) About Pan Cleaning
Q1: Can I put my cast iron pan in the dishwasher?
A: No. The high heat and strong detergents wash away the protective layer of seasoning, leading to immediate rusting of the bare iron underneath. Stick to hot water and a brush.
Q2: Is it safe to use steel wool on my stainless steel pans?
A: Generally, only use very fine steel wool (Grade #0000) or specialized stainless steel scrubbies. Coarser pads can leave tiny scratches where grease can later stick permanently.
Q3: Why does my non-stick pan look dull after washing?
A: Dullness often comes from mineral deposits from hard water or chemical residue from strong dishwasher detergents. Always hand-wash non-stick and rinse thoroughly with clean water, followed by immediate drying.
Q4: How do I remove white mineral spots from stainless steel pans?
A: These are usually calcium deposits (limescale). Simmer equal parts water and white vinegar in the pan for five minutes. The acid dissolves the minerals. Rinse and dry immediately.
Q5: Should I soak my pots and pans overnight?
A: Only if they are heavily crusted stainless steel. Never soak non-stick or cast iron pans for long periods, as this can degrade the coating or cause the cast iron to rust.
Q6: What is the best way to clean the outside bottom of my pans?
A: If the outside bottom (the part that touches the burner) is covered in black, baked-on grease, use a heavy-duty degreaser spray, let it sit for 15 minutes, and then scrub with a nylon pad or a paste of baking soda and water.
Wrapping Up Your Cookware Confidence
See? You now have proven, reliable methods to handle virtually any mess your cooking adventure throws at you. Cleaning pots and pans doesn’t have to be a dreaded chore that ruins your day. It’s just a matter of knowing what you are working with.
Whether you are reviving a stainless steel favorite with the vinegar-baking soda combo or carefully tending to your cast iron seasoning, gentle chemistry works better and faster than brute force scrubbing every time.
By adopting a quick post-meal rinse and knowing the right gentle technique for each material, you are ensuring your essential kitchen tools stay reliable for years to come. Take pride in maintaining your gear; it makes the next time you cook even more enjoyable knowing the cleanup will be a breeze!