To clean gas burners effectively, always disconnect power first. Gently remove burner caps and heads, soak them in warm, soapy water, scrub grime gently, and clear clogged ports using a thin wire or needle. Ensure components are completely dry before reassembling for safe, efficient cooking.
Struggling with uneven flames or burners that just won’t light right? You are not alone. Dirty gas burners are a common kitchen headache that affects cooking performance and can even pose safety risks if left too long. Dealing with caked-on grease and food spills can feel like a big job, but I promise it’s simpler than you think. With a few basic household items and a little patience, we can get those flames burning blue and hot again. Let’s walk through this step-by-step guide to restore your cooktop’s brilliance and efficiency.
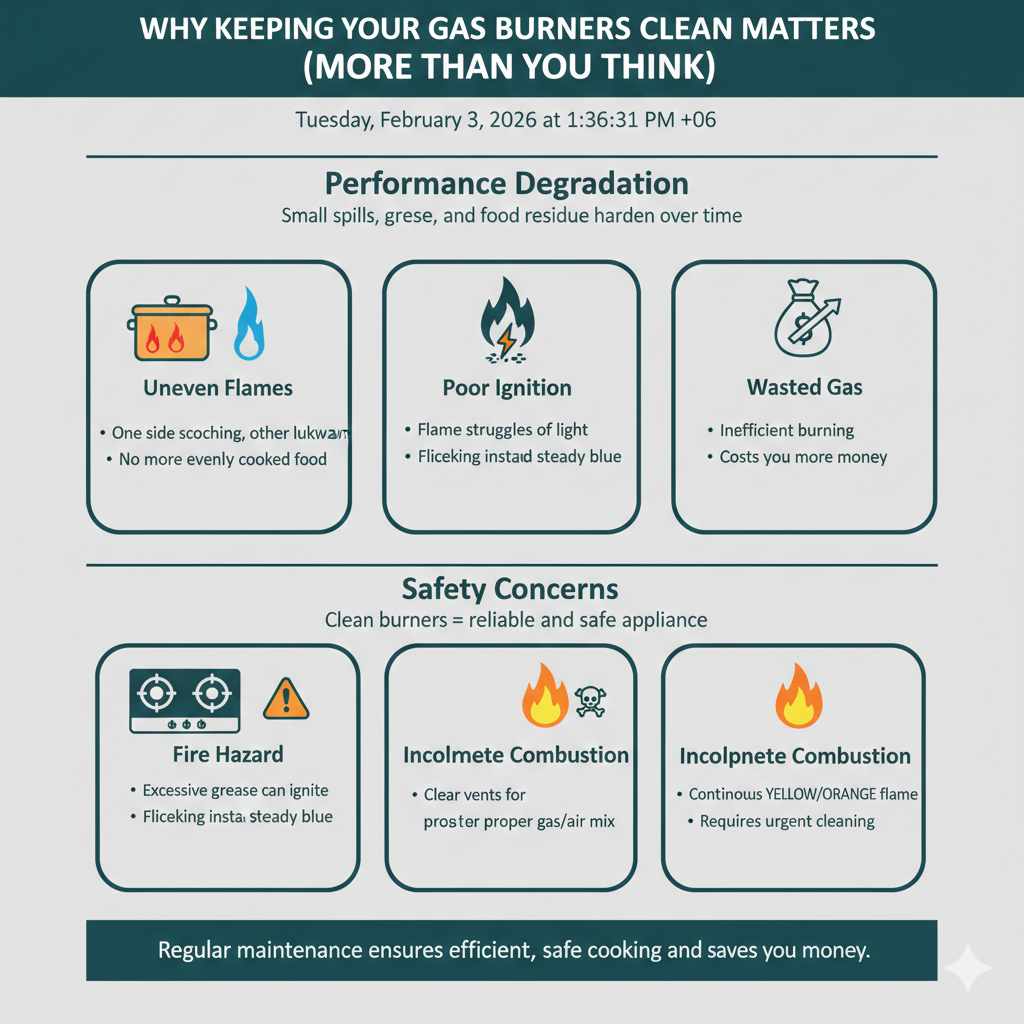
Why Keeping Your Gas Burners Clean Matters (More Than You Think)
When you use your gas range, small spills, grease splatter, and food residue inevitably end up around the burner components. Over time, this buildup hardens. This isn’t just about looks; it directly impacts how your stove works.
Performance Degradation
If the burner ports (the tiny holes where the gas comes out) get clogged, the gas flow becomes restricted. This leads to:
- Uneven Flames: One side of your pan gets scorching heat while the other stays lukewarm.
- Poor Ignition: The flame might struggle to light or flutter instead of having a steady blue glow.
- Wasted Gas: Inefficient burning means you are using more energy than necessary, which costs you money.
Safety Concerns
While modern gas ranges have excellent safety features, keeping them clean is essential for reliability. Excessive external grease buildup near the gas supply lines can become a fire hazard under extreme heat. Additionally, ensuring the vents are clear helps the gas mix properly with air, leading to complete combustion. If you notice a continuous yellow or orange flame instead of a clean blue one, it often signals incomplete combustion, which means cleaning is urgently needed.
Gathering Your Tools and Supplies
Before we dive in, let’s make sure we have everything ready. You probably already own most of these items. Preparing your workspace and tools beforehand makes the entire process smooth and quick. Remember, safety first—turn off the gas supply if you are very uncomfortable, although for simple cleaning, just ensuring the stove is off and cool is usually enough.
Essential Cleaning Checklist
Here are the must-haves for cleaning your gas burners:
| Item | Purpose |
|---|---|
| Dish Soap (Mild) | For soaking and cutting light grease. |
| Warm Water | The primary vehicle for soaking parts. |
| Non-Abrasive Sponge or Cloth | For gentle wiping—avoid anything that scratches. |
| A Thin Pin, Paperclip, or Needle | Crucial for carefully clearing clogged burner ports. |
| Old Toothbrush or Small Brush | Great for scrubbing around crevices. |
| Baking Soda (Optional) | For making a paste to tackle tough, baked-on spots. |
Pro Tip from Dustin: Never use abrasive cleaners like steel wool or harsh scouring pads on burner caps or the cooktop surface, as they can damage the finish, especially on stainless steel or enamel. We want clean, not scratched!
Step-by-Step Guide: How to Clean Gas Burners
We are going to tackle this job in stages: disassembly, soaking, scrubbing, clearing ports, and finally, drying and reassembly. Follow these steps exactly, and you’ll see great results.
Step 1: Safety First – Prepare the Cooktop
This is the most important step, please don’t skip it. You must ensure there is no chance of accidental ignition.
- Turn Off the Gas: If you are unsure how to do this at the main line, simply ensure all burner knobs are firmly in the ‘Off’ position.
- Allow Cooling: Wait until the entire stove surface is completely cool to the touch. Cleaning hot gas components is dangerous.
- Disconnect Power (Optional but Recommended): If you have an electronic ignition system (where the stove clicks), unplugging the range from the wall outlet provides an added layer of certainty that nothing will accidentally spark while you are cleaning. Check the back or bottom of your range for the power cord.
Step 2: Disassemble the Burner Components
Most gas cooktops have three main removable parts per burner. These parts separate easily by hand—no tools needed for removal.
- Remove Burner Caps: These are the flat, solid disks sitting on top of the burner assembly. Lift them straight up.
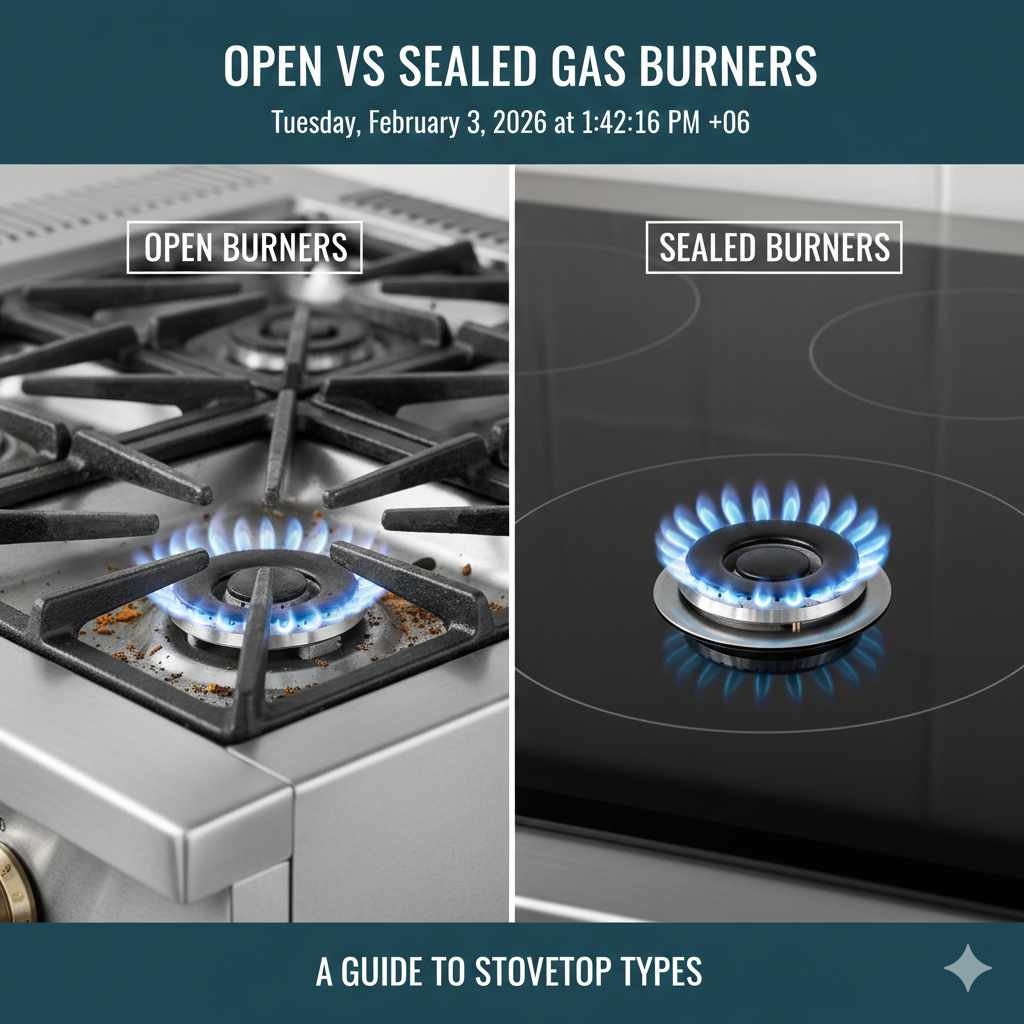
- Remove Burner Heads (or Bodies): Underneath the cap, you’ll find the component with the holes where the flame actually comes out. Lift this piece off carefully. Note that some modern stoves have sealed burners, which require a different cleaning approach (we will touch on that later).
- Handle Grates: Set aside the heavy iron grates that hold your pots and pans on a safe, clean surface, like a protected counter or a drop cloth on the floor.
Important Note on Placement: As you remove each piece, place it in the order you removed it. If your stove has different-sized burners (often a small simmer burner and a large power burner), keep the parts separated so you don’t mix them up during reassembly.
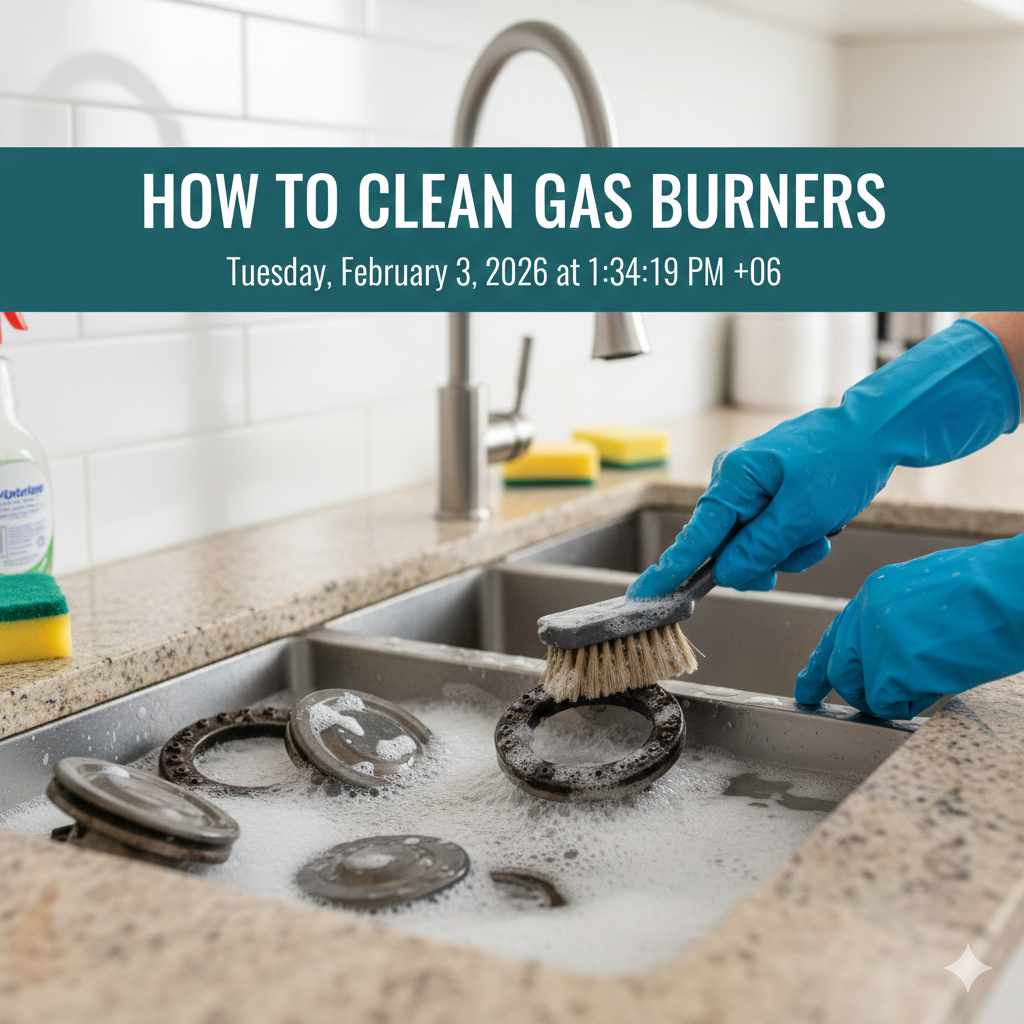
Step 3: Soaking the Caps and Heads
This soaking phase does most of the heavy lifting for you by loosening baked-on grease and food debris.
- Prepare the Soak: Fill a utility sink or a large bucket with warm water. Add a few drops of standard dish soap. You want suds, but not so much that it becomes hard to rinse.
- Submerge Components: Place all the removed burner caps and burner heads into the soapy water. Make sure they are fully submerged.
- Let Them Sit: Allow them to soak for at least 30 minutes. If the grime is really thick, let them soak for an hour. This is a great time to clean the surrounding cooktop surface (see Step 6).
Step 4: Scrubbing and Clearing the Ports (The Critical Step)
After soaking, the grime should be soft enough to remove easily. This attention to detail ensures perfect blue flames.
- Gentle Scrubbing: Take the burner heads out one by one. Use a soft sponge or an old toothbrush to gently scrub away the softened residue. Rinse under clean running water.
- Clearing the Ports: Look closely at those tiny holes (the gas ports) around the circumference of the burner head. If you see any blockage, you need to clear it.
- Take your straightened paperclip, thin needle, or sewing pin.
- Carefully insert the tip into each clogged port. Gently wiggle the pin to dislodge any debris.
- Crucial Safety Tip: Do not use a toothpick, as wood fragments can break off inside and cause a worse clog. Do not use a metal skewer that is too thick, as you could widen the hole, which changes the gas flow dynamics. Refer to manufacturer guidelines, often provided by organizations like the U.S. Department of Energy, regarding safe maintenance practices.
- Cleaning the Caps: The solid caps usually just need a light wipe with the sponge, as the trapped moisture inside the cap helps loosen spills.
Step 5: The Absolute Necessity of Drying
This is perhaps the second most crucial step after safety disconnection. If any moisture remains in the burner assemblies, particularly near the electrode (the small white ceramic tip responsible for sparking), your stove will not light properly, or it might spark constantly after the flame is lit because of residual water bridging electrical contacts.
- Air Dry: Lay all components (caps and heads) out on a dry, lint-free towel. Allow them to air dry completely. This can take several hours depending on humidity.
- Speeding Up Drying (Use Caution): If you are in a hurry, you can use a hairdryer set to the LOW heat or cool setting to gently blow air across the parts, paying extra attention to the inside channels and the electrode area. NEVER use high heat, as this can warp the metal components.
- Visual Check: Before moving on, hold each burner head up to the light and confirm every single port hole is clear and dry.
Step 6: Cleaning the Cooktop Deck Area
While the parts are drying, focus on the area underneath where they sit. This area often collects crumbs and spills.
- Wipe down the entire surface area with a damp cloth and mild soapy water or an appropriate cooktop cleaner.
- Pay special attention to the gas orifice openings—the tiny holes in the metal housing where the gas tube connects to the burner head. Be incredibly gentle here; these are precision parts. A gentle wipe is all that is needed. Do not poke anything into the orifice itself.
Step 7: Reassembly and Testing
Once everything is bone dry, it’s time to put it back together. Proper seating is key to good performance.
- Reinstall Burner Heads: Place the burner head back onto its base, ensuring it sits securely and evenly. It should feel stable and level.
- Replace Burner Caps: Place the caps back onto the center pin of the burner heads. Ensure they are centered and flat. If a cap is slightly crooked, the flame will be uneven.
- Reconnect Power: Plug the stove back into the wall outlet.
- Test the Ignition: Turn the knob for one burner to the ‘Light’ position. You should hear a consistent clicking and the burner should ignite quickly into a steady, blue flame.
- Check Flame Color: A healthy gas flame is primarily blue underneath with perhaps a hint of lighter blue or yellow at the very tip. If you see large patches of yellow or orange, turn it off and recheck the seating of the cap and dry the components again.
Dealing with Specific Types of Burner Buildup
Different kinds of messes require slightly different tactical approaches. Here’s how to handle the most common cleaning challenges.
Tackling Heavy, Baked-On Grease
If soaking alone isn’t cutting it, you need a mild abrasive paste.
- Mix baking soda with just enough water or white vinegar to create a thick paste—think toothpaste consistency.
- Apply this paste directly onto the greasy parts of the burner heads and caps.
- Let the paste sit for 15 to 20 minutes. The mild abrasive nature of the baking soda helps lift the stubborn residue when you scrub with your soft brush.
- Rinse thoroughly.
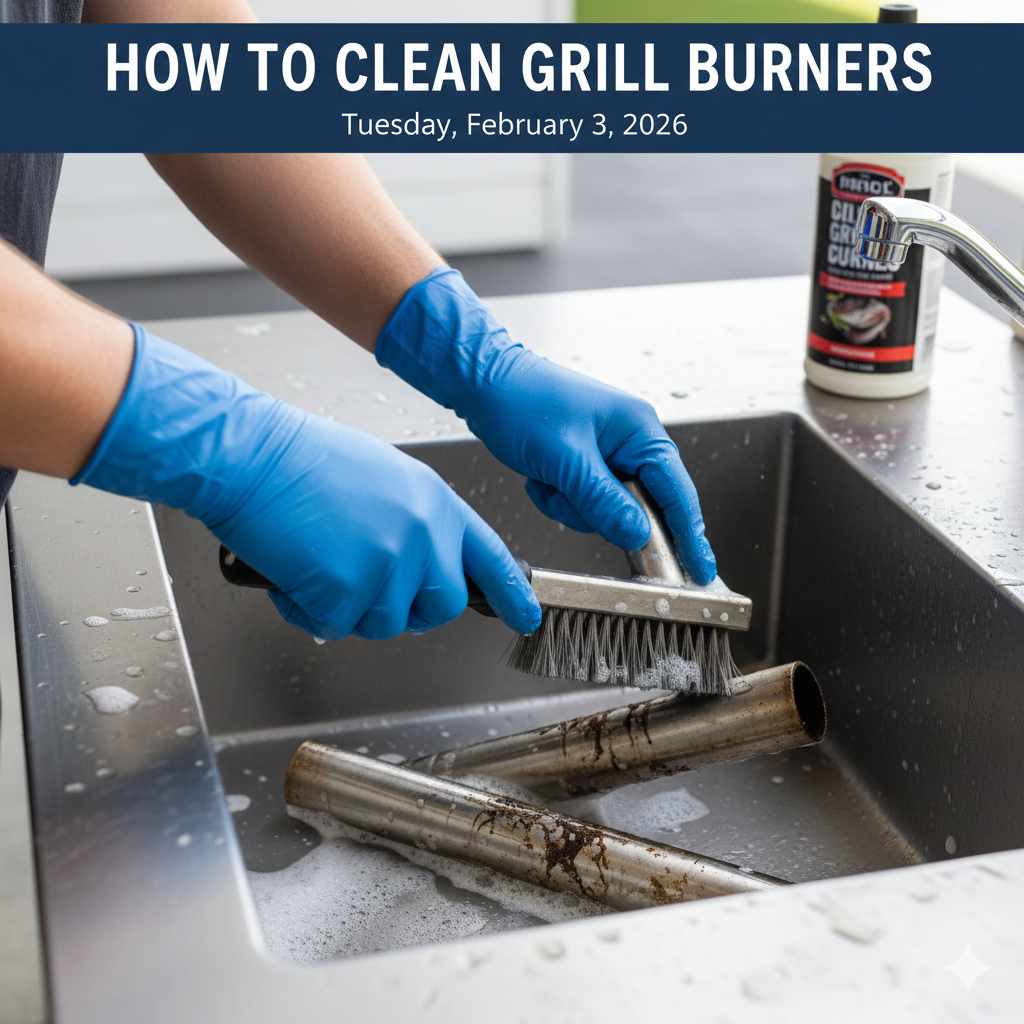
Cleaning Cooktop Grates
These usually take the brunt of the abuse. For cast iron grates, you have a few options:
- Oven Cleaner Method (Use with Extreme Caution): For very heavy black carbon buildup, some people place the grates in a heavy-duty garbage bag, spray them liberally with heavy-duty oven cleaner (following all product safety instructions, wearing gloves and eye protection), seal the bag, and let it sit overnight. Rinse extremely well the next day.
- The Dryer Sheet Trick: Place the grates in a large tub, cover them with hot water, add a few drops of dish soap, and toss in 2 or 3 dryer sheets. Let soak for several hours. Users often report that the soap and the anti-static properties of the dryer sheets help lift baked-on grime easily with minimal scrubbing.
A Note on Sealed Burners
Some newer or simpler ranges use sealed burner systems, meaning the burner head is permanently attached to the cooktop, and there are no removable caps or heads to soak. If you have this system (common on glass-top gas ranges), cleaning is easier but requires more precision immediately after spills.
- Wipe down the surface immediately after spills cool slightly.
- Use a damp cloth and a non-scratch sponge.
- Use your pin or needle to carefully clear any port holes visible directly on the cooktop surface.
Troubleshooting Common Burner Cleaning Issues
Even following the steps carefully, you might run into hiccups. As your guide, I want to help you fix common post-cleaning issues.
Problem: The Burner Clicks Constantly After Cleaning
This means the igniter electrode is still wet or has residue on it causing a short circuit.
- Solution: Turn the stove off. Unplug it. Take a dry paper towel, gently wrap it around the tip of the clicking igniter, and firmly hold it against the tip for 30 seconds. Repeat this process for all clicking burners. Repeat the long air-drying process (Step 5). Do not use the stove until the clicking stops when the knob is turned to the ‘Light’ setting without the gas even being on.
Problem: Flame is Yellow, Not Blue, After Cleaning
A yellow flame means insufficient air mixing with the gas, or the burner is not seated correctly.
- Solution 1 (Seating): Power down, unplug, and recheck that the burner head is sitting perfectly flat and the cap is centered. Remove and reseat both components.
- Solution 2 (Clog): Recheck the gas ports. Even a tiny piece of debris can affect the air/fuel mixture. Clear them again carefully.
Problem: The Burner Won’t Light at All
If you hear clicking but no spark, or no clicking at all, something is blocking the electrical path or the gas path.
- No Click: Double-check that the stove is plugged in. If it is, the igniter may need professional service, or you may have knocked a wire loose (unlikely if only cleaning).
- Clicking but No Spark: Residue or moisture is covering the white ceramic igniter tip. Dry it thoroughly as described above. If this persists, the electrode itself may be cracked or failing, requiring replacement.
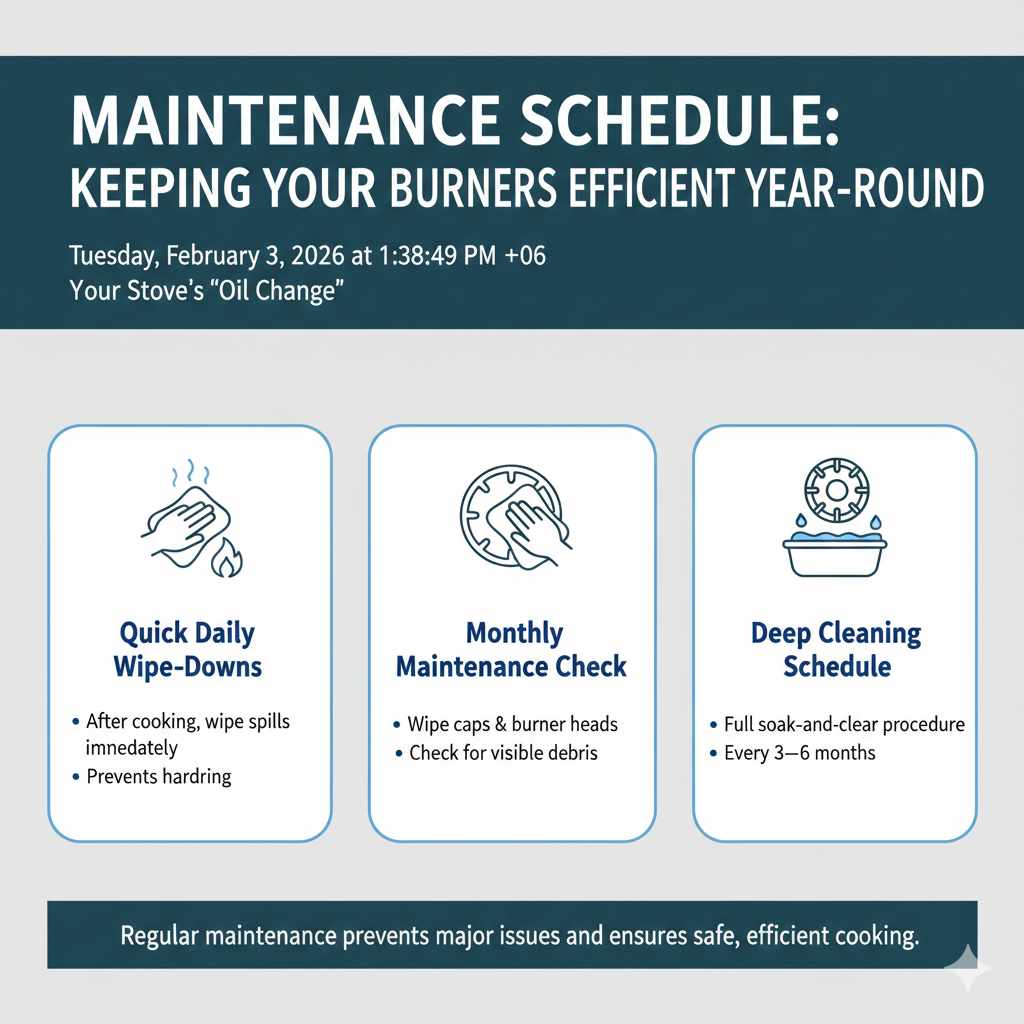
Maintenance Schedule: Keeping Your Burners Efficient Year-Round
To avoid having to do deep-cleans often, a little preventative maintenance goes a long way. Think of this like getting an oil change—it keeps the whole system running smoothly!
Quick Daily Wipe-Downs
After cooking, wait until the surface is warm (but not hot) and wipe up any obvious spills immediately. This prevents hardening.
Monthly Maintenance Check
Once a month, take off the caps and use a dry cloth to quickly wipe the burner heads and ensure no visible debris is sitting near the ports. This takes less than five minutes.
Deep Cleaning Schedule
Depending on how much you cook, aim to perform the full, deep soak-and-clear procedure (Steps 1 through 7) every three to six months.
For those interested in the science behind safe appliance operation, resources from organizations like the National Fire Protection Association (NFPA) offer great insights into maintaining safe gas appliances in the home.
Frequently Asked Questions (FAQ) About Gas Burner Cleaning
Q1. Can I use bleach to clean my gas burner caps and heads?
A. Generally, no. Bleach can be too harsh and may corrode or discolor the metal parts, especially aluminum or coated pieces. Stick to mild dish soap and warm water for soaking.
Q2. How do I know if the flame color is correct after cleaning?
A. The correct color is primarily bright blue. Small yellow tips are sometimes acceptable, especially on older stoves, but large amounts of yellow or orange indicate poor combustion, suggesting you still have a clog or the burner isn’t seated right.
Q3. Is it safe to use vinegar on gas burner parts?
A. Yes, white vinegar is great for tackling mineral deposits or mild buildup, often dissolving grease better than just soap. You can use it diluted in your soaking water or in a paste with baking soda, provided you rinse all residues off completely.
Q4. What if the burner parts are still dirty after soaking?
A. If soaking for an hour wasn’t enough, try soaking them in very hot water with a squirt of dish soap overnight, or use the baking soda paste method described above. Avoid aggressive scraping, as this can damage the gas port shape.
Q5. How long should the burner components take to dry?
A. Burner components should be completely dry before reassembly—this usually takes 4 to 6 hours of air drying, depending on humidity and airflow. Moisture left inside the burner ports or near the igniter can prevent ignition, cause continuous clicking, or lead to uneven flames. If you need to speed things up, you may use a hairdryer on a low or cool setting, gently blowing air across the ports and igniter area. Avoid high heat, which can warp metal parts or damage ceramic igniters. When in doubt, wait longer—drying fully is always better than rushing.
Conclusion: Clean Burners Mean Safer, Better Cooking Every Day
Cleaning your gas burners isn’t just a cosmetic chore—it’s essential maintenance that directly affects performance, efficiency, and safety. When burner caps and ports are free of grease and debris, gas flows evenly, igniters work reliably, and flames burn the clean blue color your stove was designed to produce.
The process doesn’t require special tools or professional service. With warm, soapy water, gentle scrubbing, careful port clearing, and—most importantly—thorough drying, you can restore your burners to like-new operation in a single afternoon. Regular cleaning also prevents wasted gas, reduces cooking frustration, and helps you avoid unnecessary repair calls down the road.
By making burner care part of your routine maintenance schedule, you’re taking control of your kitchen’s most important appliance. A clean gas burner responds instantly, heats evenly, and operates safely—exactly what you want every time you turn the knob.
Strong flames start with clean burners, and clean burners start with simple, smart care.