Quick Summary:
Tying a ratchet tie-down securely involves threading the strap through the ratchet mechanism, pulling it snug, and then repeatedly pushing the handle down to tighten. Release the strap by lifting the handle and pressing the release lever. This simple method ensures your cargo stays put!
Securing your belongings for transport can feel a bit daunting, especially when you want to be absolutely sure they won’t shift. Those ratchet tie-downs look like they have a lot of moving parts, and the thought of your precious cargo coming loose on the road might keep you up at night. But don’t you worry! With a few simple steps, you’ll be a pro at tying ratchet tie-downs, giving you peace of mind on any journey. We’ll walk through it together, making sure you feel confident and capable. Get ready to secure your load with ease!
Understanding Your Ratchet Tie-Down
Before we dive into the “how-to,” it’s helpful to know the main parts of your ratchet tie-down. These straps are fantastic because they provide a lot of tension with minimal effort, making them ideal for securing just about anything, from furniture to your kayak.
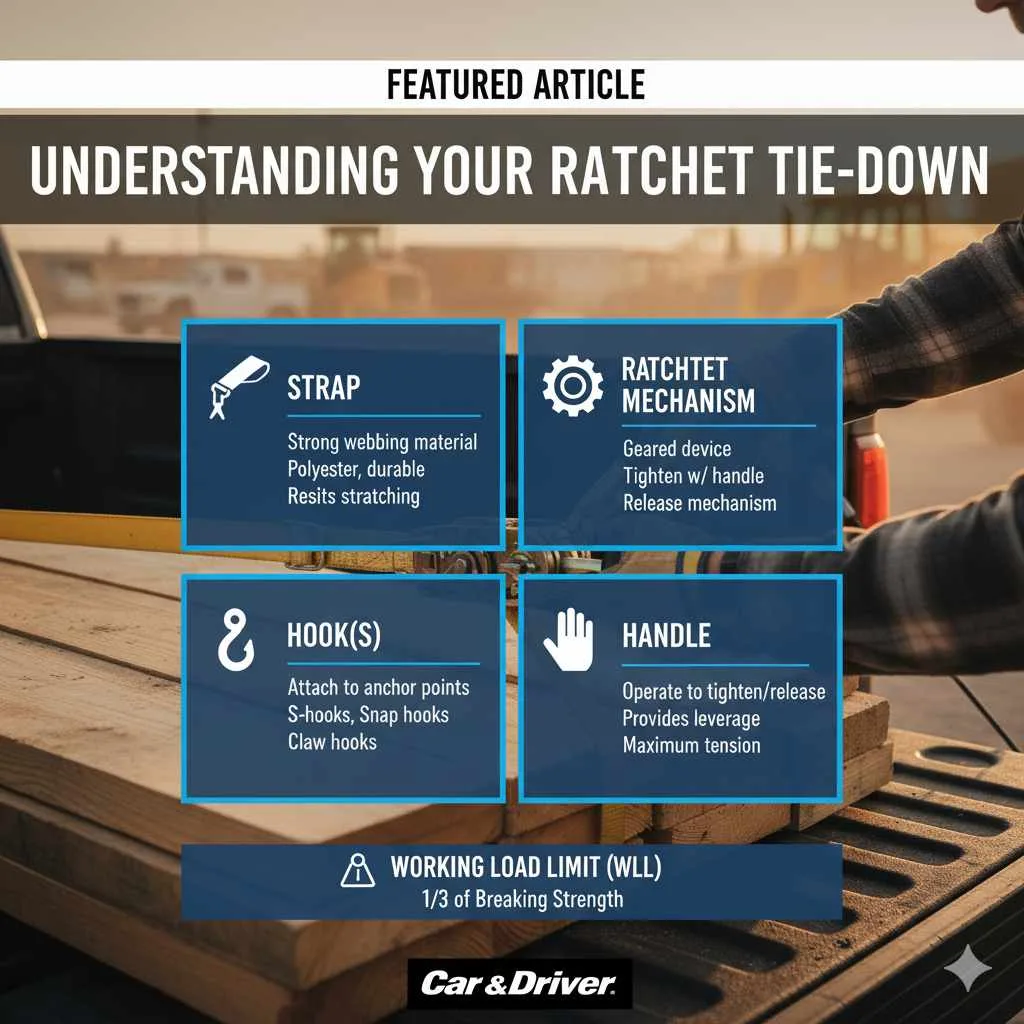
Key Components of a Ratchet Tie-Down:
- Strap: This is the strong webbing material that wraps around your item and connects to the ratchet. It’s usually made of polyester, which is durable and resists stretching.
- Ratchet Mechanism: This is the heart of the tie-down. It’s a geared device that allows you to tighten the strap by repeatedly moving a handle. It also has a release mechanism so you can undo it.
- Hook(s): Ratchet tie-downs typically have hooks on each end of the strap. These are designed to attach securely to anchor points on your vehicle, trailer, or other secure surfaces. They can be S-hooks, snap hooks, or claw hooks, depending on the intended use.
- Handle: This is the part you operate to tighten and release the strap. It’s designed to give you leverage for maximum tension.
Why Use Ratchet Tie-Downs?
You might wonder why you’d choose a ratchet tie-down over other methods like bungee cords or simple rope. The answer lies in their superior holding power and control.
- Strong Tension: Ratchet tie-downs allow you to apply significant tension, far more than you could achieve with a knot or bungee cord. This is crucial for preventing items from shifting, especially during transit over bumpy roads or long distances.
- Secure Hold: Once tightened, a ratchet tie-down holds its tension firmly. Unlike bungee cords, which can stretch and loosen, a ratchet tie-down maintains its grip until you deliberately release it.
- Versatility: They are incredibly versatile and can be used to secure a wide range of items, from camping gear and sporting equipment to large appliances or furniture during a move.
- Ease of Use (Once Learned): While it might seem complex at first, learning to use them is straightforward, and they are much easier to tighten effectively than trying to knot heavy-duty straps.
According to the Federal Highway Administration, proper load securement is critical for road safety. Using the right equipment, like ratchet tie-downs, and knowing how to use them correctly plays a vital role in preventing accidents.
Step-by-Step Guide: How to Tie a Ratchet Tie-Down
Ready to get your gear secured? Follow these simple steps. We’ll break it down so it’s easy to understand and execute.
Step 1: Prepare Your Tie-Down and Item
First, lay out your ratchet tie-down and ensure the strap is free of any knots or twists. Inspect the strap for any damage, like cuts or fraying. If you find any, it’s best to replace the tie-down. Make sure the item you’re securing is stable and ready to be strapped down. Position the item where it needs to be, and identify good anchor points on your vehicle or trailer.
Step 2: Thread the Strap Through the Ratchet Mechanism
Identify the end of the strap that has the hook attached and the end that goes into the ratchet mechanism. You’ll notice that the ratchet part has a slot or opening. Take the loose end of the strap (the one without the hook) and feed it through this slot. You want to feed it from the side opposite the handle’s pivot point. Pull a good length of the strap through – usually, about 6 to 12 inches (15-30 cm) is a good starting point, depending on the size of your item and where you’re attaching the hooks.
The goal here is to get the strap set up so that when you start ratcheting, the strap will pull inwards, toward the ratchet. Imagine you’re threading a needle, but with a broad, flat strap! You’ll want to have enough strap fed through so you can create tension without the strap running out before you’re done tightening.
Step 3: Attach the Hooks
Now, take the hook on the end of the strap and attach it to a sturdy anchor point. This could be a tie-down ring on your trailer, a D-ring in your truck bed, or a designated anchor point on a roof rack. Make sure the hook is securely fastened and won’t slip off. Repeat this with the other hook on the strap, attaching it to another suitable anchor point. For most items, you’ll want to crisscross the straps or position them so they pull the load down evenly from multiple directions.
Step 4: Remove Excess Slack
With both hooks attached and some slack still in the strap, pull the loose end of the strap firmly. This will remove any initial looseness and get the strap snug against your item. You want the strap to be taut before you start ratcheting. This pre-tensioning step ensures that your ratcheting effort is focused on creating tightness, rather than just taking up slack.
Step 5: Begin Ratcheting
This is where the magic happens! Hold the ratchet mechanism steady with one hand. With your other hand, grasp the handle and begin to move it up and down. Each downward push of the handle will pull more of the strap through the ratchet, tightening it further. You’ll hear a clicking sound as the gears engage. Keep pushing the handle down, repeating the motion. You should feel the strap getting tighter and tighter around your item.
Important Tip: Always ratchet in a smooth, consistent motion. Avoid jerky movements. Also, be mindful of how much tension you’re applying. You want it tight, but don’t overtighten to the point where you might damage your item or the tie-down itself. For most applications, a firm, snug fit that prevents any movement is sufficient.
You can see a visual demonstration of this process on many reputable hardware store websites or through instructional videos on product pages for ratchet tie-downs.
Step 6: Final Tightening and Checking
Continue ratcheting until the strap is as tight as you need it. You’ll know it’s tight when the item is firmly secured and doesn’t shift when you gently try to move it. Give the strap a good tug to ensure it’s not going anywhere. Once you’re satisfied, try to lift the handle slightly. It should not move further down. This indicates the ratchet is locked in place.
Test it! Gently try to rock the item you’ve secured. If it moves, apply a few more ratchet strokes. It’s always better to be a little tighter than too loose. A secure load is a safe load!
Step 7: Releasing the Tie-Down
When it’s time to unload, releasing the tie-down is just as important as tightening it. To release the tension:
- Lift the ratchet handle all the way up to its limit.
- While holding the handle in the fully lifted position, press down on the release lever. This is usually a small tab or button located near the pivot point of the handle.
- This action disengages the ratchet, allowing you to pull the strap back through the mechanism.
- Slowly pull the strap until it’s loose enough to unhook.
Be careful when releasing, as there might be residual tension. Allow the mechanism to move freely and don’t force it. Always operate the release lever fully to disengage the ratchet.
Tips for Success and Best Practices
To make your tie-down experience even smoother and safer, keep these tips in mind:
- Always Use the Right Weight Rating: Ratchet tie-downs come with Working Load Limits (WLL). Never exceed the WLL, which is the maximum load the tie-down is rated for during normal use. This information is usually printed on the strap. A common WLL for general-purpose tie-downs might be 500 lbs, but heavier-duty ones can be rated for much more. For comparison, a typical S-hook might have a WLL of around 200 lbs.
- Protect Your Cargo and Straps: Where the strap contacts sharp edges of your cargo, use edge protectors or corner protectors. These prevent the strap from fraying or being cut, ensuring its integrity and extending its life.
- Check Anchor Points: Ensure the anchor points you’re using are strong and securely fastened to the vehicle or trailer. A weak anchor point can fail, rendering the tie-down useless.
- Use Multiple Tie-Downs: For larger or heavier items, use more than one tie-down to distribute the load and ensure maximum security. Two tie-downs are usually better than one.
- Secure Properly for Different Types of Loads: For items like motorcycles or ATVs, you’ll want to use multiple tie-downs to prevent tipping and shifting from all directions.
- Regular Inspections: Before each use, visually inspect your tie-downs for wear and tear. This includes checking the webbing, stitching, and hardware.
- Proper Storage: When not in use, store your tie-downs in a clean, dry place, away from direct sunlight and chemicals, which can degrade the material.
Common Ratchet Tie-Down Issues and How to Fix Them
Even with the best intentions, sometimes things don’t go perfectly. Here are common problems and their solutions:
| Problem | Possible Cause | Solution |
|---|---|---|
| Ratchet won’t tighten | Strap is not threaded correctly through the ratchet mechanism. | Unthread the strap and re-thread it, ensuring it goes through the correct slot and pulls toward the handle when tensioned. |
| Ratchet won’t release | Release lever is not being fully depressed, or the mechanism is jammed with debris. | Lift the handle to its highest point. Firmly press the release lever. If debris is suspected, try to clear it gently with a brush or compressed air. Never force it. |
| Strap slipping after tightening | Not enough tension applied initially, or the ratchet is not fully engaged. | Release and re-tighten, ensuring you pull for more stroke cycles and that the ratchet clicks firmly with each downward push. Ensure the handle is fully down. |
| Strap fraying or damaged | Contact with sharp edges on cargo, excessive wear, or age. | Immediately discontinue use and replace the tie-down. Use edge protectors on future loads. |
| Hooks not fitting anchor points | Incorrect hook type for the anchor. | Ensure you are using tie-downs with appropriate hooks for your anchor points. Some applications may require specialized hardware. |
For more detailed information on load securement requirements, you can refer to resources like the National Highway Traffic Safety Administration (NHTSA), which provides guidelines and recalls related to vehicle safety, including cargo securing.
Different Types of Ratchet Tie-Downs
While the basic principle of using a ratchet tie-down remains the same, there are variations you might encounter, each suited for specific tasks:
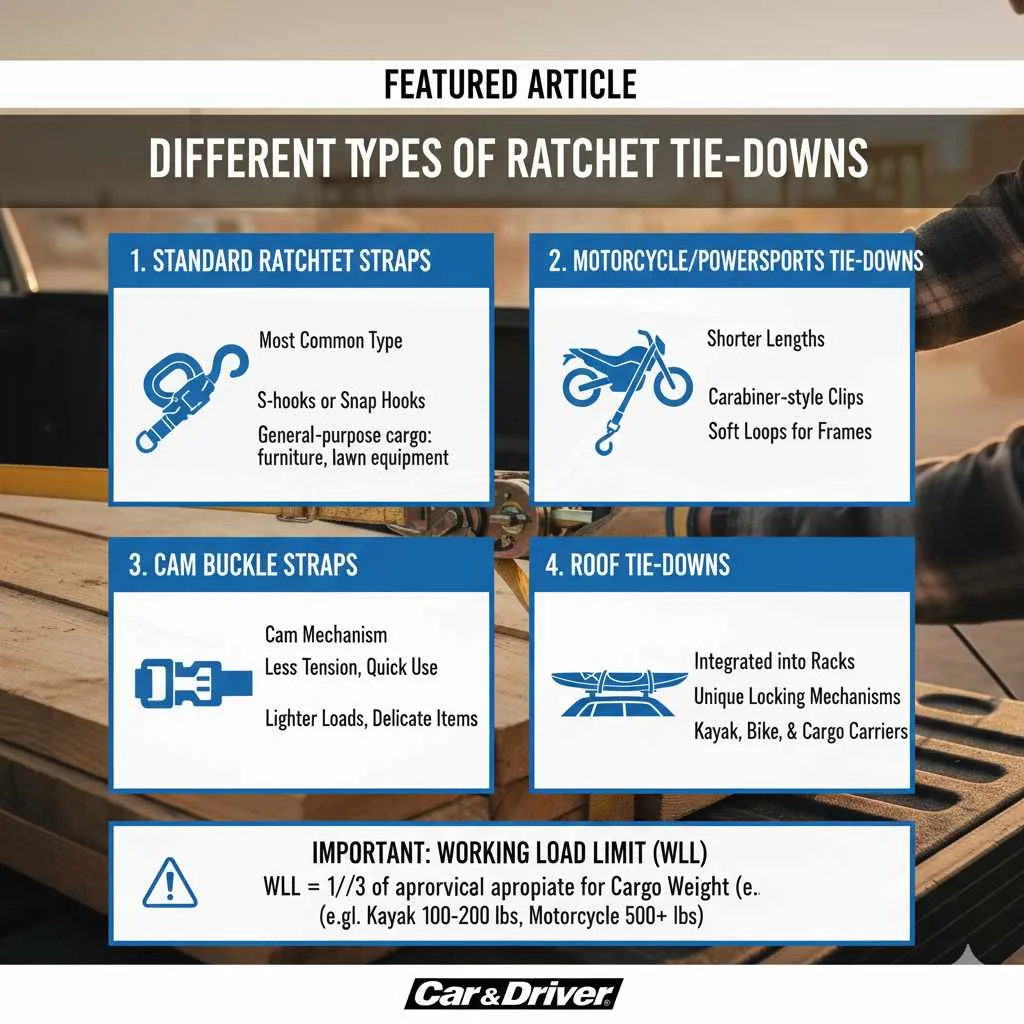
- Standard Ratchet Straps: These are the most common type, with S-hooks or snap hooks. They are great for general-purpose cargo like furniture, lawn equipment, and DIY project materials.
- Motorcycle/Powersports Tie-Downs: Often shorter and designed with specific hook types (like smaller carabiner-style clips) to work with motorcycle frames and trailer tie-down points. Some may include soft loops for delicate frames.
- Cam Buckle Straps: While not technically ratchet tie-downs, cam buckles use a similar webbing system but rely on a cam mechanism to tighten. They offer less tension but are quick to use and won’t overtighten and damage delicate items. They are a good alternative for lighter loads where extreme tension isn’t needed.
- Roof Tie-Downs: These are often integrated into kayak or bike rack systems and might have unique locking mechanisms or shorter strap lengths tailored for specific vehicle accessories.
The strength of a tie-down is often indicated by its breaking strength and its working load limit (WLL). The WLL is typically one-third of the breaking strength. Always choose tie-downs with a WLL that is appropriate for the weight and nature of the cargo you are securing. For example, securing a lightweight kayak might only require a WLL of 100-200 lbs, while securing a motorcycle might require tie-downs with a WLL of 500 lbs or more.
Frequently Asked Questions (FAQ)
Q1: How tight should a ratchet tie-down be?
A ratchet tie-down should be snug enough to prevent the item from shifting during transit. You shouldn’t be able to easily move the item. However, avoid overtightening to the point where you might damage the cargo or the tie-down strap itself.
Q2: Can I use ratchet tie-downs to tow something?
No, ratchet tie-downs are designed for securing stationary loads, not for towing. Towing requires specialized equipment like tow straps or trailer hitches designed to handle the forces involved in pulling a vehicle.
Q3: What is the difference between a ratchet tie-down and a bungee cord?
Ratchet tie-downs can achieve much higher tension and provide a more secure, non-stretching hold. Bungee cords (or Bungee cords) offer some elasticity and are good for light-duty, temporary securing, but they can stretch and loosen, making them less suitable for heavy or valuable items.
Q4: How do I prevent my ratchet tie-down strap from fraying?
Use edge protectors or corner protectors where the strap comes into contact with sharp edges of your cargo. This prevents the strap from being cut or abraded, significantly extending its lifespan.
Q5: What is the “Working Load Limit” (WLL) on a tie-down?
The Working Load Limit (WLL) is the maximum load recommended for normal use in a straight line. It’s usually listed on the tie-down strap. Always ensure the WLL of your tie-down is sufficient for the weight of the item you are securing.
Q6: How do I store my ratchet tie-downs?
Store them clean, dry, and away from direct sunlight, extreme temperatures, and chemicals. Untangle them and coil them loosely to prevent damage to the webbing and mechanism.
Q7: Can I repair a damaged ratchet tie-down?
It is generally not recommended to repair damaged ratchet tie-downs. Fraying, cuts, or damaged hardware compromise the integrity of the tie-down and can lead to failure. Replace any damaged tie-down immediately.
Conclusion
Mastering how to tie a ratchet tie-down is an incredibly useful skill that offers tremendous peace of mind. From securing your weekend adventure gear to ensuring your new furniture arrives home safely, these seemingly simple straps are powerhouses of securement. Remember to always start with a good inspection, thread the strap correctly, pull it snug, ratchet with consistent motion, and then give it a final check. Releasing is just as important, so always engage that release lever fully. With practice, you’ll find the process quick, easy, and incredibly effective. So go ahead, confidently secure your loads and enjoy your travels knowing everything is held tight and safe!