

Quick Summary: Installing a door threshold on concrete is a straightforward DIY project that enhances your home’s look and seals drafts. This guide provides easy-to-follow steps, tool lists, and tips to achieve a professional finish, even for beginners.
Welcome, fellow home enthusiasts! Is that little unsealed gap at your doorway letting in drafts and looking a bit unfinished? You’ve come to the right place! Installing a door threshold on concrete might sound a bit technical, but I promise it’s totally achievable. We’ll walk through it together, step-by-step, so you can create a beautiful, comfortable, and polished entryway. Say goodbye to drafts and hello to a cozier, more stylish home!
Why a Door Threshold on Concrete Matters
A door threshold, also known as a door saddle or sill, is more than just a decorative piece. It’s a crucial element at the base of your doorway, sitting directly on the concrete floor. Its main jobs are to bridge the gap between finished flooring and the concrete slab, help prevent drafts and water from entering your home, and provide a smooth transition. For concrete floors, especially in basements or entryways, a well-installed threshold can significantly improve energy efficiency and comfort.
Think of it as the final touch that ties your entryway together. It adds a clean line, a touch of your personal style, and can even protect your door from wear and tear at the bottom. For a beginner, tackling this project boosts your DIY confidence and saves you money compared to hiring a professional. Let’s get started on transforming your doorway!

Choosing the Right Door Threshold Material
The material of your door threshold can impact its durability, appearance, and how easy it is to install. For concrete floors, you have several excellent options:
- Wood: A classic choice, wood thresholds are easy to cut and shape. They offer a warm, traditional look. Common woods include oak, pine, and redwood. However, wood can be susceptible to moisture damage if not properly sealed or maintained, especially in high-traffic or damp areas.
- Metal: Aluminum and bronze are popular metal threshold materials. They are incredibly durable, resistant to wear, and can offer a sleek, modern appearance. Metal thresholds are great for high-traffic areas and are less prone to rot or warping.
- Composite/Vinyl: These modern materials mimic the look of wood or stone but offer superior durability and moisture resistance. They are often a budget-friendly and low-maintenance option, making them a favorite for many homeowners.
- Stone/Marble: For a truly premium look, solid stone thresholds like granite or marble can be used. These are highly durable and add a touch of luxury. However, they are heavier, more difficult to cut, and can be more expensive.
Considerations When Selecting:
- Durability for the location: Will it be a high-traffic entry? Is it prone to moisture?
- Style: Does it match your home’s interior and exterior design?
- Maintenance: Some materials require more upkeep than others.
- Budget: Prices vary significantly between materials.
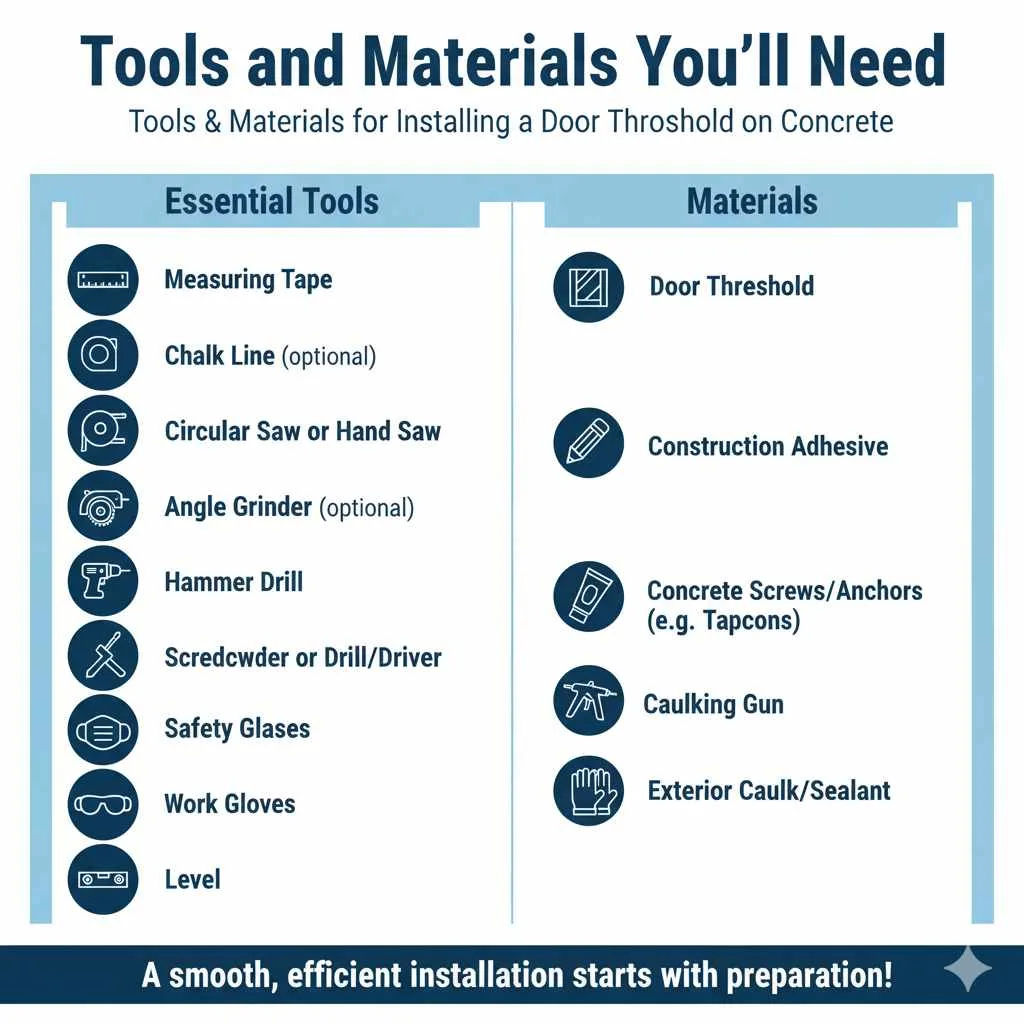
Tools and Materials You’ll Need
Gathering your supplies beforehand makes the installation process smooth and efficient. Here’s a comprehensive list of what you’ll need to install a door threshold on concrete:
Essential Tools:
- Measuring Tape: For accurate measurements of your doorway.
- Pencil: To mark cutting lines and mounting points.
- Chalk Line (optional but helpful): For striking straight lines on concrete.
- Circular Saw or Hand Saw: For cutting wood or composite thresholds. A metal-cutting blade may be needed for metal thresholds.
- Angle Grinder with Concrete Cutting Blade (for deeper mortise): If you need to create a recessed area. Always use safety glasses and a dust mask for concrete work.
- Hammer Drill: For drilling pilot holes into the concrete.
- Masonry Drill Bits: Specifically designed for drilling into concrete. The size will depend on your fasteners.
- Screwdriver or Drill/Driver: To secure the threshold with screws.
- Caulking Gun: For applying adhesive and sealant.
- Safety Glasses: Always protect your eyes, especially when cutting or drilling.
- Dust Mask: Essential when working with concrete or sawdust.
- Work Gloves: To protect your hands.
- Level: To ensure your threshold is installed perfectly straight.
Materials:
- Door Threshold: The chosen material and size for your doorway.
- Construction Adhesive: A strong adhesive suitable for concrete and your chosen threshold material.
- Concrete Screws or Anchors: Appropriate fasteners for securing the threshold to concrete. Tapcons are a popular choice for concrete.
- Exterior Caulk/Sealant: For sealing the edges and preventing water ingress. Choose a paintable option if you plan to paint your threshold.
Step-by-Step Guide: How to Install Door Threshold on Concrete
Let’s get this project done! Follow these steps for a seamless installation. Remember, patience and accuracy are your best friends here.
Step 1: Measure Your Doorway
This is the most critical step for a perfect fit. Measure the width of your doorway opening at the floor where the threshold will sit. It’s a good idea to measure in a few places and use the largest measurement to ensure your threshold will span the entire opening comfortably. You’ll also want to check the depth of your existing subfloor or the thickness of the door jambs to ensure the threshold will sit flush or create the desired transition.
Pro Tip: If you’re replacing an old threshold, measure the old one carefully. If it fit well, you can use those dimensions as a guide.
Step 2: Prepare the Concrete Surface
The area where the threshold will be installed needs to be clean, dry, and smooth. Sweep or vacuum any dust and debris. If there are any significant cracks or unevenness in the concrete, you might want to fill them with a concrete patching compound and let it cure fully. A clean surface ensures the adhesive bonds properly.
For a more professional look and a tighter seal, especially if your door jambs extend below the finished flooring, you might consider creating a “mortise” or recessed area for the threshold. This involves cutting a shallow groove into the concrete for the threshold to sit within. This is where an angle grinder with a concrete cutting blade comes in handy. This step isn’t always necessary, especially if your threshold is designed to sit on top of the concrete, but it offers a very clean finish. Always wear your safety gear when using power tools like grinders.
A great resource for understanding concrete preparation can be found from the U.S. Army Corps of Engineers, offering detailed insights into concrete repair and maintenance, which can be valuable for ensuring a solid base.
Step 3: Cut Your Door Threshold
Based on your measurements from Step 1, carefully cut your chosen threshold material to the correct length. If you are working with wood or composite, a circular saw or hand saw will work well. For metal thresholds, you might need a special metal-cutting blade or an angle grinder. Always measure twice and cut once! Double-check your measurements before making any cuts.
If your threshold has a specific profile (like a beveled edge), ensure you cut it so the profile faces the correct direction for a smooth transition. For doorways that aren’t perfectly square, you may need to make angled cuts (miters) at the ends. However, for a simple threshold installation, straight cuts are usually sufficient, and you can seal any small gaps later.
Step 4: Test Fit the Threshold
Before applying any adhesive or drilling any holes, place your cut threshold into its intended position. Check to see if it fits snugly against the door jambs and spans the entire opening without any awkward gaps. Ensure it sits level. If it’s too long, trim it down slightly. If it’s too short, you’ll need to cut a new piece.
This test fit is crucial for identifying any issues and making minor adjustments. A good fit now will save you a lot of trouble later and ensure a professional-looking finish.
Step 5: Mark Fastener Locations
Once you have a perfect fit, keep the threshold in place. Using your pencil, mark the spots where you will drill pilot holes for your fasteners. Typically, you’ll want at least two fasteners on each side, spaced a few inches from the ends, and one or two in the center. Aim for placements that will go into solid concrete and not a void.
If you are creating a mortise (recessing the threshold), you’ll mark the outline of the threshold on the concrete itself. For a surface-mounted threshold, you’ll mark where the screw heads will go.
Step 6: Drill Pilot Holes in Concrete
Remove the threshold. Using your hammer drill and the appropriate masonry bit (slightly smaller than your concrete screws or anchors), drill pilot holes at the marks you made in Step 5. Drill deep enough to accommodate the full length of your fasteners. For example, if you’re using 2-inch concrete screws, you’ll want your pilot hole to be at least 2 inches deep.
Safety First: Wear safety glasses and a dust mask during this step. Concrete dust can be harmful, and flying debris is always a risk.
Step 7: Apply Adhesive
Apply a generous bead of construction adhesive to the underside of the threshold, or directly to the concrete surface where the threshold will sit. Ensure the adhesive covers most of the surface to create a strong bond. If you are using a wooden threshold in a potentially damp area, consider applying a moisture barrier or sealant to the concrete and threshold before the adhesive.
Some adhesives require you to let them “tack up” for a few minutes before pressing the material into place. Always read and follow the manufacturer’s instructions for the adhesive you are using.
Step 8: Position and Secure the Threshold
Carefully place the threshold back into its position, pressing it firmly down into the adhesive. Ensure it aligns with your door jambs. Now, use your drill/driver to insert the concrete screws or anchors through the pilot holes and into the concrete. This will firmly secure the threshold to the floor.
Important: Don’t overtighten the screws, as this could strip the threads or damage the threshold material. snug is perfect! If your threshold is heavy, like stone, you might need assistance to position it before securing. If you created a mortise, the threshold should sit nearly flush with the surrounding concrete or flooring.
Step 9: Seal the Edges
Once the threshold is securely in place, it’s time to seal the edges. Use your caulking gun to apply a thin, even bead of exterior-grade caulk or sealant along the seams where the threshold meets the door jambs and the concrete floor. This step is vital for preventing drafts, water, and pests from entering your home.
Smooth the caulk line with a damp finger or a caulk-smoothing tool for a clean, professional finish. For a perfect look, ensure the caulk matches the color of your threshold or is paintable if you plan to paint it later. Allow the caulk to dry according to the manufacturer’s instructions.
Differences in Installation Methods
While the core steps remain similar, some variations exist depending on your threshold material and the desired finish. Here’s a quick comparison:
| Threshold Type | Key Installation Differences | Considerations |
|---|---|---|
| Wood | Easier to cut and shape. May require more thorough sealing against moisture. Can be stained or painted. | Ensure good ventilation. Use waterproof adhesive and consider a moisture barrier beneath if in a damp area. |
| Metal (Aluminum, Bronze) | Requires metal-cutting tools. Very durable. May have pre-drilled holes. | Can be slippery if not textured. Prone to scratching during cutting. Use appropriate fasteners. |
| Composite/Vinyl | Easy to cut, like wood. Water-resistant. Often designed for simple installation. | Check for expansion/contraction with temperature changes. Ensure adhesive is compatible. |
| Stone/Marble | Heavy, requires careful handling and specialized cutting tools (diamond blades). Often requires epoxy adhesive for a secure bond and grout/sealant. | Can be very expensive. Installation is more involved. Best for areas where its weight and durability are advantageous. |
Step 10: Final Touches and Cleanup
Once the caulk has cured, do a final inspection. Wipe away any excess adhesive residue (some can be cleaned up with mineral spirits, depending on the adhesive type – check the product label). Ensure all screws are snug and the threshold is stable.
If you’re painting or staining your wooden or composite threshold, now is the time to do it once all adhesives and caulks have fully cured. A fresh coat of paint or stain can really elevate your entryway’s look. For a beautiful finish, consider checking out guides on proper painting techniques for home improvement, like those offered by the Federal Highway Administration’s Paint and Coatings Manual for insights into durable finishes, which can be adapted for home applications.
Clean up your work area thoroughly. Dispose of any scraps, sawdust, or debris properly. You’ve done it!
Frequently Asked Questions (FAQ)
Let’s address some common questions beginners might have about installing a door threshold on concrete.
Q1: Do I need to attach a threshold to concrete?
Yes, attaching a threshold to concrete is generally recommended. It provides a secure connection, prevents the threshold from shifting, and helps create a more effective seal against drafts and moisture. Without securing it, the threshold could become a tripping hazard over time.
Q2: What’s the best adhesive for a door threshold on concrete?
A strong construction adhesive designed for concrete and your specific threshold material (wood, metal, composite) is best. Products like Loctite PL Premium or Liquid Nails Fuze*It are excellent, durable choices. Always check the product label to ensure compatibility.
Q3: Can I just glue a door threshold to concrete?
While adhesive is crucial for a strong bond, for most applications, it’s best to also use mechanical fasteners like concrete screws (e.g., Tapcons) or anchors drilled into the concrete. This dual approach ensures maximum security and longevity, especially for interior doors or high-traffic areas.
Q4: How do I create a recessed threshold (mortise)?
To create a mortise, you’ll use an angle grinder with a concrete cutting blade to carefully cut a shallow groove into the concrete that matches the dimensions of your threshold. This allows the threshold to sit flush with or slightly below the surrounding floor level, creating a very clean, seamless look. Always wear protective gear, including a respirator and safety glasses, when cutting concrete.
Q5: What if my concrete floor isn’t perfectly level?
If your concrete is only slightly uneven, a good construction adhesive can often compensate for minor imperfections. For more significant unevenness, you might need to use a concrete leveling compound to create a smoother surface before installing the threshold. Alternatively, you might need to use shims under the threshold to get it level before securing it, then seal any resulting gaps with caulk.
Q6: How far apart should concrete screws for a threshold be?
For a standard 3-foot door threshold, aim for about three screws per side – one near each end and one in the middle. Over a 6-foot threshold, you might add another pair in the center. Spacing them roughly 12-18 inches apart is a good general guideline.
Q7: Can I install a threshold over existing finished flooring next to the concrete?
This depends on the type of finished flooring. If you have laminate, vinyl, or thin tile right up to where the threshold will be, you can sometimes install the threshold over it. However, for a truly professional and durable installation, especially if the finished flooring extends to the door jambs, it’s often best to remove the finished flooring in the threshold area to give a clean surface for the threshold to attach to the concrete or subfloor.
Conclusion
See? You’ve got this! Installing a door threshold on concrete is a fantastic DIY project that adds polish, comfort, and energy efficiency to your home. By choosing the right materials, gathering your tools, and following these clear, manageable steps, you can achieve a professional-looking result that you’ll be proud of. Remember to prioritize safety and accuracy throughout the process. That seamless look and draft-free comfort are well within your reach. Enjoy your beautiful, newly finished doorway!


Leave a Reply