Laminate edges on furniture and countertops can sometimes be an eyesore, especially when the dark seam becomes too visible. The good news is that there are ways to hide and blend these edges seamlessly into the overall design. In this article, we’ll explore some techniques for concealing laminate edges, giving your furniture or countertops a polished and professional appearance.
How to Hide Laminate Edge
One common method for hiding laminate edges is using a router with a tungsten-carbide edge trimming blade to create a shallow chamfer-cut at a 45-degree angle. This approach embraces the exposed dark stripe as a design element while giving the edge a clean, finished look. Alternatively, edge banding or hardwood strips can be attached as “faces” to cover the dark edge completely.
For laminate countertops specifically, there are decorative edging options available, such as Formica’s IdealEdge®. This solution eliminates the traditional flat edges and brown seams that are often associated with laminate surfaces. With these techniques in mind, you’ll be well on your way to achieving a sleek and seamless look for your laminate furniture and countertops.
Edge Banding

To hide the edges of laminate, a great method is using edge banding. This not only conceals the joints but also makes furniture or countertops look polished.
Start by cleaning the laminate edges and smoothing them by sanding. I use a sanding guide block for a neat edge.
There are different types of edge banding, but I prefer iron-on veneer edging for its affordability and accessibility. To apply it, use a household iron to activate the adhesive.
Here’s how I do it:
- Measure and cut: Cut the veneer edging a bit longer than the edge to be covered.
- Align the veneer: Place the veneer edging carefully on the laminate edge with the adhesive side facing down.
- Apply heat: Use a medium-heated household iron to press the veneer onto the laminate. Ensure an even application without bubbles.
- Trim the excess: After the adhesive cools, trim any extra edging with a sharp knife.
If you prefer, you can use a hardwood band instead of veneer. Glue it to the laminate edge, shape it with a router, and get creative with designs to enhance your laminate project’s appearance.
T-molding

T-molding is a popular and effective solution for concealing laminate edges, particularly when two even surfaces meet. Made from a variety of materials like PVC, wood, or aluminum, T-molding helps bridge the gap between laminate and the adjoining surface while providing a visually pleasing finish.
The T-shaped profile of the molding enables it to fit snugly into the small gaps between laminate edges, ensuring a secure fit. In my experience, installing T-molding is quite straightforward. First, measure the length of the gap you need to cover, and then cut the T-molding to that size. Next, place the T-mold in the gap, ensuring the central part covers it while the T’s wings rest on both surfaces.
For a longer-lasting installation, I recommend using adhesive or adhesive tape on the bottom of the central part of the T-molding. This helps the molding stay in place, particularly in high-traffic areas.
Some advantages of using T-molding for hiding laminate edges include:
- Versatility: T-molding is available in various materials, colors, and styles, making it easy to find one that matches your laminate design.
- Durability: The molding’s rigid structure enhances the lifespan of the laminate edge it covers.
- Aesthetics: T-molding provides a clean, professional finish, effectively concealing unsightly gaps between laminate edges and adjacent surfaces.
However, I’ve noticed that T-molding may not be suitable for significant height differences between adjoining surfaces or for use on curved edges.
Veneer Edging

I want to share an easy way to make your project look really polished by hiding the edges of exposed plywood. I use a technique called veneer edging, which involves adding a thin layer of wood veneer to the edges.
Here’s what I do: First, I pick a wood veneer that matches the color and grain of the plywood. Then, I measure and cut the veneer a bit longer than I need. Before attaching it, I make sure the plywood edges are smooth.
To stick the veneer, I use an iron to activate the adhesive on the back. I press it onto the plywood edge, applying even pressure. It’s important to keep the iron moving so the material doesn’t get too hot.
Once the veneer is on, I trim any extra material for a perfect fit. I use a sharp blade and cut in a way that compresses the grain. Some methods suggest leaving a small gap, which you can smooth out later with fine sanding or filing.
That’s it! Using veneer edging makes your project look more professional and improves its overall appearance.
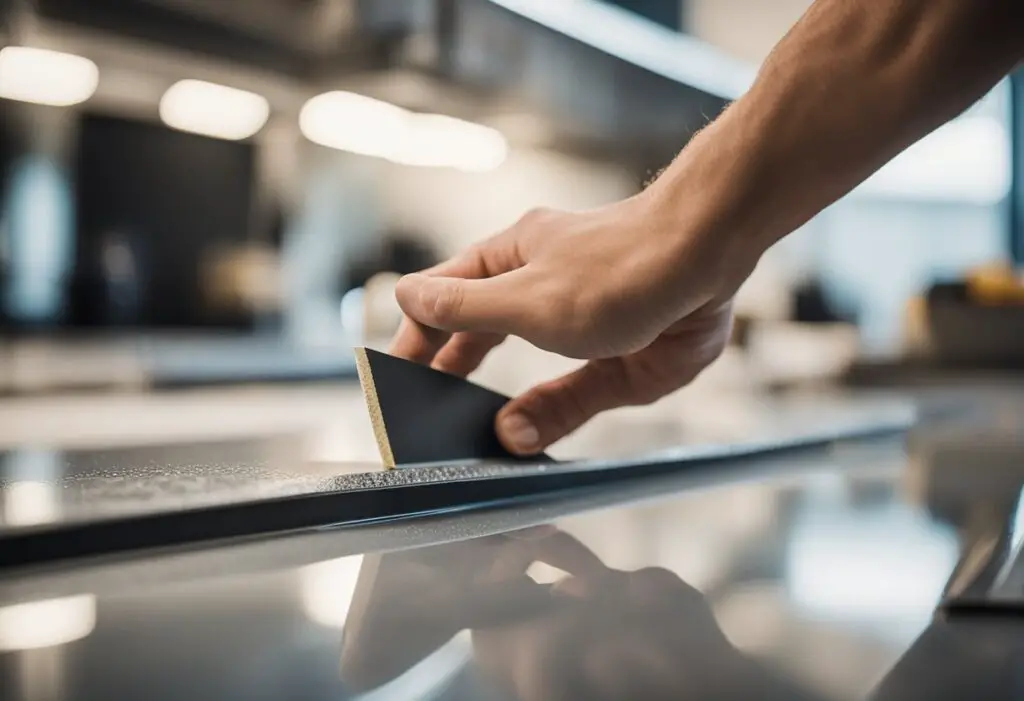
Iron-on Edging

When I want to hide the edges of my laminate project, I use a method called iron-on edging. This edging is like a strip with adhesive on one side that gets activated by heat. It comes in different colors and wood styles to match the laminate.
First, I make sure the laminate edges are clean. I cut a strip of edging a bit longer than the edge I’m covering. This extra can be trimmed later.
I center the strip on the edge, making sure it hangs over on both sides. I heat up my iron to medium and start at one end. Moving along, I press the iron to make the adhesive stick. I need to keep the iron moving to avoid burning.
After applying the edging, I use a flat tool to smooth it out while it’s still warm. Once it cools, I trim the extra edges with a sharp knife.
Finally, I lightly sand the edge to make it smooth. This method gives my project a clean and professional look by hiding the laminate edges.
Solid Wood Edging
One effective way to hide laminate edges is by using solid wood edging. I prefer this method as it gives a more professional and durable finish. Adding a solid wood edge to a laminated surface not only provides an aesthetic upgrade, but also offers extra protection against chipping and wear.
To get started, measure and cut the wood edging to the desired length, ensuring the thickness matches the thickness of your laminate surface. Next, I like to mark and cut biscuit slots in both the edging and the laminate surface. Using biscuits can help to avoid alignment issues and keeps the wood edge just slightly above the laminated surface.
Here’s a step by step process:
- Mark and cut biscuit slots: Cut the slots in the wood edging first, then use the same setting with a sheet of paper under the fence to cut the slots in the laminated surface.
- Apply glue: Spread a thin layer of wood glue inside the biscuit slots and along the edge of the laminate surface using a brush or finger.
- Insert biscuits: Place biscuits inside the slots of the wood edging and laminate surface.
- Attach edging: Align the wood edging with the laminate surface, ensuring the slots match up. Press the edging firmly against the laminate surface.
- Clamp in place: Use clamps to hold the edging in place while the glue dries. Be careful not to overtighten the clamps, as it could damage the edging or laminate surface.
- Sand flush: Once the glue has fully dried, sand the wood edging flush with the laminate surface using a fine-grit sandpaper or a sanding block.
Leave a Reply