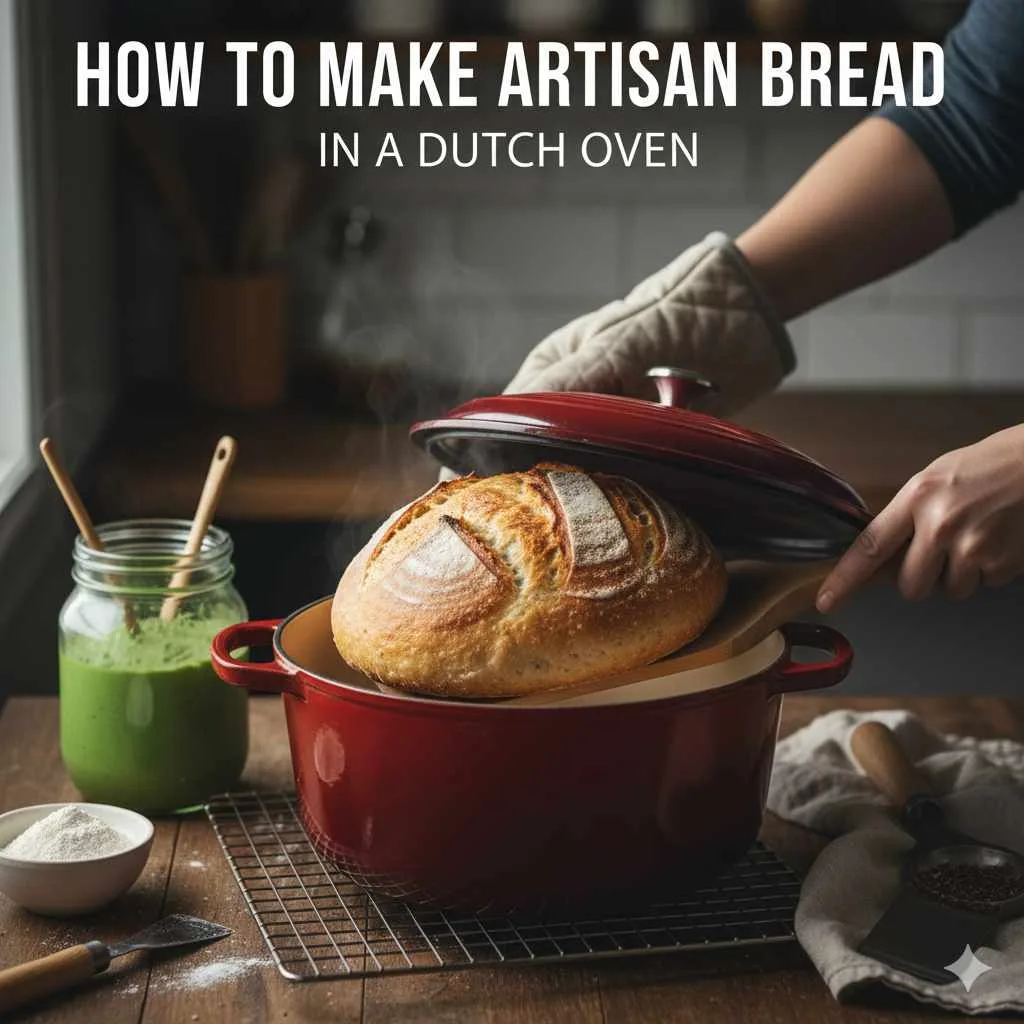
Yes, you can make incredibly impressive, bakery-quality bread at home using just a Dutch oven! This method is surprisingly easy, even for beginners. The Dutch oven traps steam, creating a perfect crust and a wonderfully soft interior, giving you effortless perfection in every loaf.
Ever dreamt of pulling a golden, crusty loaf of bread straight from your own oven? It often feels like a skill reserved for seasoned bakers. The thought of kneading, proofing, and achieving that perfect oven spring can be a little intimidating. Many home bakers find themselves frustrated with flat loaves or tough crusts. But what if there was a simple trick to unlock that artisanal bread magic without a fancy setup? The good news is, there is! Your trusty Dutch oven, often used for stews, is the secret weapon you need for stunning bread. Get ready to impress yourself and everyone you know with this foolproof method.
Why a Dutch Oven is Your Secret Baking Ally
A Dutch oven is more than just a cooking pot; it’s a miniature, portable convection oven when you’re baking bread. Its heavy, cast-iron construction (or enameled cast-iron) heats up beautifully and evenly, mimicking the intense, steamy environment of a professional bread oven. This environment is crucial for achieving that signature artisanal crust and an airy crumb.
The Magic of Steam
Bread dough needs plenty of steam, especially in the initial stages of baking. This steam keeps the surface of the dough moist and flexible, allowing it to expand fully (oven spring) before the crust sets. A Dutch oven, with its tight-fitting lid, traps the moisture released by the dough itself, creating a naturally steamy environment. No need for extra steam pans or complicated techniques!
Even Heat Distribution
The thick walls of a Dutch oven absorb and distribute heat uniformly. This means your bread bakes evenly all around, preventing hot spots and ensuring a consistent rise and golden-brown crust. This is a huge advantage over baking directly on a baking sheet.
The “Effortless” Factor
Because the Dutch oven does so much of the work, especially in controlling the oven environment, the process feels incredibly straightforward. You’re not babysitting steam, and the thick pot offers a forgiving baking surface. This ease is what makes it perfect for beginners aiming for impressive results.

Gather Your Tools and Ingredients
Before you start baking, let’s make sure you have everything you need for success. Baking bread is wonderfully simple when it comes to ingredients and tools, especially with the Dutch oven method.
Essential Ingredients:
- Flour: All-purpose flour is a great starting point for beginners. Bread flour has a higher protein content, which can result in a chewier texture, but all-purpose works wonderfully.
- Yeast: Instant yeast (also called rapid-rise or quick-rise yeast) is the easiest for beginners as it doesn’t require proofing separately.
- Salt: Essential for flavor and controlling yeast activity.
- Water: Lukewarm water (around 105-115°F or 40-46°C) is ideal for activating yeast.
- Optional additions: A touch of sugar can help feed the yeast, though it’s not strictly necessary for basic white bread.
Must-Have Equipment:
- Dutch Oven: A 5-quart or 6-quart Dutch oven is perfect for a standard loaf. It must be oven-safe to at least 450°F (230°C). Enamel cast iron is popular and easy to clean.
- Measuring Cups and Spoons: For accurate ingredient measurements.
- Large Mixing Bowl: To mix and let your dough rise.
- Bench Scraper or Spatula: For handling sticky dough.
- Parchment Paper: Makes transferring the dough into the hot Dutch oven much easier and cleaner.
- Oven Mitts: Extremely important for handling the very hot Dutch oven.
- Cooling Rack: To let your bread cool properly after baking.
Simple Steps to Your Perfect Dutch Oven Loaf
This recipe focuses on a no-knead Dutch oven bread. It’s designed for maximum flavor and minimum effort, perfect for when you want amazing bread without the workout.
Step 1: Mix the Dough
In your large mixing bowl, combine the following:
- 3 cups (about 400g) All-Purpose Flour
- 1 ½ teaspoons Instant Yeast
- 1 ½ teaspoons Salt
Whisk these dry ingredients together. Then, pour in 1 ½ cups (about 355ml) of lukewarm water. Stir with a spatula or your hands until just combined. The dough will be shaggy and sticky – this is exactly what you want! Don’t overmix.
Step 2: The Long, Slow Rise (Fermentation)
Cover the bowl tightly with plastic wrap or a damp kitchen towel. Let the dough sit at room temperature for 8 to 24 hours. The longer it ferments, the more flavor it will develop. A longer, slower rise is key to the no-knead method. You’ll know it’s ready when it’s doubled in size and covered in little bubbles.
Step 3: Shape (Gently!) and Rest
Lightly flour your work surface. Turn the dough out of the bowl. It will be sticky and bubbly. Gently fold the edges of the dough into the center a few times to create a rough ball. Try not to deflate it too much. Place the dough ball on a piece of parchment paper, seam-side down. Cover it loosely with plastic wrap or a clean kitchen towel and let it rest for 20-30 minutes while your oven preheats.
Step 4: Preheat That Dutch Oven!
This is a crucial step. Place your empty Dutch oven (with the lid on) into your oven. Preheat your oven to 450°F (230°C). Let the Dutch oven heat up for at least 30 minutes. A thoroughly preheated pot is essential for a good crust.
Step 5: Bake the Bread – Part 1 (Covered)
Once the oven and Dutch oven are fully preheated, carefully remove the hot Dutch oven from the oven using sturdy oven mitts. Be very cautious; it’s extremely hot! Carefully lift the dough by the parchment paper and gently lower it into the preheated Dutch oven. Place the lid back on. Carefully return the Dutch oven to the oven and bake for 30 minutes.
Step 6: Bake the Bread – Part 2 (Uncovered)
After 30 minutes, remove the lid from the Dutch oven. Your bread should have risen significantly and started to turn golden. Continue baking, uncovered, for another 15-20 minutes, or until the crust is a deep golden brown and the internal temperature of the bread reaches around 200-210°F (93-99°C) when measured with an instant-read thermometer.
Step 7: Cool and Enjoy!
Carefully remove the bread from the Dutch oven (using the parchment paper is helpful here). Transfer the loaf to a wire cooling rack. Let it cool for at least 1 hour before slicing. This cooling time allows the internal structure of the bread to set, ensuring a perfect texture and preventing a gummy interior. Resist the urge to cut into it too soon!
A Visual Guide to Your Dutch Oven Bread Journey
Seeing is believing, and sometimes a visual can make all the difference. Here’s a quick look at what your bread might look like at different stages.
| Stage | Appearance | Description |
|---|---|---|
| Dough After Mixing |  | A rough, sticky mass with no discernible gluten structure. |
| Dough After Long Rise |  | Puffy, doubled in size, with visible bubbles on the surface. |
| Bread After Initial Bake (Covered) |  | A pale, puffed-up loaf, just beginning to brown. |
| Finished Loaf (Uncovered Bake) |  | Deep golden brown, with a crackling crust and a well-risen shape. |
(Note: Replace placeholder image URLs with actual descriptive image links if possible.)
Tips for Baking Success
Even with a simple method, a few extra pointers can take your bread from good to phenomenal:
- Preheat THOROUGHLY: The Dutch oven needs to be screaming hot. Don’t skimp on the preheating time.
- Don’t Overwork the Dough: The beauty of this no-knead method is its simplicity. Gentle handling is key to preserving that lovely airy texture.
- Parchment Paper is Your Friend: It makes transferring the delicate, risen dough into the scorching-hot Dutch oven so much safer and easier.
- Listen to Your Oven: Ovens can vary. Your bread might need a few minutes more or less than the recipe suggests. Use visual cues (color!) and a thermometer if you have one.
- Cooling is Crucial: This is a step many beginners rush. Allowing the bread to cool completely is vital for its final texture.
Troubleshooting Common Bread Baking Issues
Don’t worry if your first loaf isn’t absolutely perfect. Every baker has had mishaps! Here are some common issues and how to fix them:
| Problem | Possible Cause(s) | Solution |
|---|---|---|
| Flat Loaf (Poor Oven Spring) | Dough was under-proofed or over-proofed. Yeast was inactive or expired. Oven not hot enough. Too much handling of the dough leading to deflation. | Ensure proper room temperature and rising time. Check yeast expiration. Preheat oven and Dutch oven thoroughly. Handle dough gently during shaping. |
| Dense, Gummy Crumb | Bread was cut while still hot. Dough was underdeveloped (fermented too little or mixed poorly). | Allow bread to cool for at least 1 hour before slicing. For next time, consider a longer fermentation or double-check your water temperature if using active dry yeast. |
| Tough Crust | Baked too long uncovered. Not enough initial steam (lid not on tight enough or oven atmosphere was too dry). | Monitor color and reduce uncovered baking time if necessary. Ensure the lid seals well. |
| Bottom Crust is Burnt | Dutch oven too close to oven element, or oven runs very hot. | Try placing a baking sheet on the rack below the Dutch oven during the covered portion of baking. |
| Pale Crust | Oven temperature too low. Not baked long enough. | Ensure oven is accurately preheated. Bake uncovered for the full recommended time, or slightly longer, until desired color is reached. |
Beyond the Basics: Flavor Variations
Once you’ve mastered this simple loaf, you might want to experiment! Here are a few ideas to get your creative juices flowing:
- Herbs and Cheese: Add fresh or dried herbs (like rosemary, thyme, or chives) and grated cheese (cheddar, Parmesan) to the dough during the final gentle shaping stage.
- Garlic Parmesan: Mix in roasted garlic cloves and grated Parmesan cheese.
- Whole Wheat: Substitute up to half of the all-purpose flour with whole wheat flour for a nuttier flavor and denser texture. You might need a touch more water with whole wheat flour.
- Seeded Bread: Incorporate sunflower seeds, pumpkin seeds, or chia seeds into the dough for added texture and nutrients.
For even more advanced bread-making techniques and dough science, resources from universities can be incredibly insightful. For instance, the University of Illinois Extension often shares research-based information on food science and baking, which details the role of gluten development and fermentation in bread making.
Many reputable culinary tool manufacturers also offer extensive guides and recipes. For example, Le Creuset, a well-known brand for Dutch ovens, provides articles and videos on their website that showcase various ways to use their products for baking, offering practical tips from experienced bakers.

Frequently Asked Questions (FAQ)
Q1: Can I use any Dutch oven?
A1: Yes, as long as it’s oven-safe to at least 450°F (230°C) and has a tight-fitting lid. Enameled cast iron is most common and works wonderfully. If you have a bare cast-iron Dutch oven, ensure it’s well-seasoned.
Q2: How do I know if my yeast is still good?
A2: For instant yeast, check the expiration date. If you’re unsure or using active dry yeast, you can test it: place a teaspoon of yeast in a small bowl with ¼ cup of warm water (105-115°F) and a pinch of sugar. Let it sit for 5-10 minutes. If it becomes foamy and bubbly, it’s active and ready to use.
Q3: My dough is too sticky to handle, what should I do?
A3: This is normal for no-knead dough! Lightly flour your hands and your surface. Don’t be tempted to add too much extra flour to the dough itself, as this can make the bread dense. Gently fold it into itself. A bench scraper can be very helpful for manipulating sticky dough.
Q4: Can I make this bread ahead of time?
A4: Yes! The long, slow rise is ideal for prepping ahead. You can let the dough complete its 8-24 hour rise in the refrigerator after the initial bulk fermentation, then shape and let it come to room temperature before baking. This can also enhance flavor.
Q5: Do I need to grease my Dutch oven?
A5: No, you do not need to grease the Dutch oven. The high heat and the parchment paper prevent sticking. Greasing can actually cause the bottom crust to cook too quickly or unevenly.
Q6: What if I don’t have parchment paper?
A6: You can carefully turn the dough directly into the hot Dutch oven, but it’s much trickier and carries a higher risk of burns. Alternatively, you could very lightly flour the bottom of the Dutch oven before dropping the dough in, but parchment paper is highly recommended for ease and safety.
The Rewarding End Result
Baking bread in a Dutch oven is one of those kitchen triumphs that feels incredibly rewarding. The aroma that fills your home as the bread bakes is simply divine. The satisfaction of slicing into a warm, crusty loaf that you made with your own hands is unparalleled. It’s a simple act of creation that brings comfort, taste, and a sense of accomplishment.
Don’t be discouraged if your first loaf isn’t magazine-perfect. Each bake is a learning experience, and even a slightly imperfect loaf will taste amazing because you made it yourself! This method is designed to be forgiving, and with each attempt, you’ll grow more confident. You’ll discover the rhythm of the dough and the nuances of your oven. Soon, baking homemade bread will become a cherished ritual, a way to bring warmth and deliciousness into your home with a technique that’s surprisingly accessible.


Leave a Reply